Easter Flavoured Chocolates!

OLYMPUS DIGITAL CAMERA

What You Will Need – White chocolate melts (I use Cadbury or Nestle), Food Colouring, Your favourite essence (I used mint, strawberry, blueberry, orange and lemon), Chocolate Easter molds, Glass container, Teaspoon.

Step One – Place melts in a glass bowl (suitable for microwaving) and put them in the microwave for about 30 seconds. Give them a stir with your teaspoon and then if they need more melting time put them in for 10 – 15 seconds. Repeat this 10-15 seconds at a time until they are liquid.

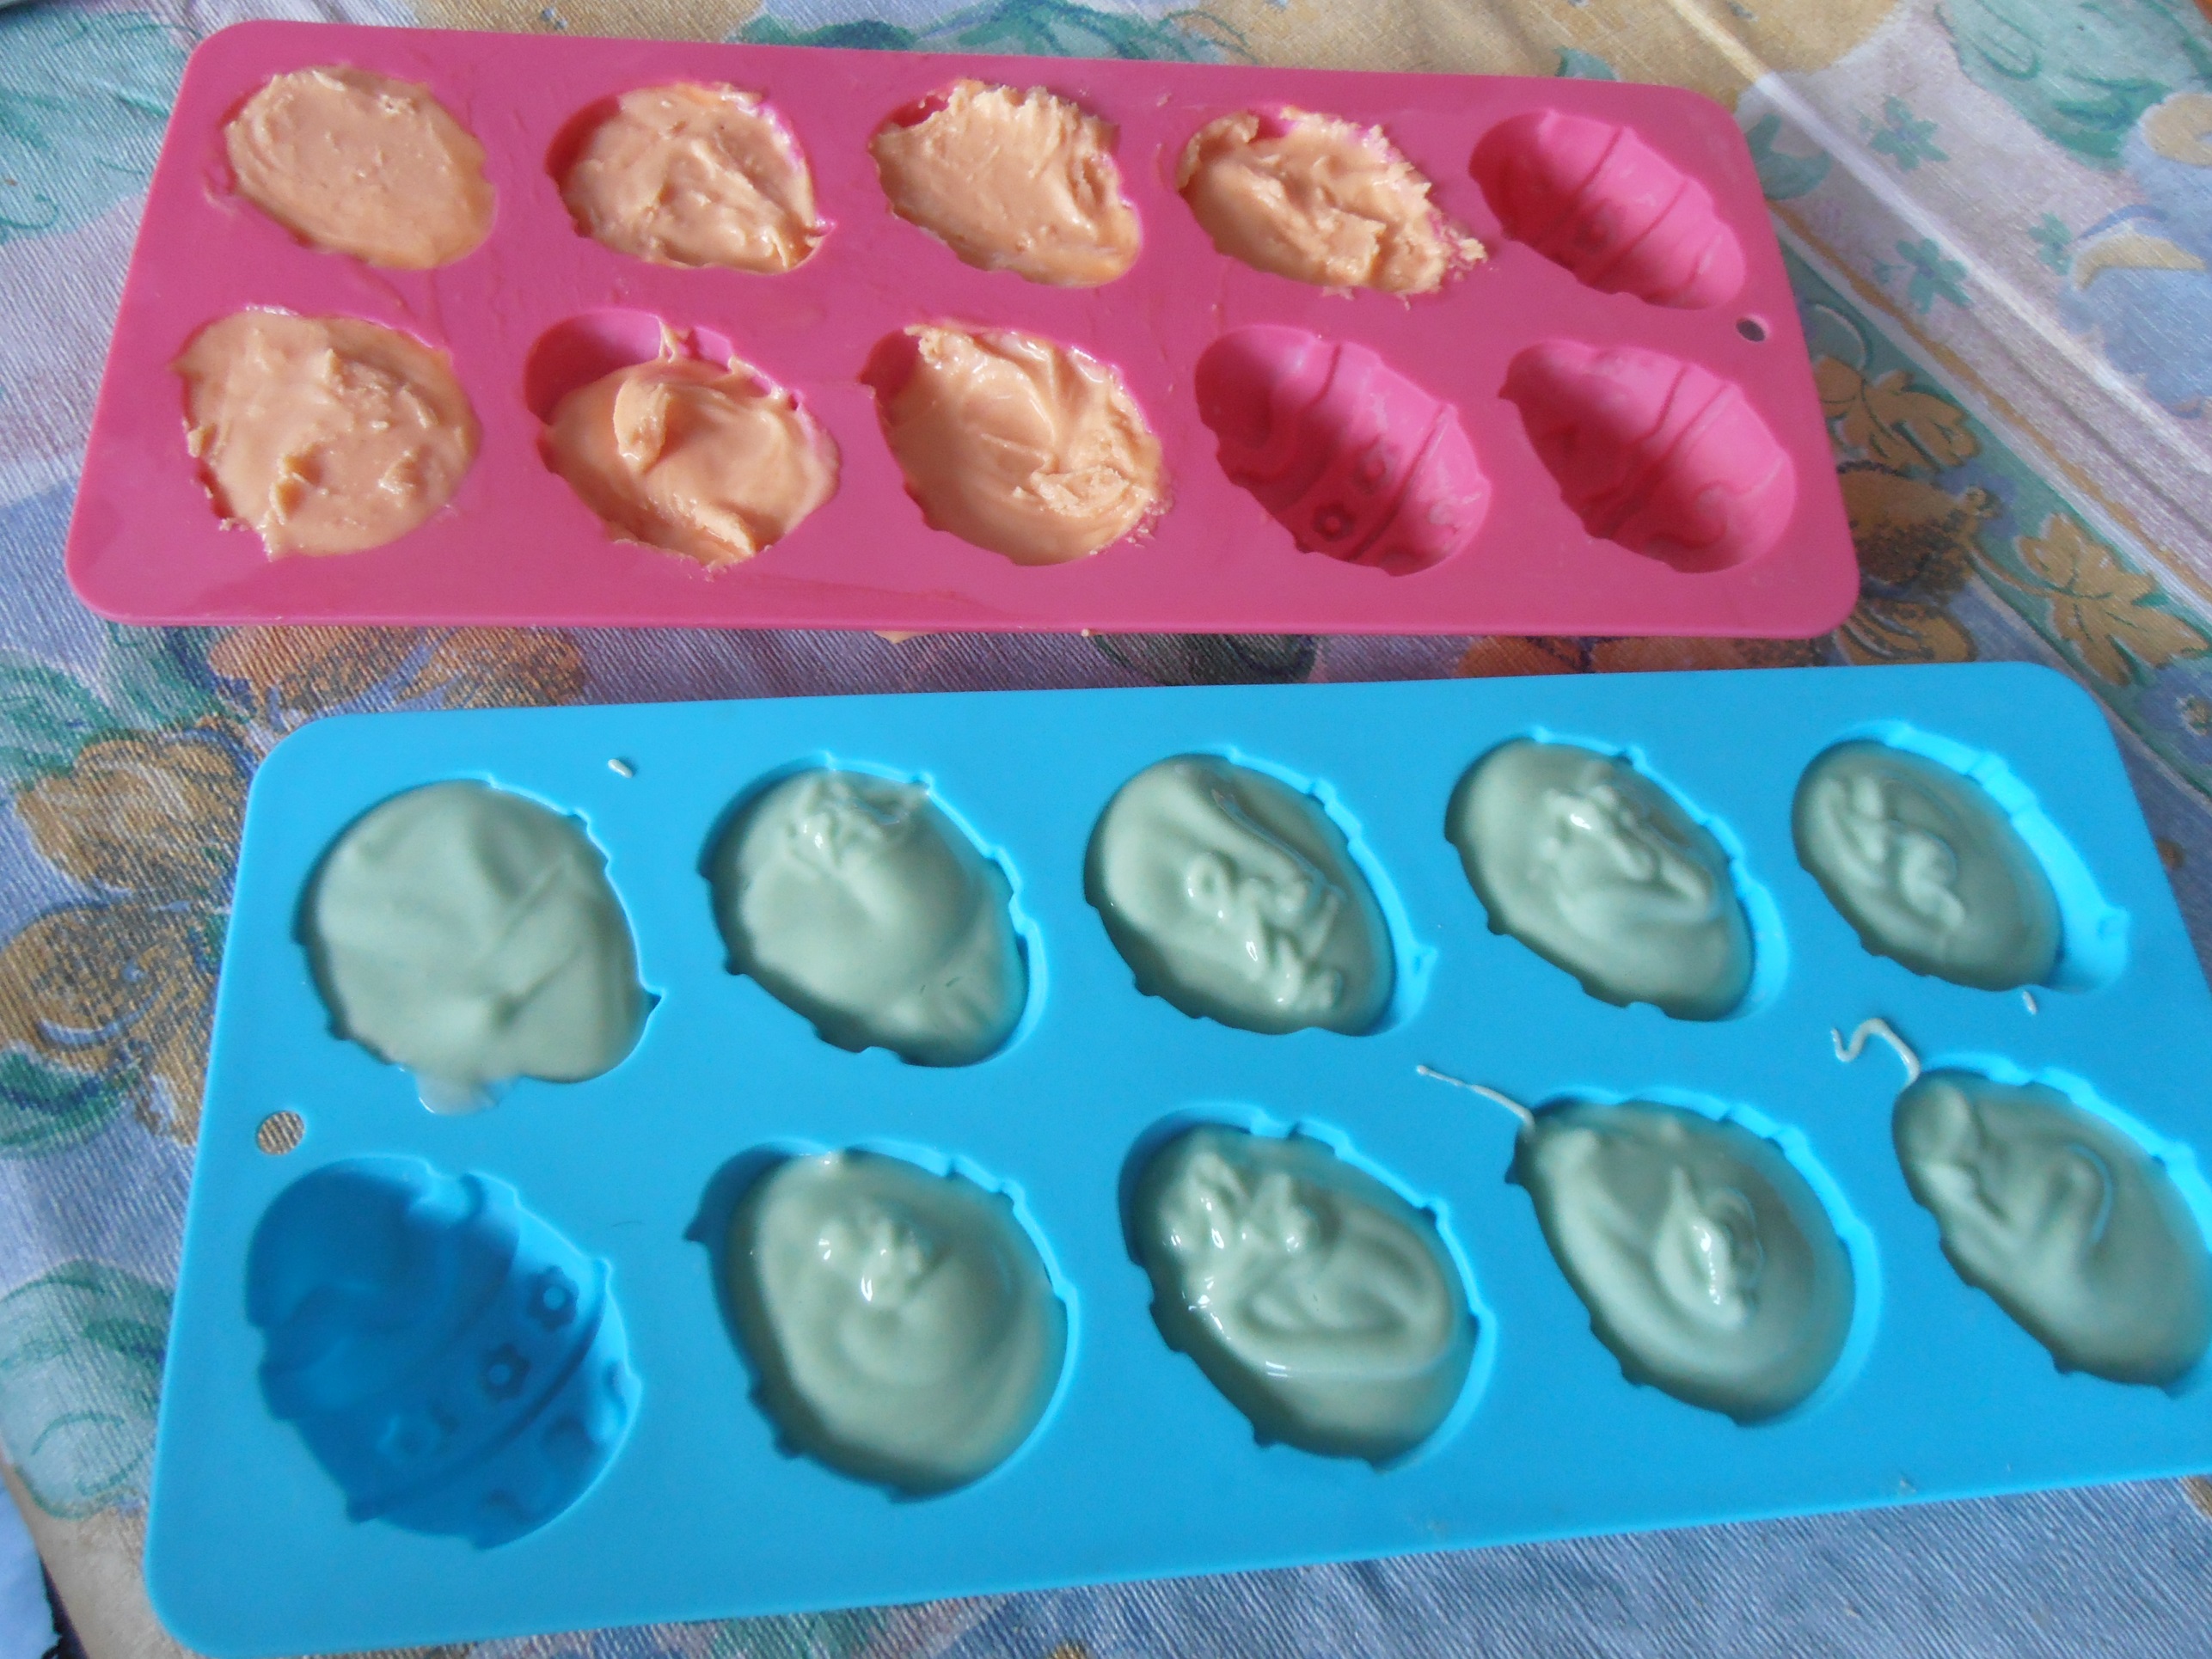
Step Two – Add the colour you have chosen and stir. Then add the matching essence eg. pink and strawberry. When the essence is added the chocolate often begins to harden quite quickly so you have to move fairly fast.

Step Three – Pour or spoon your  melted chocolate into the Easter egg molds and then place in the fridge to set.

OLYMPUS DIGITAL CAMERA

Step Four – Once that flavour is set, remove the chocolates and store them in the fridge. Thoroughly wash the molds and glass bowl so that you can begin again with another delicious flavour.

Step Five – Share and enjoy the tasty and colourful chocolate treats you have made.

OLYMPUS DIGITAL CAMERA

Happy Guiding and a Peaceful Easter

From,

Darling Precious Children

By darlingpreciouschildren Posted in Easter

Eggcellent Easter Basket!

OLYMPUS DIGITAL CAMERA

What You Will Need – Cornflour, Tablespoon, Water, Balloon, Strips of newspaper, Strips of white paper, Coloured paint, Two pipe cleaners, Shredded paper, Your favourite Easter Treats!

Step One – Make paper mache glue by firstly mixing one tablespoon of cornflour with a tablespoon of tap water to form a paste.  Then gradually add about 500 mls of boiling water to the paste and stir until you have a milky consistency.

Step Two – Draw a line with texta around your blown up balloon, about half way down. Also have your strips of newspaper ready to go.

OLYMPUS DIGITAL CAMERA

Step Three – Rest your balloon in a bowl so that it doesn’t move. Soak a piece of newspaper in the paste and place it on your balloon. Repeat this process until the whole top end (up to the line) of your balloon is covered. Then go over the whole area again at least two more times before letting it dry.

OLYMPUS DIGITAL CAMERA

OLYMPUS DIGITAL CAMERA

Step Four – When first few layers are dry apply at least three more layers and then one or two layers of white paper using the same method as in Step Three. Let it dry completely.

OLYMPUS DIGITAL CAMERA

OLYMPUS DIGITAL CAMERA

Step Five – When the outside is completely dry, pop the balloon and then paper mache the inside of the bowl using one or two layers of white paper.

OLYMPUS DIGITAL CAMERA

Step Six – Paint the outside using whatever colour you would like your basket to be. Let it dry and then give it another coat, once again leaving it to dry completely.

OLYMPUS DIGITAL CAMERA

OLYMPUS DIGITAL CAMERA

OLYMPUS DIGITAL CAMERA

Step Seven – Twist two pipe cleaners together to make a handle. Then use a pin to make a hole on either side of your basket.  Thread the pipe cleaner through each hole and then bend each end up to fasten it.

OLYMPUS DIGITAL CAMERA

Step Eight – Fill your Eggcellent Easter Baskets with coloured shredded paper and all of your favourite Easter Treats.

OLYMPUS DIGITAL CAMERA

OLYMPUS DIGITAL CAMERA

Happy Guiding and a Peaceful Easter

From,

Darling Precious Children

OLYMPUS DIGITAL CAMERA

By darlingpreciouschildren Posted in Easter

Marbleous Easter Eggs!

OLYMPUS DIGITAL CAMERA

What You Will Need:  Easter egg template, Cardboard, Marbles, Different coloured paints, Plastic spoons, A Box with sides, Paint palette.

OLYMPUS DIGITAL CAMERA

Step One – Trace your Easter egg template onto white cardboard and cut out.

Step Two – Mix a few different coloured paints in your paint palette then put a marble and a spoon in each section filled with your chosen paint colour.

OLYMPUS DIGITAL CAMERA

Step Three – Place the cardboard Easter egg in the centre of your box.  Next, use the spoons to lift each marble out one by one and place them on your Easter egg in the box.

Step Four – This is the best part! Get the child/children to hold each end of the box and tip it back and forwards, side to side, making the paint covered marble roll all over the Easter Egg.

OLYMPUS DIGITAL CAMERA

OLYMPUS DIGITAL CAMERA

Step Five – Carefully place your Easter eggs somewhere to dry for about one hour.

OLYMPUS DIGITAL CAMERA

OLYMPUS DIGITAL CAMERA

OLYMPUS DIGITAL CAMERA

OLYMPUS DIGITAL CAMERA

Step Six – Your marvelous Marbleous Easter Egg is now ready to be put up somewhere special.

OLYMPUS DIGITAL CAMERA

Happy Guiding and a Peaceful Easter

From,

Darling Precious Children

By darlingpreciouschildren Posted in Easter

Colour Me Funny Easter Bunny!

OLYMPUS DIGITAL CAMERA

What you will need:  A photo of your darling precious child/children, A strong cardboard plate, Scissors, PVA/craft glue, Paint brush, Paint containers, White cardboard or recycled cardboard that can be painted white, White paper, White paint, Pink or Blue paint, Cotton balls, Fluffy pom-pom, and Coloured pipe cleaners.

Step One: Carefully cut two ears out of your white cardboard or recycled cardboard and paint both white (if not already white).

OLYMPUS DIGITAL CAMERA             OLYMPUS DIGITAL CAMERA

Step Two:   Paint the child’s left hand pink or blue and then get them to stamp it on white paper. Then paint their right hand pink or blue and get them to stamp it on the paper too. Children can paint their own hands if they are able to.

OLYMPUS DIGITAL CAMERA

Step Three: When the hand prints are dry, cut them out and paste them on the white bunny ears. Then laminate them if you would like to.

OLYMPUS DIGITAL CAMERA             OLYMPUS DIGITAL CAMERA

Step Four:   Cut out the enlarged photo of your darling precious child to fit the inside of your cardboard plate (laminate it if you would like to) then paste it onto the paper plate.

Step Five:   Glue cotton balls on the top of your bunny ears then around your bunny face and paper plate using your PVA/ craft glue.

OLYMPUS DIGITAL CAMERA                                                             OLYMPUS DIGITAL CAMERA

OLYMPUS DIGITAL CAMERA

Step Six: Glue your bunny ears to the back of your bunny face with PVA/craft glue and leave facing downwards for an hour or two to dry.

OLYMPUS DIGITAL CAMERA

Step Seven:   Choose three coloured pipe cleaners and twist them together then glue them below your darling precious child’s/bunnies nose with PVA/craft glue. Finish your gorgeous bunny with a coloured fluffy pom-pom nose (see photo).

Your Colour Me Funny Easter Bunny is now complete so put it somewhere special where it will make everyone smile the whole Easter season! You now have your own unique bunny to treasure for years to come.

OLYMPUS DIGITAL CAMERA

Happy guiding and a peaceful Easter,

from

Darling Precious Children

By darlingpreciouschildren Posted in Easter