Easter Cards!

20150316_141053

What you will need – Cardboard; Easter pictures; Scissors; Glue; Coloured pencils, textas, crayons, or paint to draw and decorate with; and anything else you would like to add e.g sparkles, pom poms, fancy paper etc.

Step 1 – Cut your cardboard to whatever size you would like to make your card/cards.

Step 2 – Find some Easter pictures in magazines, old cards, on the internet, or draw them.

Step 3 – Use your Easter pictures, colours etc to make unique Easter cards from the heart.

Step 4 – Write a heart felt message inside.

Step 5 – Give them to all your loved ones and spread the Easter cheer.

20150316_141033

Happy Guiding and abundance of Easter blessings,

From

Darling Precious Children

Easy Easter Bunny Masks!

IMG_20150330_153805

20150325_144719  20150326_151959

What You Will Need: Cardboard, Hat elastic, Easter bunny template or you can draw your own (http://www.firstpalette.com/Craft_themes/Animals/animalmasks/animalmask.html has a good one), Coloured pencils, crayons, textas or paint, Coloured pom pom for the nose.

20150326_124113

Step 1 – Draw or print up your Easter Bunny onto a piece of cardboard.

Step 2 – Colour with coloured pencils, crayons, textas or paint.

20150326_124212

Step 3 – Carefully cut around the Easter Bunny and its eyes.

Step 4 – Punch a hole in each side and add some hat elastic (don’t forget to measure it on the child’s head first).

Step 5  – Stick on the pom pom nose.

20150316_135147

20150328_145540

Your Funny Bunny Mask is now ready, so wear it happily as you hop along!

20150328_14494920150329_152842

20150325_144753

Happy Guiding and Easter Blessings to all

From

Darling Precious Children

Elegant Easter Egg Hanging!

20150316_121434

What you will need: An Easter Egg Template (you can make up your own or websites such as http://www.firstpalette.com/tool_box/printables/eastereggs.html have some great ones), Cardboard, Scissors, PVA/Craft glue, Assorted jewels and sparkles (you can buy them cheaply from discount stores), Hole punch, Hanging ribbon,  Coloured textas, crayons, pencils, paint and anything else you would like to use to decorate your Elegant Easter Egg Hanging.

20150316_121508

Step 1 – Print or draw your Easter Egg onto a piece of cardboard (any colour you wish).

Step 2 – Carefully cut out your Easter Egg and punch a hole in the top with your hole punch.

Step 3 – Use your assortment of jewels, sparkles, colours, etc to decorate your egg in anyway you like. It is best to use PVA/Craft glue when gluing jewels and sparkles as they may not stick otherwise.

Step 4 – After it has completely dried, thread a piece of ribbon through the hole at the top of your Elegant Easter Egg Hanging and tie a knot in the end.

Step 5 – Hang your Elegant Easter Egg Hanging up somewhere where everyone will be sure to admire it 🙂

20150316_121426

Happy Guiding

and a very blessed and happy Easter

from

Darling Precious Children


Easter Bunny Buddies!

OLYMPUS DIGITAL CAMERA


What You Will Need – Paper cut out people; white cardboard (for bunny ears); different coloured wrapping paper; coloured pencils/textas; fluffy pompoms; googly eyes; scissors; PVA glue.


OLYMPUS DIGITAL CAMERA

Step 1 – Place a piece of wrapping paper under your cardboard person and trace the shape of pants, shirts, dresses, shorts –  or whatever outfit you would like –  with a lead pencil.

OLYMPUS DIGITAL CAMERA

Step 2 – Using a scissors, carefully cut out the clothes along the lines you have just made with your pencil. Then paste them onto your paper cut out.

OLYMPUS DIGITAL CAMERA

Step 3 – Draw a template for your Easter bunny ears onto a piece of white cardboard and trace this to make as many ears as you will need. Then carefully cut these out and glue them on with your PVA glue.

OLYMPUS DIGITAL CAMERA

OLYMPUS DIGITAL CAMERA

Step 4 – Colour the centre of your bunny ears in pink and then draw on anything else you would like e.g face, paws etc using your coloured pencils.

OLYMPUS DIGITAL CAMERA

Step 5 – Using PVA glue, stick on googly eyes and a pompom for a tail (if you have any bunnies facing backwards).

OLYMPUS DIGITAL CAMERA

OLYMPUS DIGITAL CAMERA

Your cute little Easter Bunny Buddies are now complete!

OLYMPUS DIGITAL CAMERA

OLYMPUS DIGITAL CAMERA

Happy Easter!

From

Darling Precious Children


Easter Egg Crystals!

OLYMPUS DIGITAL CAMERA

What You Will Need –  Water,  Egg shells (washed carefully and dried), PVA glue, Epsom salts, Food Colouring.

OLYMPUS DIGITAL CAMERA

Step One –  Paint the inside of your egg shells with the PVA glue to help seal any cracks and sprinkle a little Epsom salts in each. Then let dry.

OLYMPUS DIGITAL CAMERA

Step Two – Put about five tablespoons of Epsom salts in a dish then dissolve with about 400 mls of boiling water.

Step Three – Fill each of the egg shells with the mixture.

OLYMPUS DIGITAL CAMERA

Step 4 – Add a different drop of food colouring to each egg shell and give each a stir.

OLYMPUS DIGITAL CAMERA

Step Five – Add another sprinkle of Epsom salts to each egg then leave to form.

OLYMPUS DIGITAL CAMERA

Step Six  – Keep observing each day for about two to three weeks to see what is happening.

OLYMPUS DIGITAL CAMERA

OLYMPUS DIGITAL CAMERA

Step Seven – Your Easter egg crystals have formed and are adding a little Easter sparkle. Enjoy!

OLYMPUS DIGITAL CAMERA

OLYMPUS DIGITAL CAMERA

Happy Guiding and a Peaceful Easter

From,

Darling Precious Children

OLYMPUS DIGITAL CAMERA

OLYMPUS DIGITAL CAMERA

By darlingpreciouschildren Posted in Easter

Easter Flavoured Chocolates!

OLYMPUS DIGITAL CAMERA

What You Will Need – White chocolate melts (I use Cadbury or Nestle), Food Colouring, Your favourite essence (I used mint, strawberry, blueberry, orange and lemon), Chocolate Easter molds, Glass container, Teaspoon.

Step One – Place melts in a glass bowl (suitable for microwaving) and put them in the microwave for about 30 seconds. Give them a stir with your teaspoon and then if they need more melting time put them in for 10 – 15 seconds. Repeat this 10-15 seconds at a time until they are liquid.

Step Two – Add the colour you have chosen and stir. Then add the matching essence eg. pink and strawberry. When the essence is added the chocolate often begins to harden quite quickly so you have to move fairly fast.

Step Three – Pour or spoon your  melted chocolate into the Easter egg molds and then place in the fridge to set.

OLYMPUS DIGITAL CAMERA

Step Four – Once that flavour is set, remove the chocolates and store them in the fridge. Thoroughly wash the molds and glass bowl so that you can begin again with another delicious flavour.

Step Five – Share and enjoy the tasty and colourful chocolate treats you have made.

OLYMPUS DIGITAL CAMERA

Happy Guiding and a Peaceful Easter

From,

Darling Precious Children

By darlingpreciouschildren Posted in Easter

Eggcellent Easter Basket!

OLYMPUS DIGITAL CAMERA

What You Will Need – Cornflour, Tablespoon, Water, Balloon, Strips of newspaper, Strips of white paper, Coloured paint, Two pipe cleaners, Shredded paper, Your favourite Easter Treats!

Step One – Make paper mache glue by firstly mixing one tablespoon of cornflour with a tablespoon of tap water to form a paste.  Then gradually add about 500 mls of boiling water to the paste and stir until you have a milky consistency.

Step Two – Draw a line with texta around your blown up balloon, about half way down. Also have your strips of newspaper ready to go.

OLYMPUS DIGITAL CAMERA

Step Three – Rest your balloon in a bowl so that it doesn’t move. Soak a piece of newspaper in the paste and place it on your balloon. Repeat this process until the whole top end (up to the line) of your balloon is covered. Then go over the whole area again at least two more times before letting it dry.

OLYMPUS DIGITAL CAMERA

OLYMPUS DIGITAL CAMERA

Step Four – When first few layers are dry apply at least three more layers and then one or two layers of white paper using the same method as in Step Three. Let it dry completely.

OLYMPUS DIGITAL CAMERA

OLYMPUS DIGITAL CAMERA

Step Five – When the outside is completely dry, pop the balloon and then paper mache the inside of the bowl using one or two layers of white paper.

OLYMPUS DIGITAL CAMERA

Step Six – Paint the outside using whatever colour you would like your basket to be. Let it dry and then give it another coat, once again leaving it to dry completely.

OLYMPUS DIGITAL CAMERA

OLYMPUS DIGITAL CAMERA

OLYMPUS DIGITAL CAMERA

Step Seven – Twist two pipe cleaners together to make a handle. Then use a pin to make a hole on either side of your basket.  Thread the pipe cleaner through each hole and then bend each end up to fasten it.

OLYMPUS DIGITAL CAMERA

Step Eight – Fill your Eggcellent Easter Baskets with coloured shredded paper and all of your favourite Easter Treats.

OLYMPUS DIGITAL CAMERA

OLYMPUS DIGITAL CAMERA

Happy Guiding and a Peaceful Easter

From,

Darling Precious Children

OLYMPUS DIGITAL CAMERA

By darlingpreciouschildren Posted in Easter

Marbleous Easter Eggs!

OLYMPUS DIGITAL CAMERA

What You Will Need:  Easter egg template, Cardboard, Marbles, Different coloured paints, Plastic spoons, A Box with sides, Paint palette.

OLYMPUS DIGITAL CAMERA

Step One – Trace your Easter egg template onto white cardboard and cut out.

Step Two – Mix a few different coloured paints in your paint palette then put a marble and a spoon in each section filled with your chosen paint colour.

OLYMPUS DIGITAL CAMERA

Step Three – Place the cardboard Easter egg in the centre of your box.  Next, use the spoons to lift each marble out one by one and place them on your Easter egg in the box.

Step Four – This is the best part! Get the child/children to hold each end of the box and tip it back and forwards, side to side, making the paint covered marble roll all over the Easter Egg.

OLYMPUS DIGITAL CAMERA

OLYMPUS DIGITAL CAMERA

Step Five – Carefully place your Easter eggs somewhere to dry for about one hour.

OLYMPUS DIGITAL CAMERA

OLYMPUS DIGITAL CAMERA

OLYMPUS DIGITAL CAMERA

OLYMPUS DIGITAL CAMERA

Step Six – Your marvelous Marbleous Easter Egg is now ready to be put up somewhere special.

OLYMPUS DIGITAL CAMERA

Happy Guiding and a Peaceful Easter

From,

Darling Precious Children

By darlingpreciouschildren Posted in Easter

Colour Me Funny Easter Bunny!

OLYMPUS DIGITAL CAMERA

What you will need:  A photo of your darling precious child/children, A strong cardboard plate, Scissors, PVA/craft glue, Paint brush, Paint containers, White cardboard or recycled cardboard that can be painted white, White paper, White paint, Pink or Blue paint, Cotton balls, Fluffy pom-pom, and Coloured pipe cleaners.

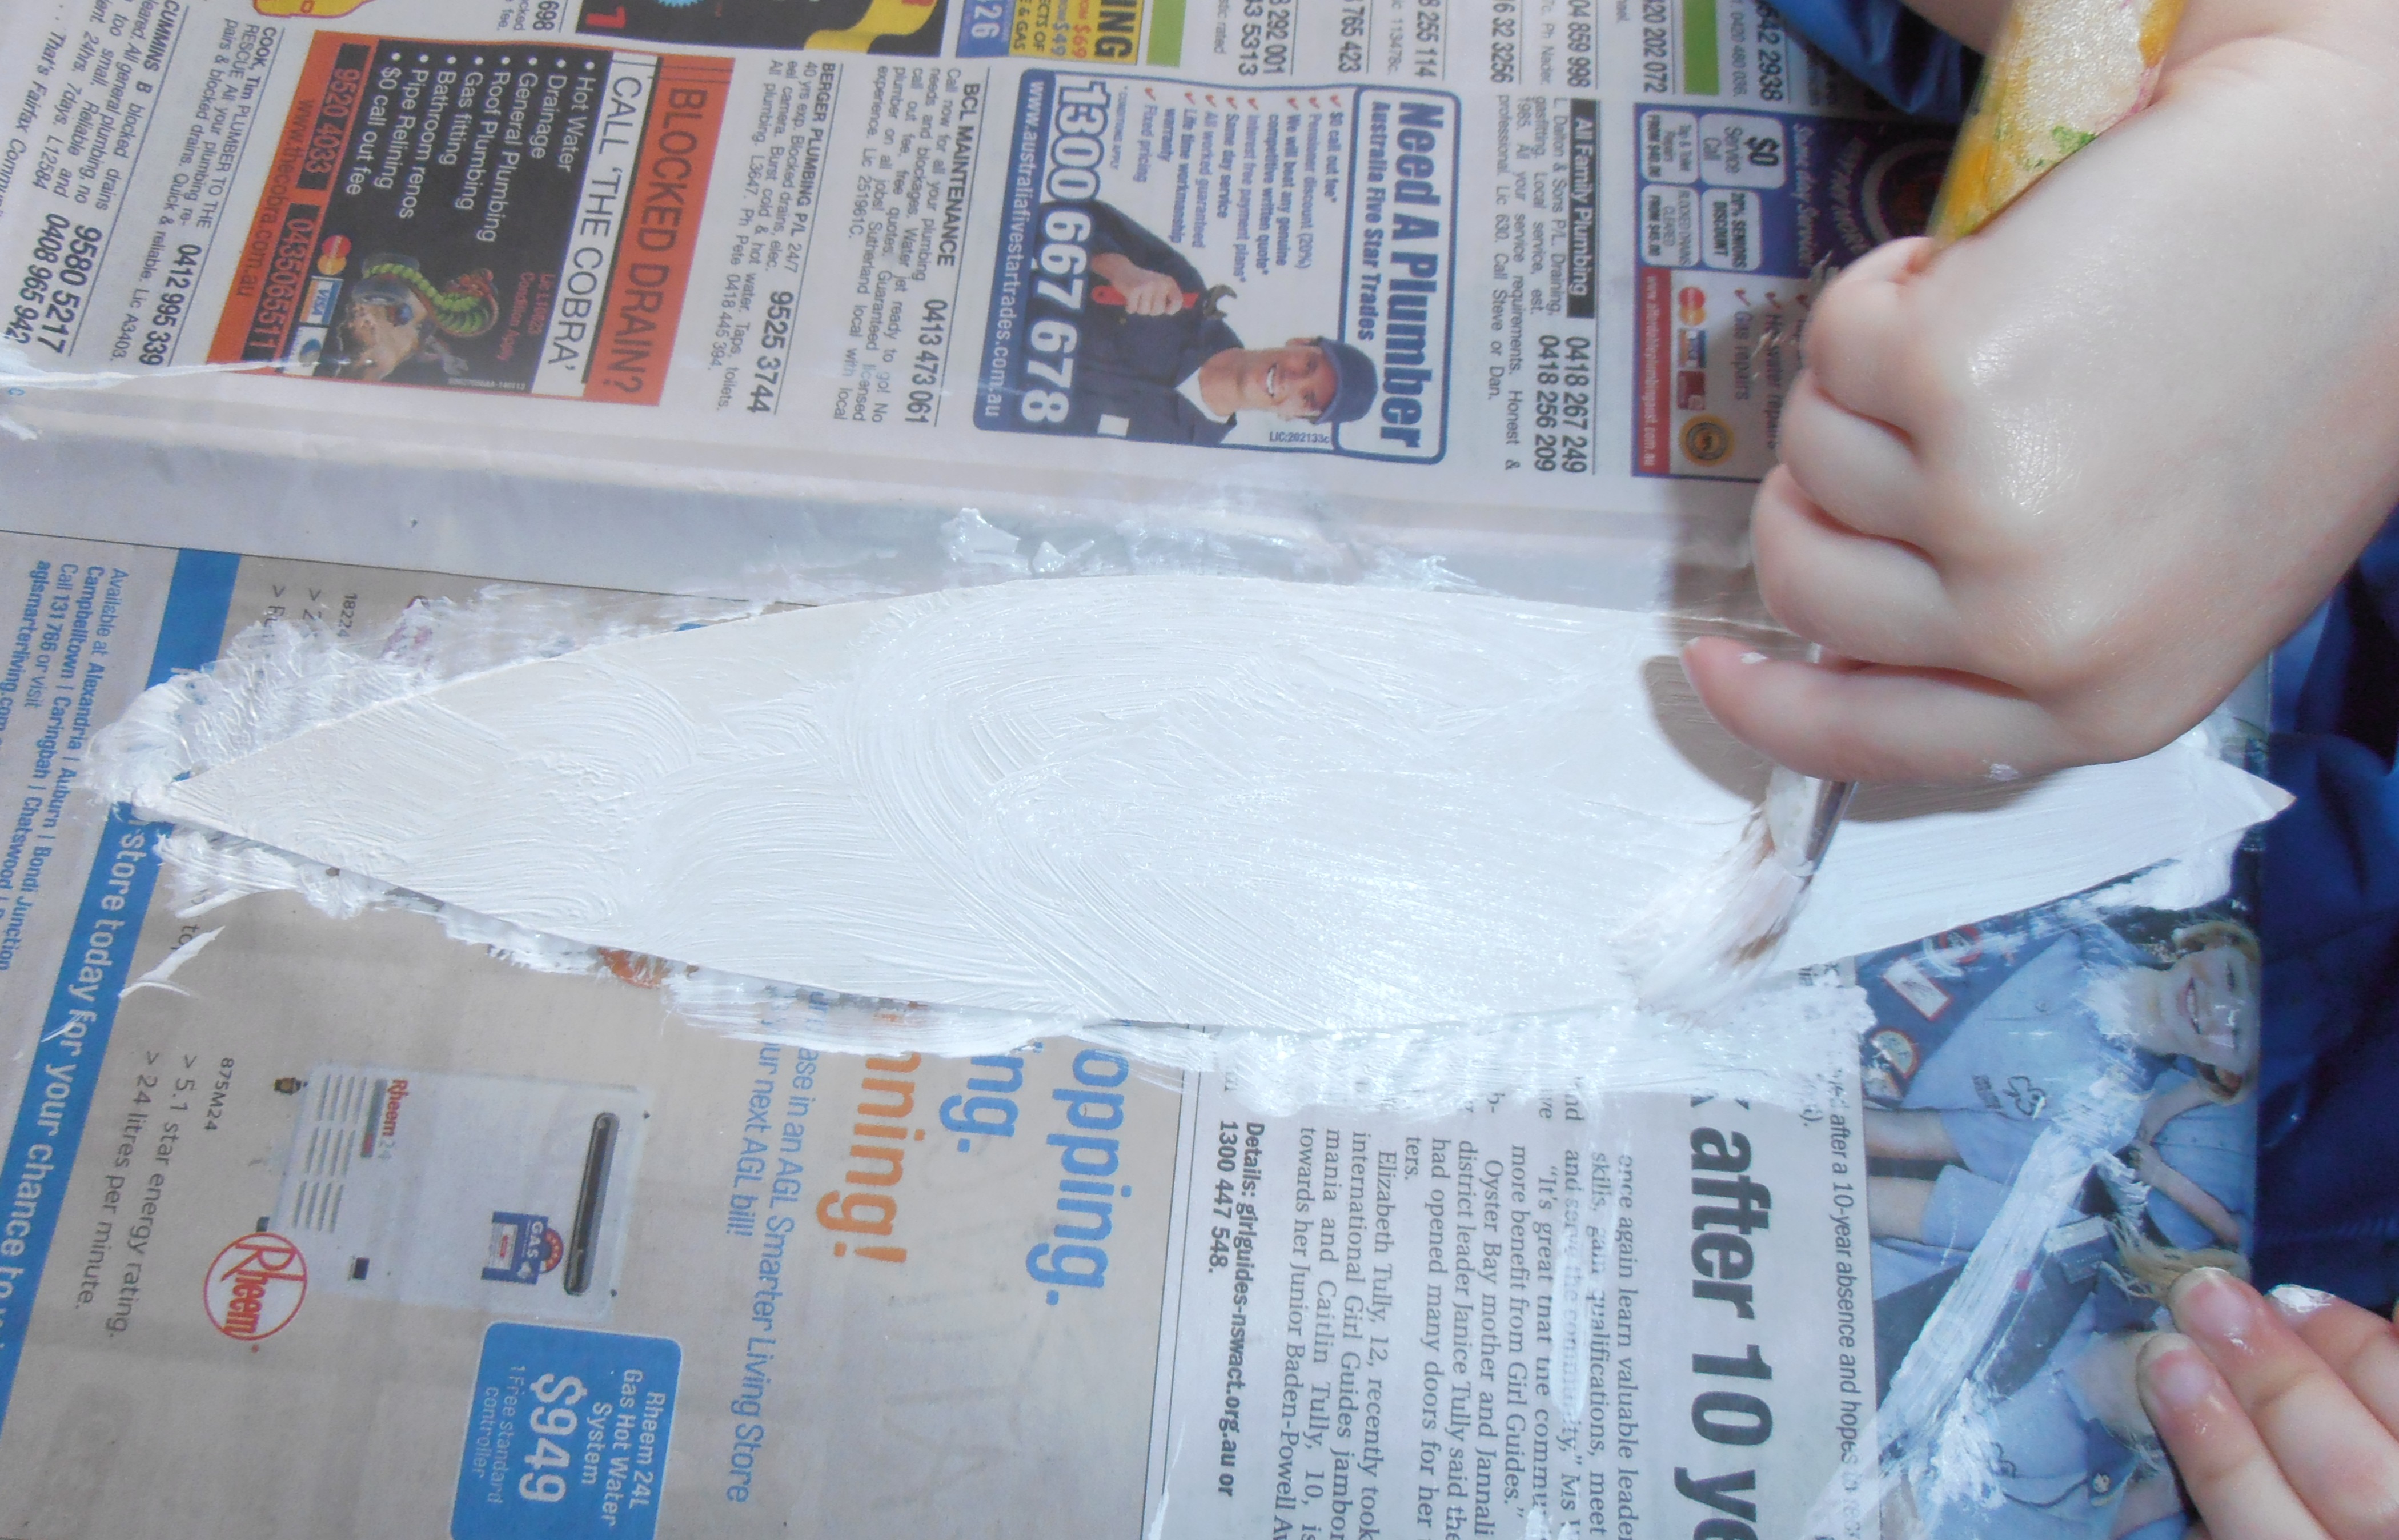
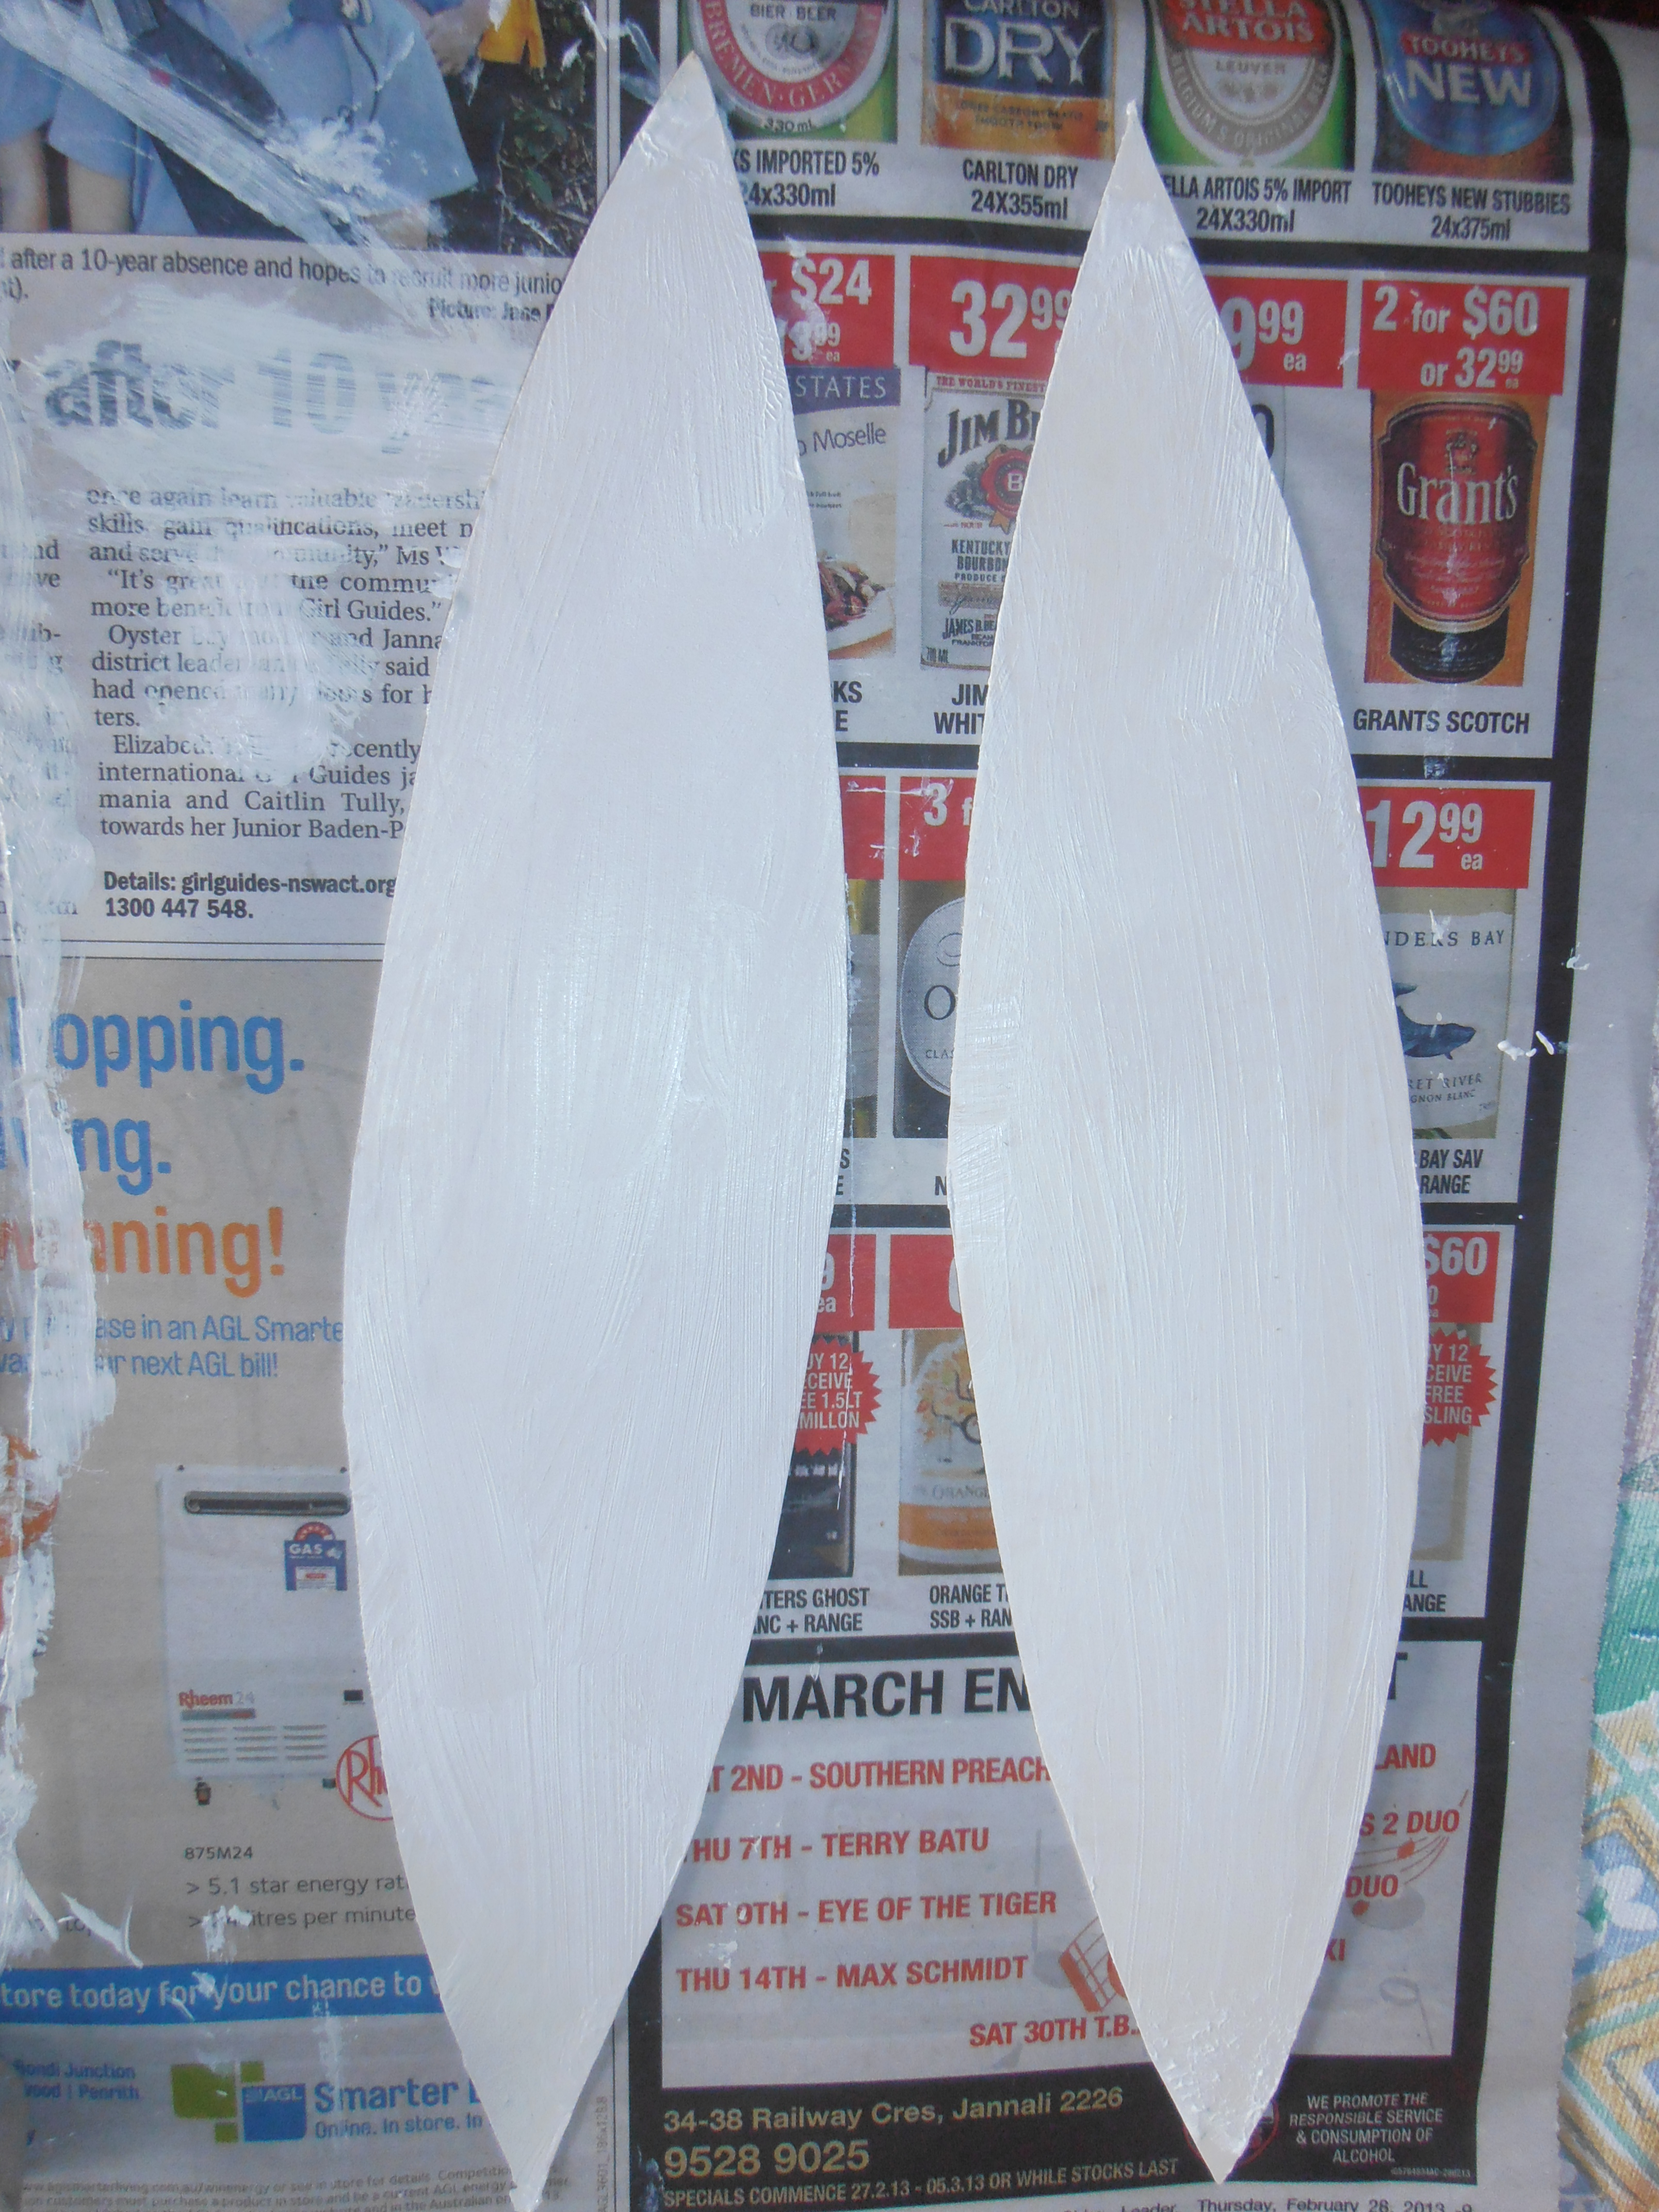
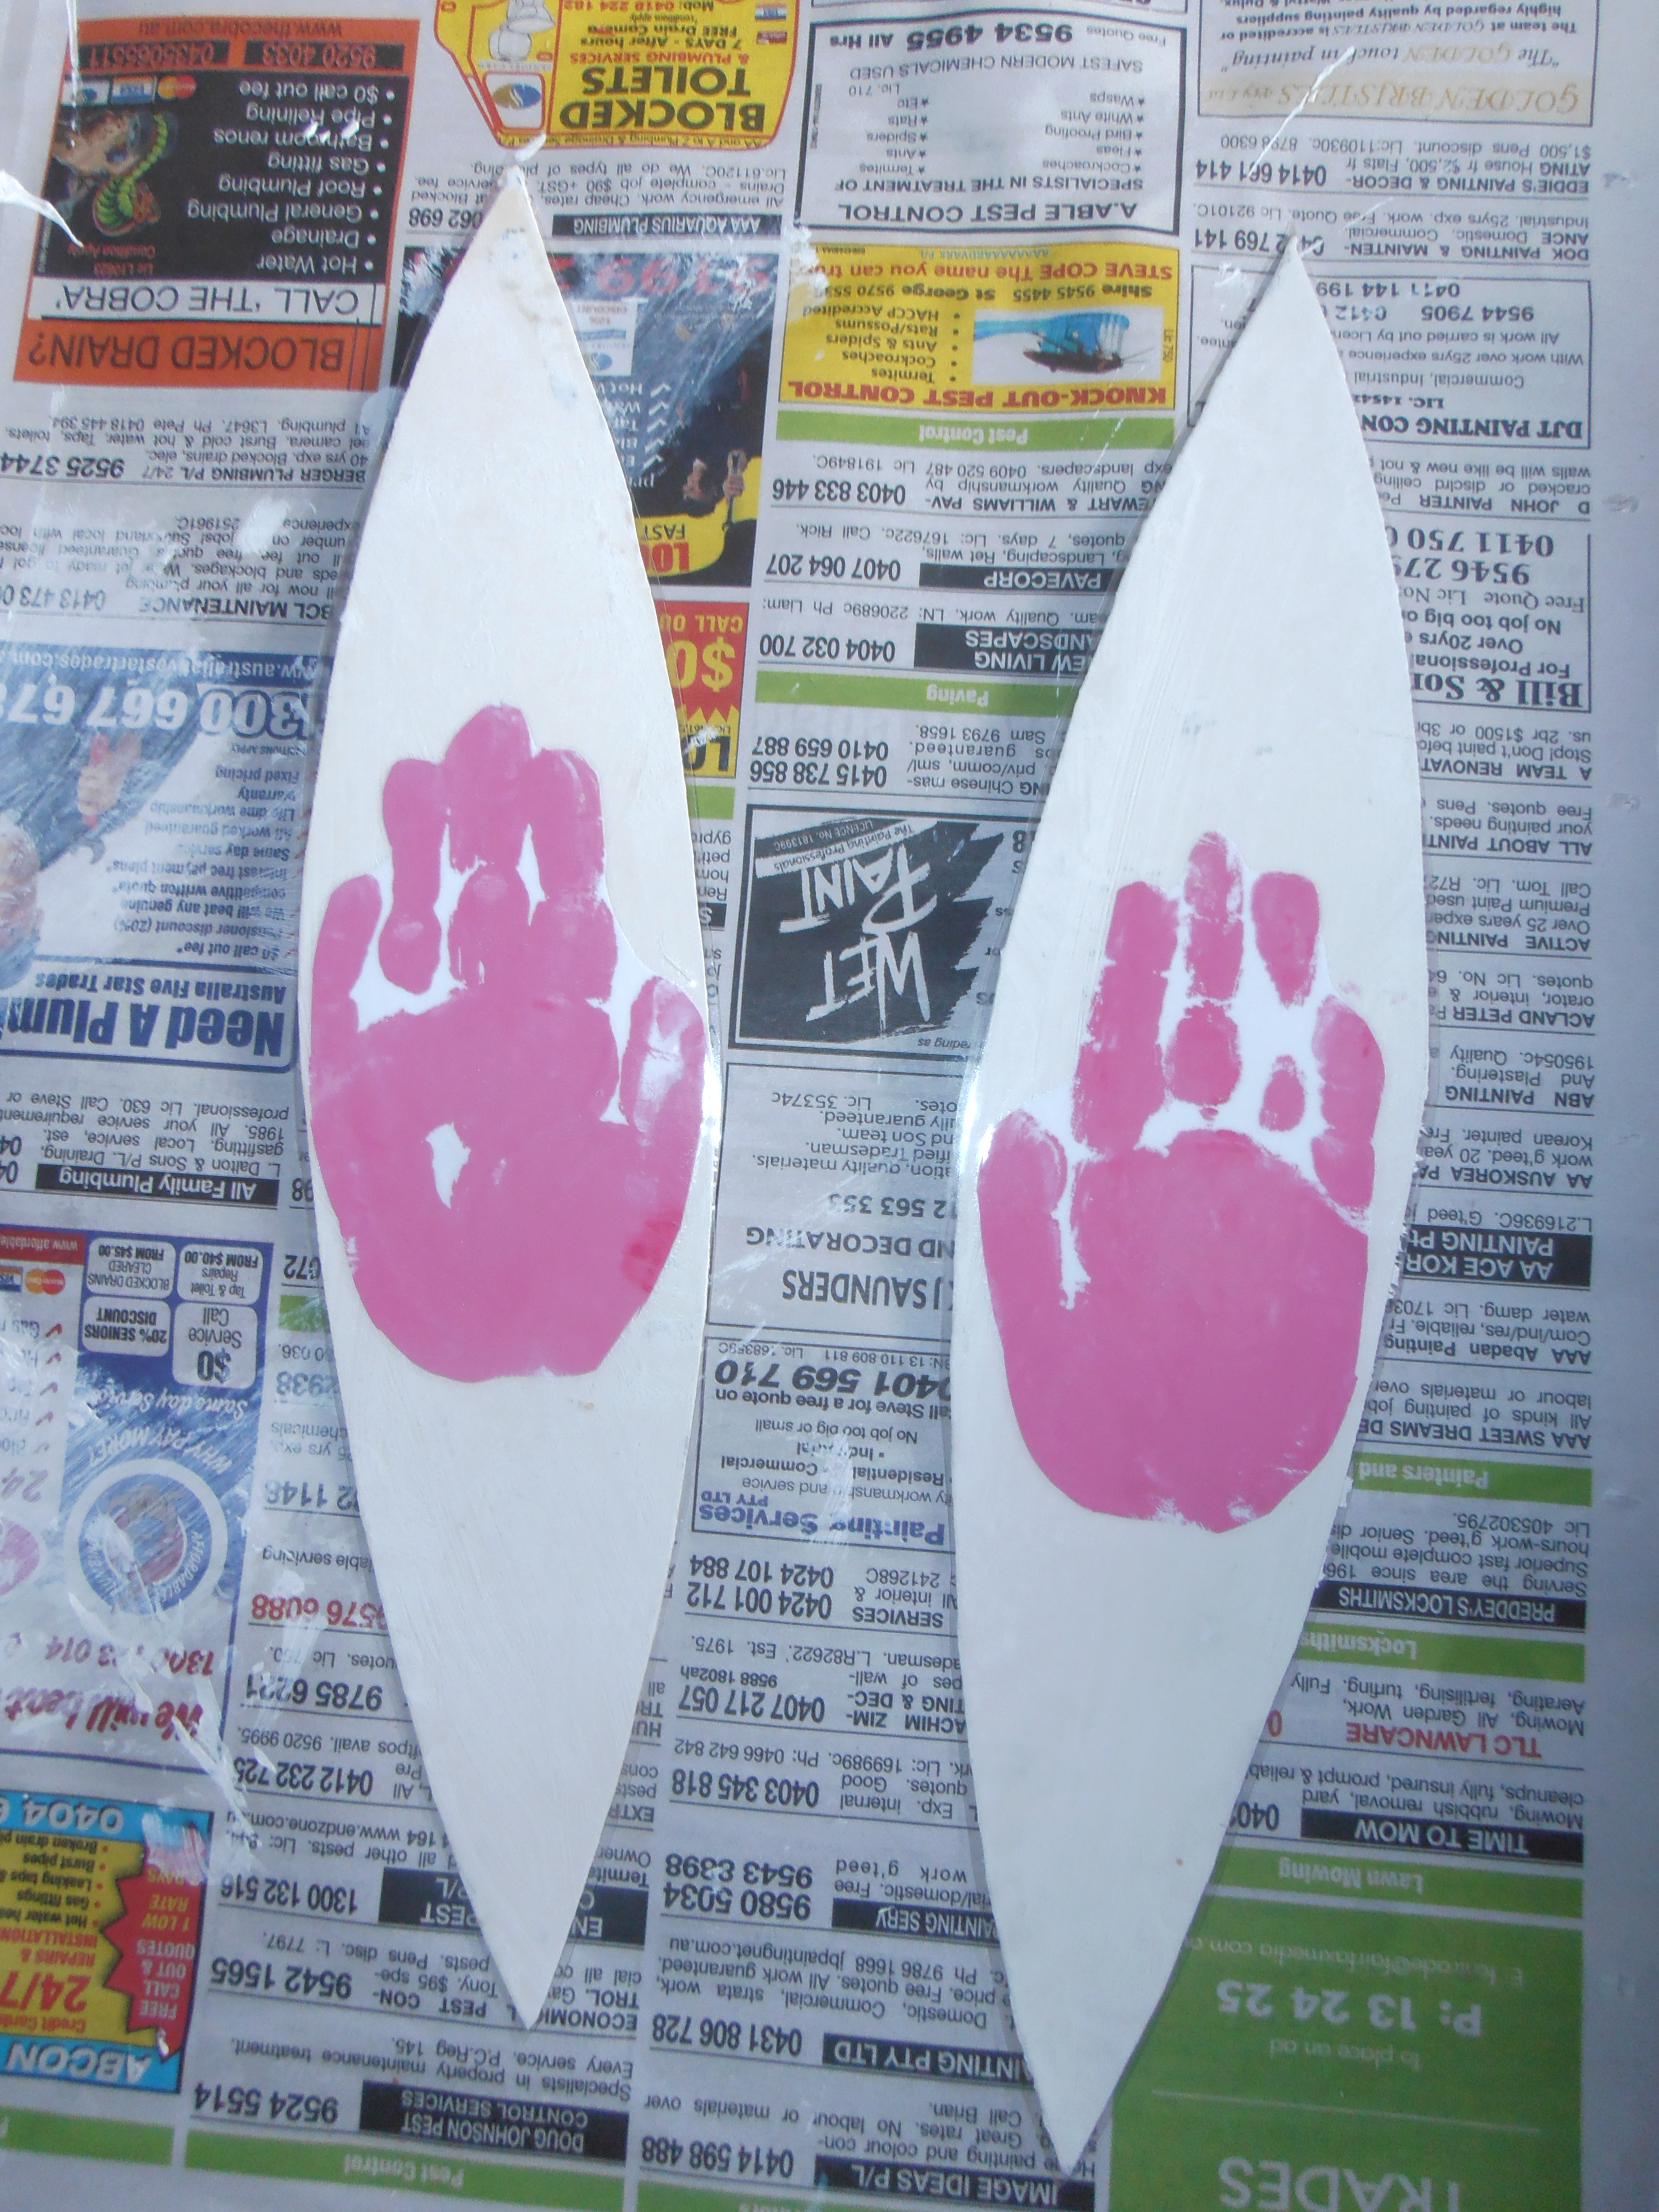
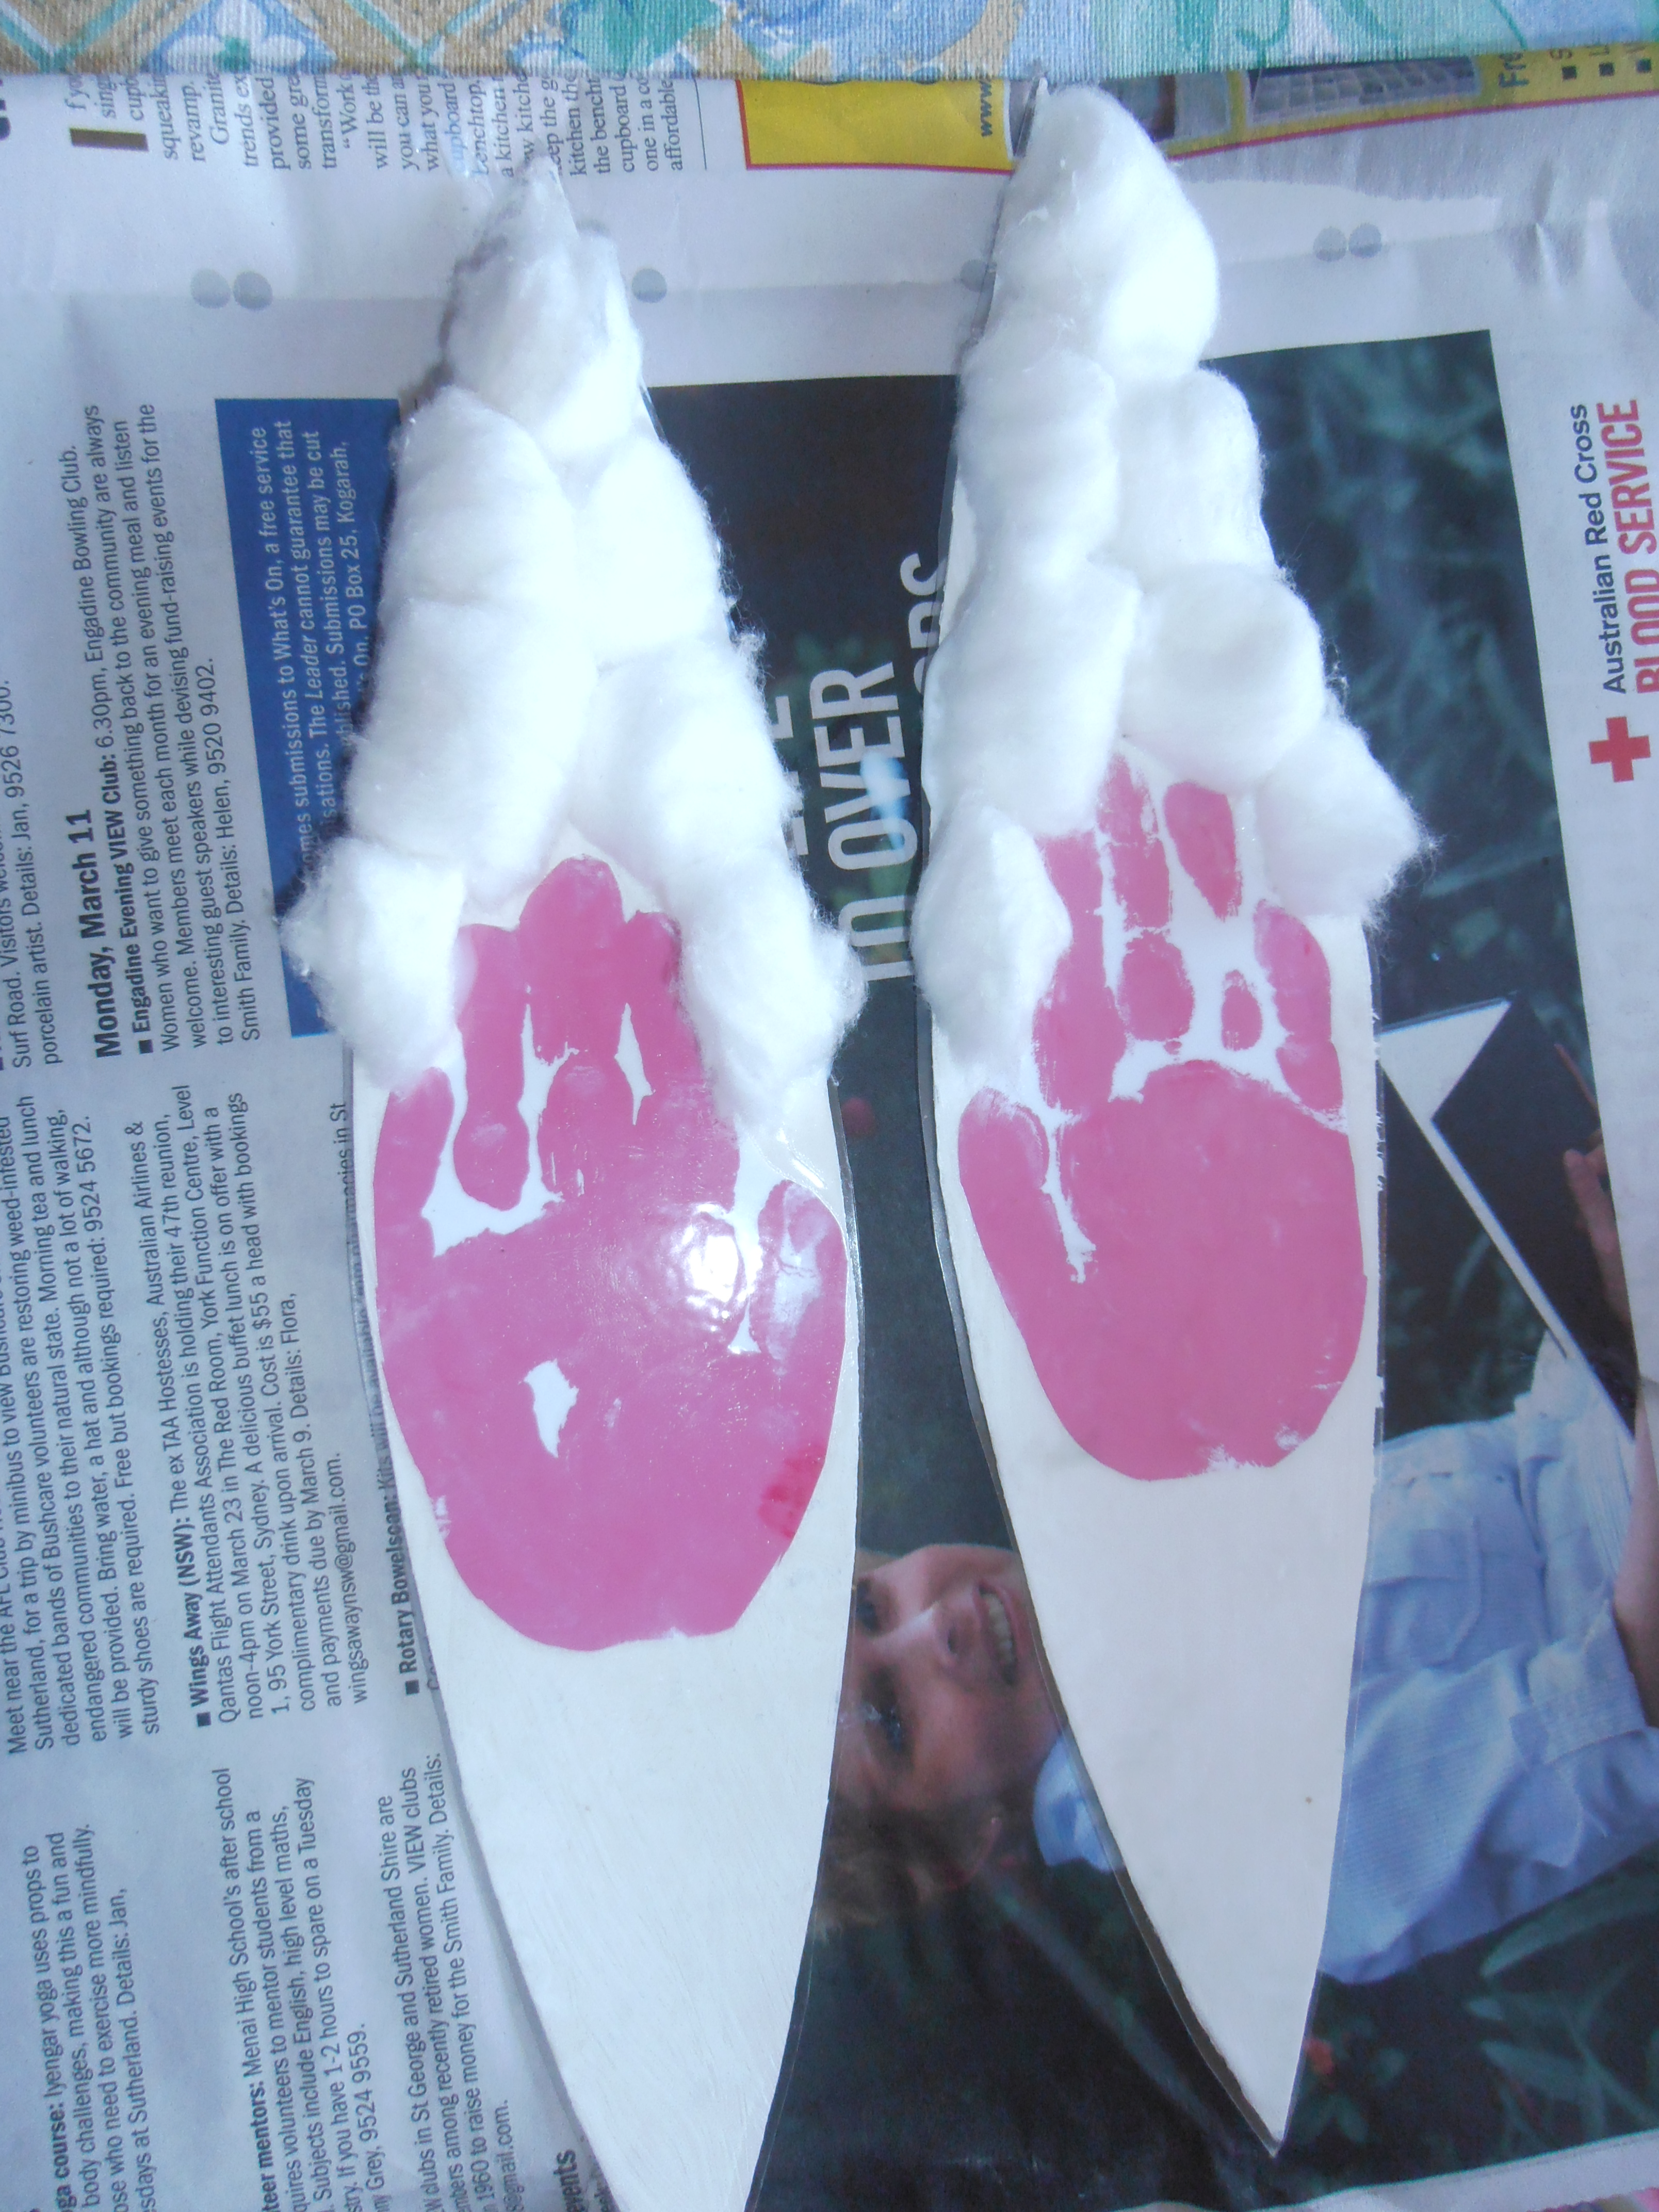
Step One: Carefully cut two ears out of your white cardboard or recycled cardboard and paint both white (if not already white).

OLYMPUS DIGITAL CAMERA             OLYMPUS DIGITAL CAMERA

Step Two:   Paint the child’s left hand pink or blue and then get them to stamp it on white paper. Then paint their right hand pink or blue and get them to stamp it on the paper too. Children can paint their own hands if they are able to.

OLYMPUS DIGITAL CAMERA

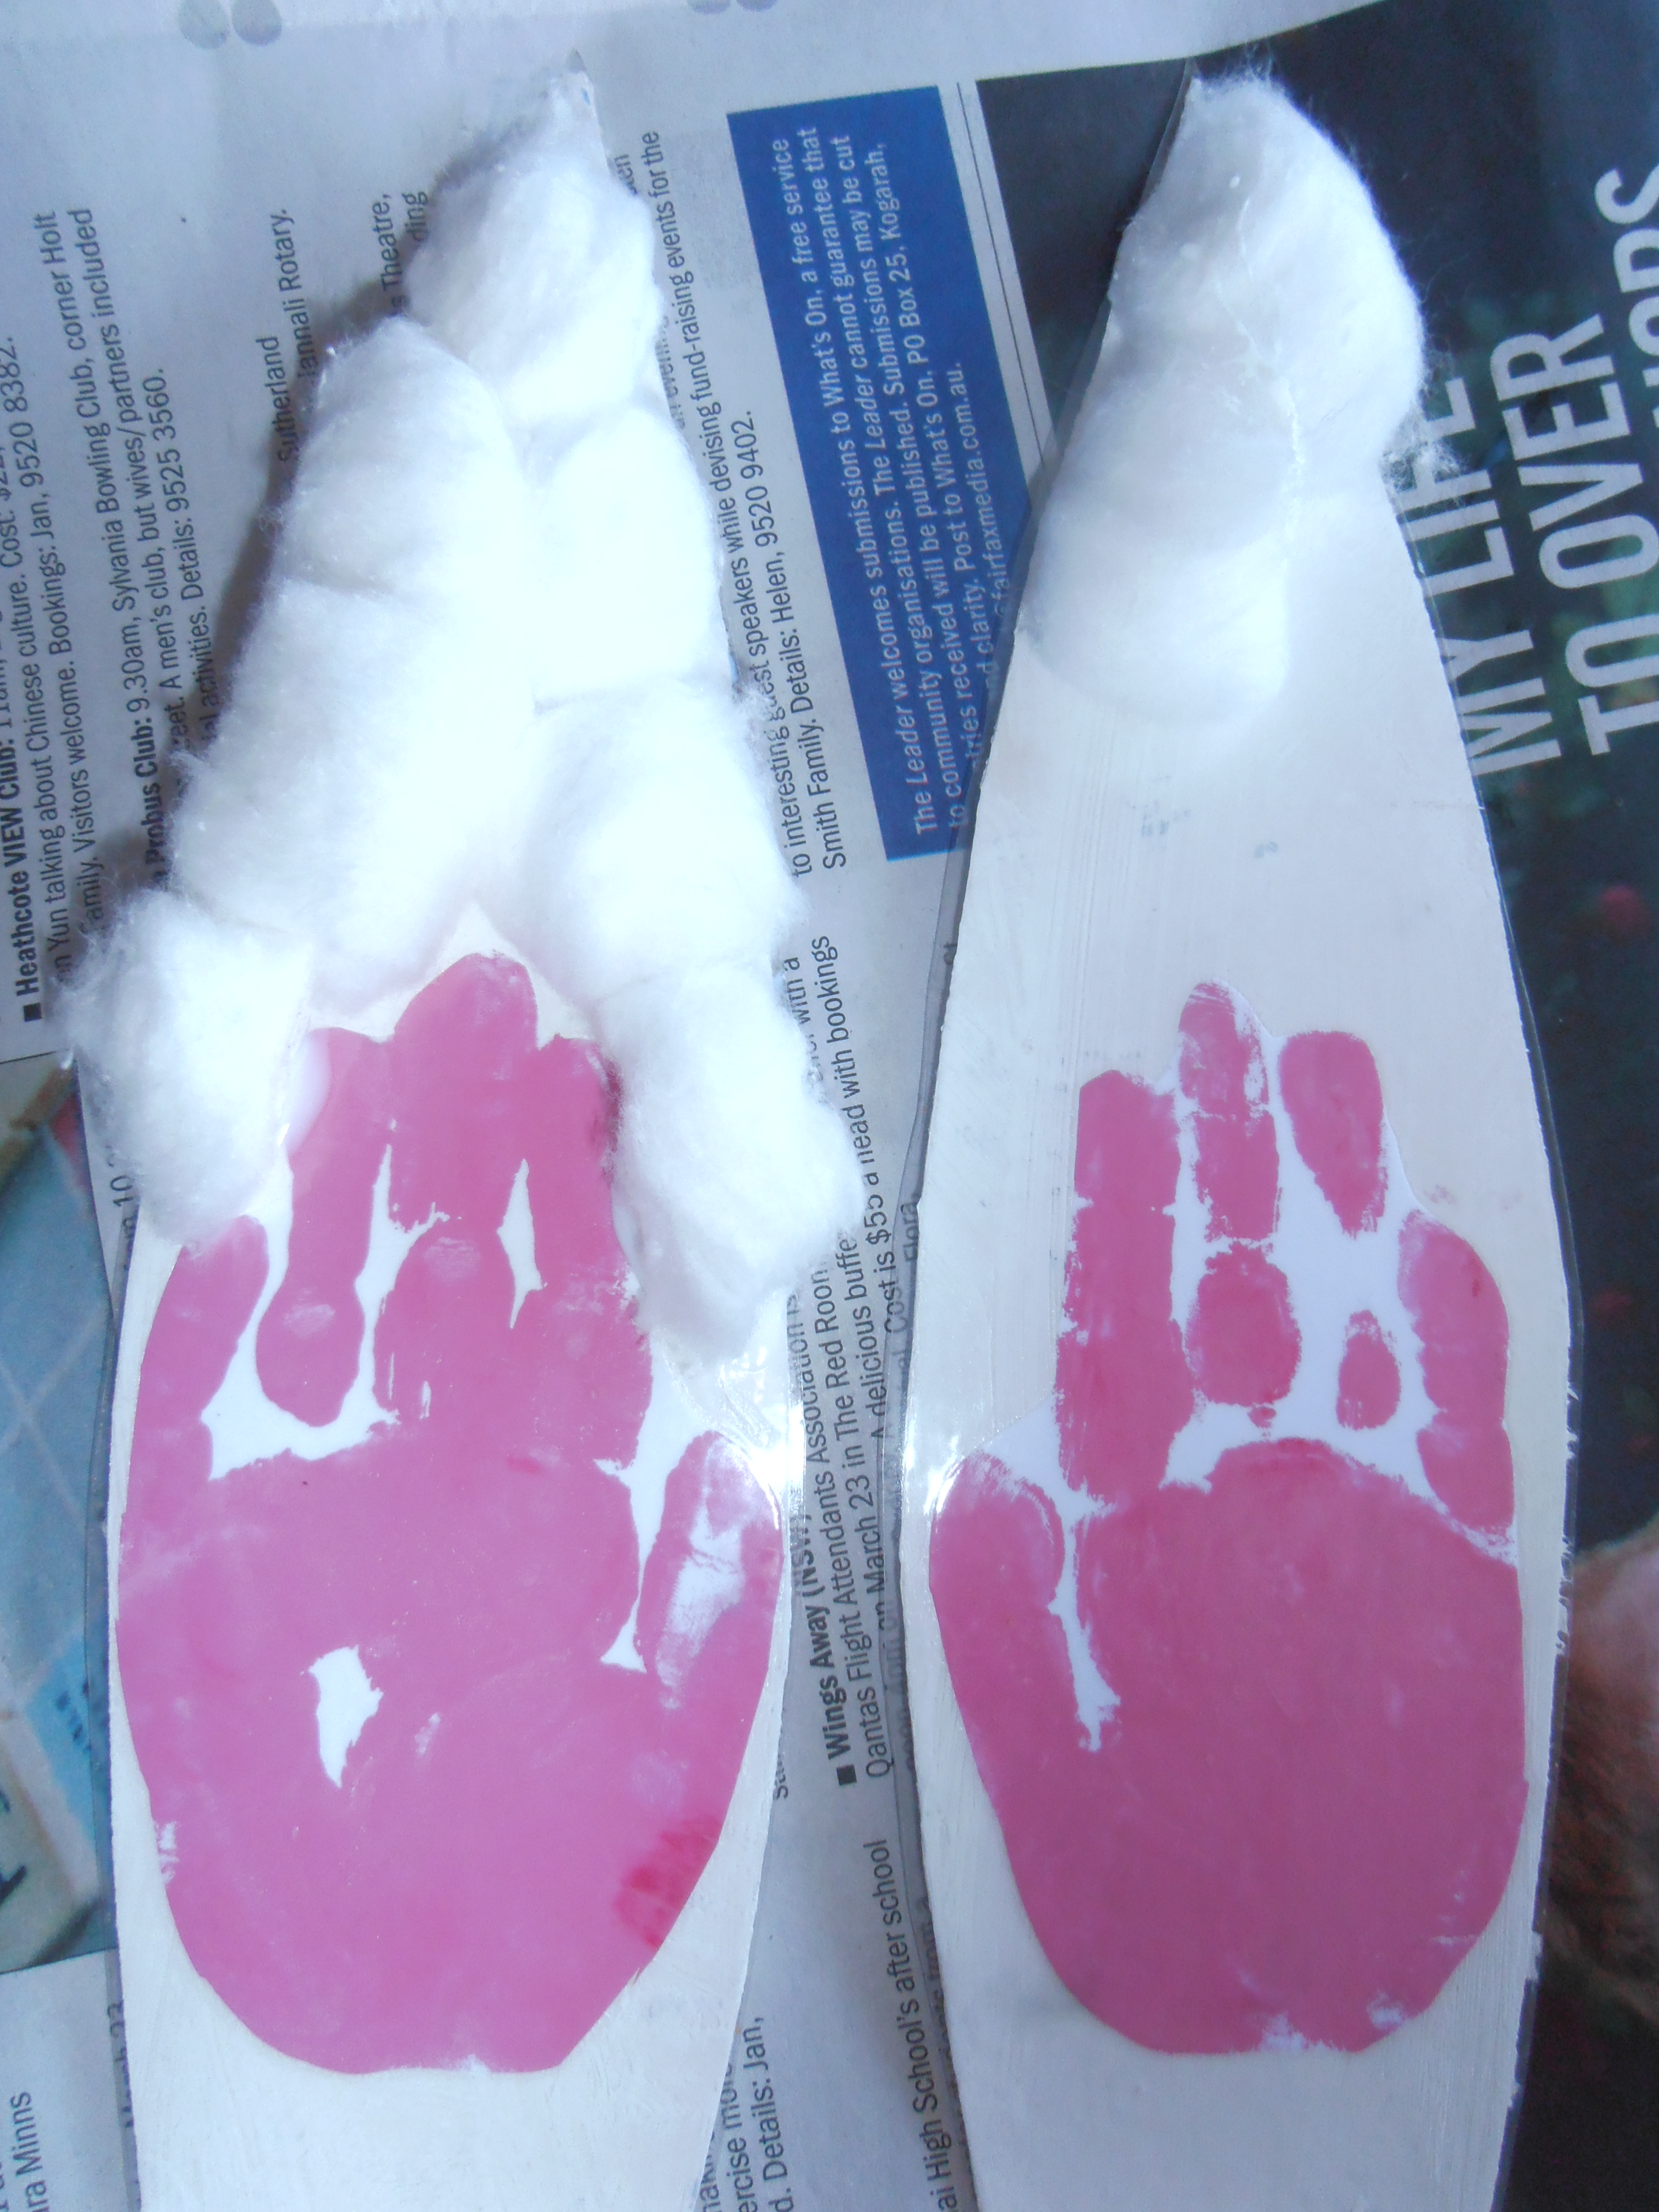
Step Three: When the hand prints are dry, cut them out and paste them on the white bunny ears. Then laminate them if you would like to.

OLYMPUS DIGITAL CAMERA             OLYMPUS DIGITAL CAMERA

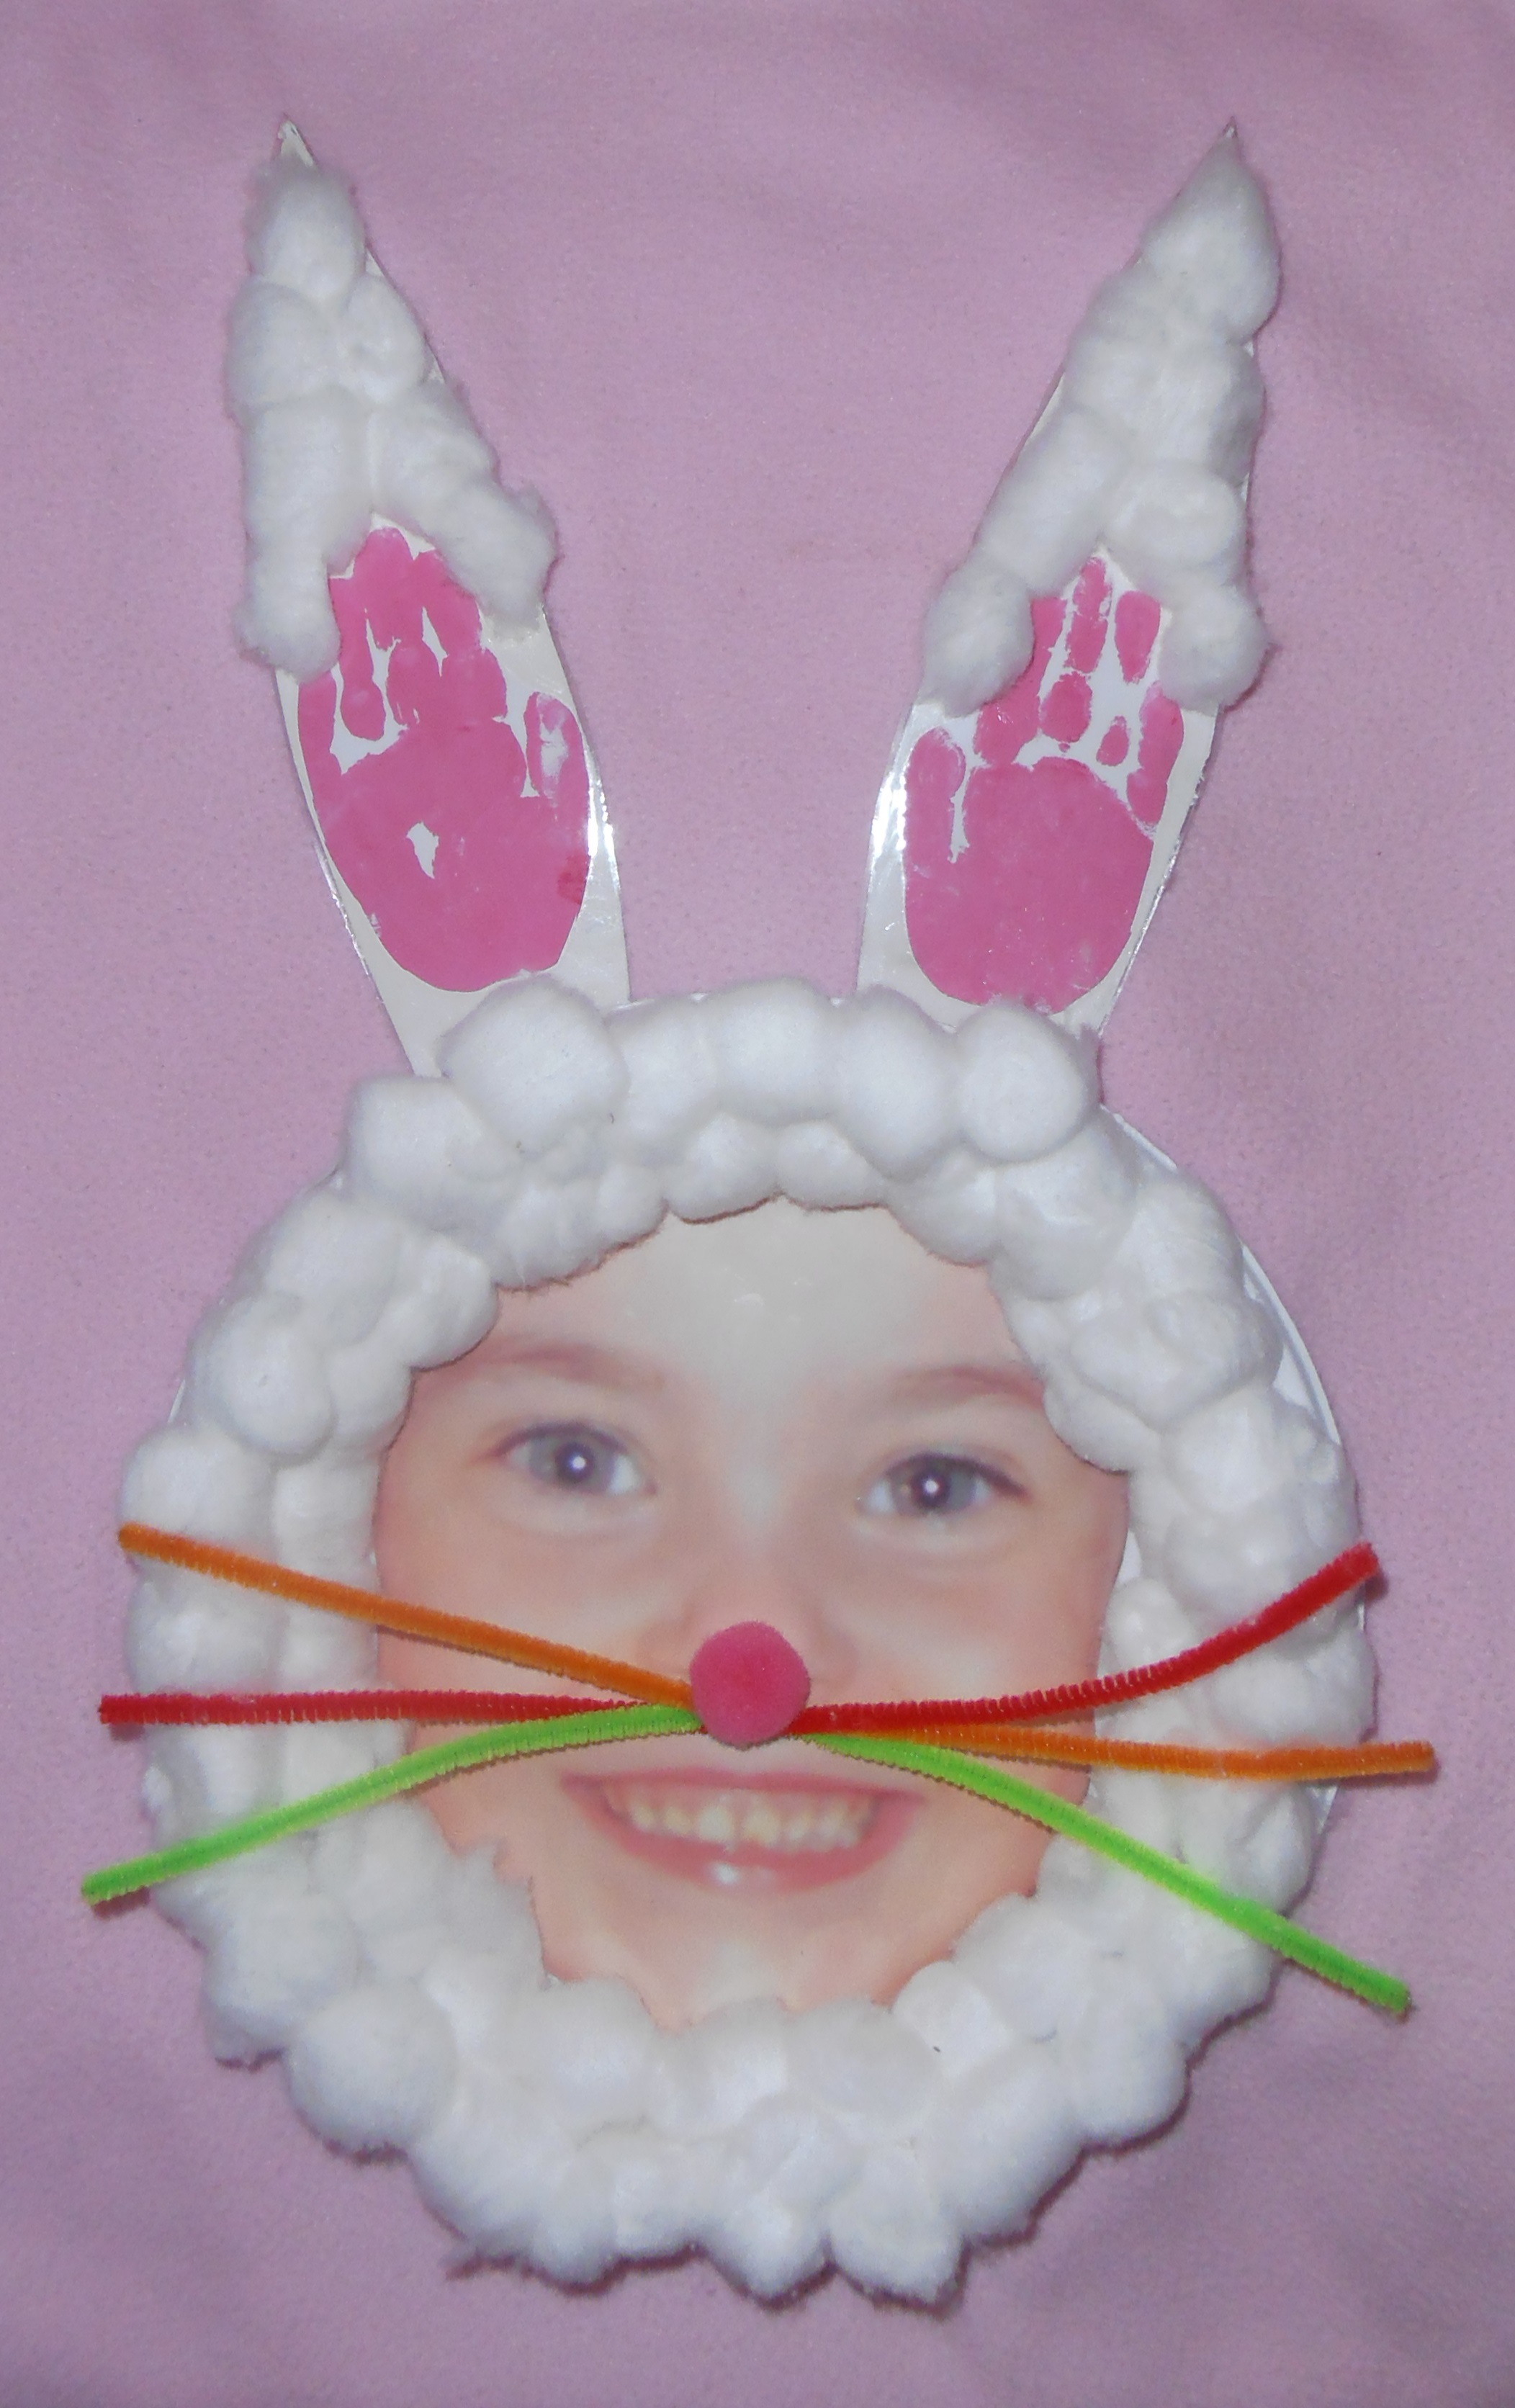
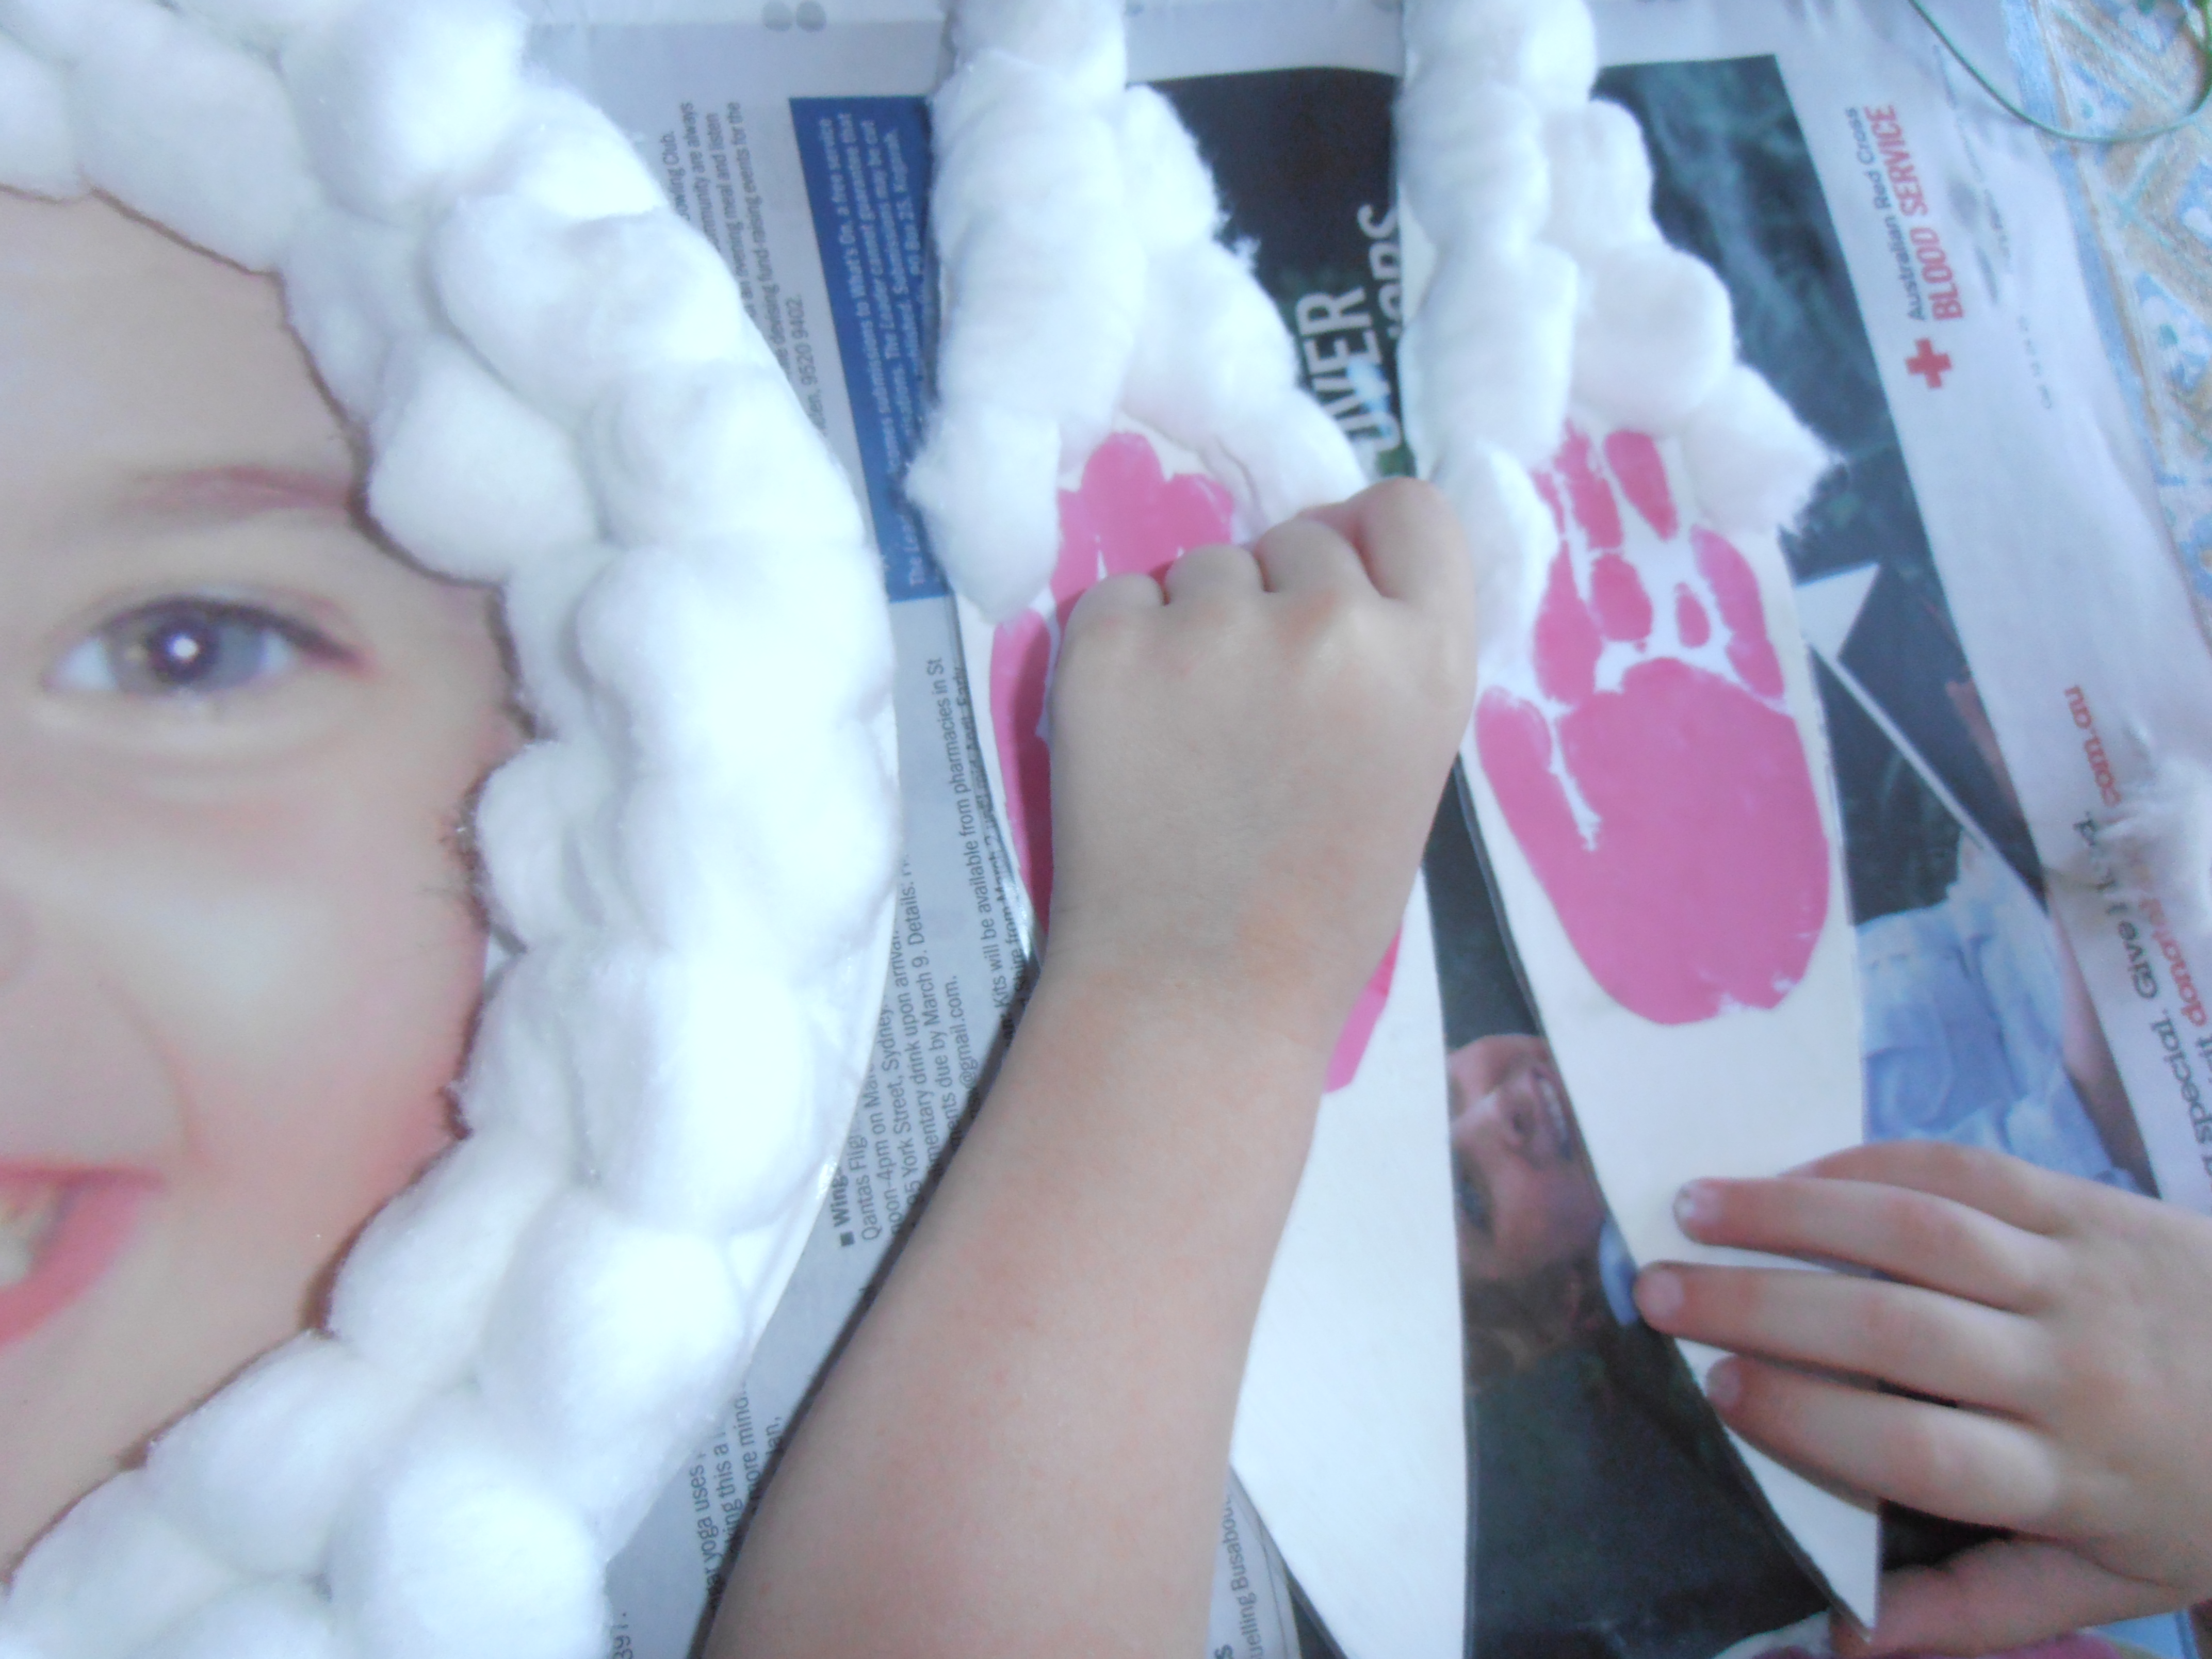
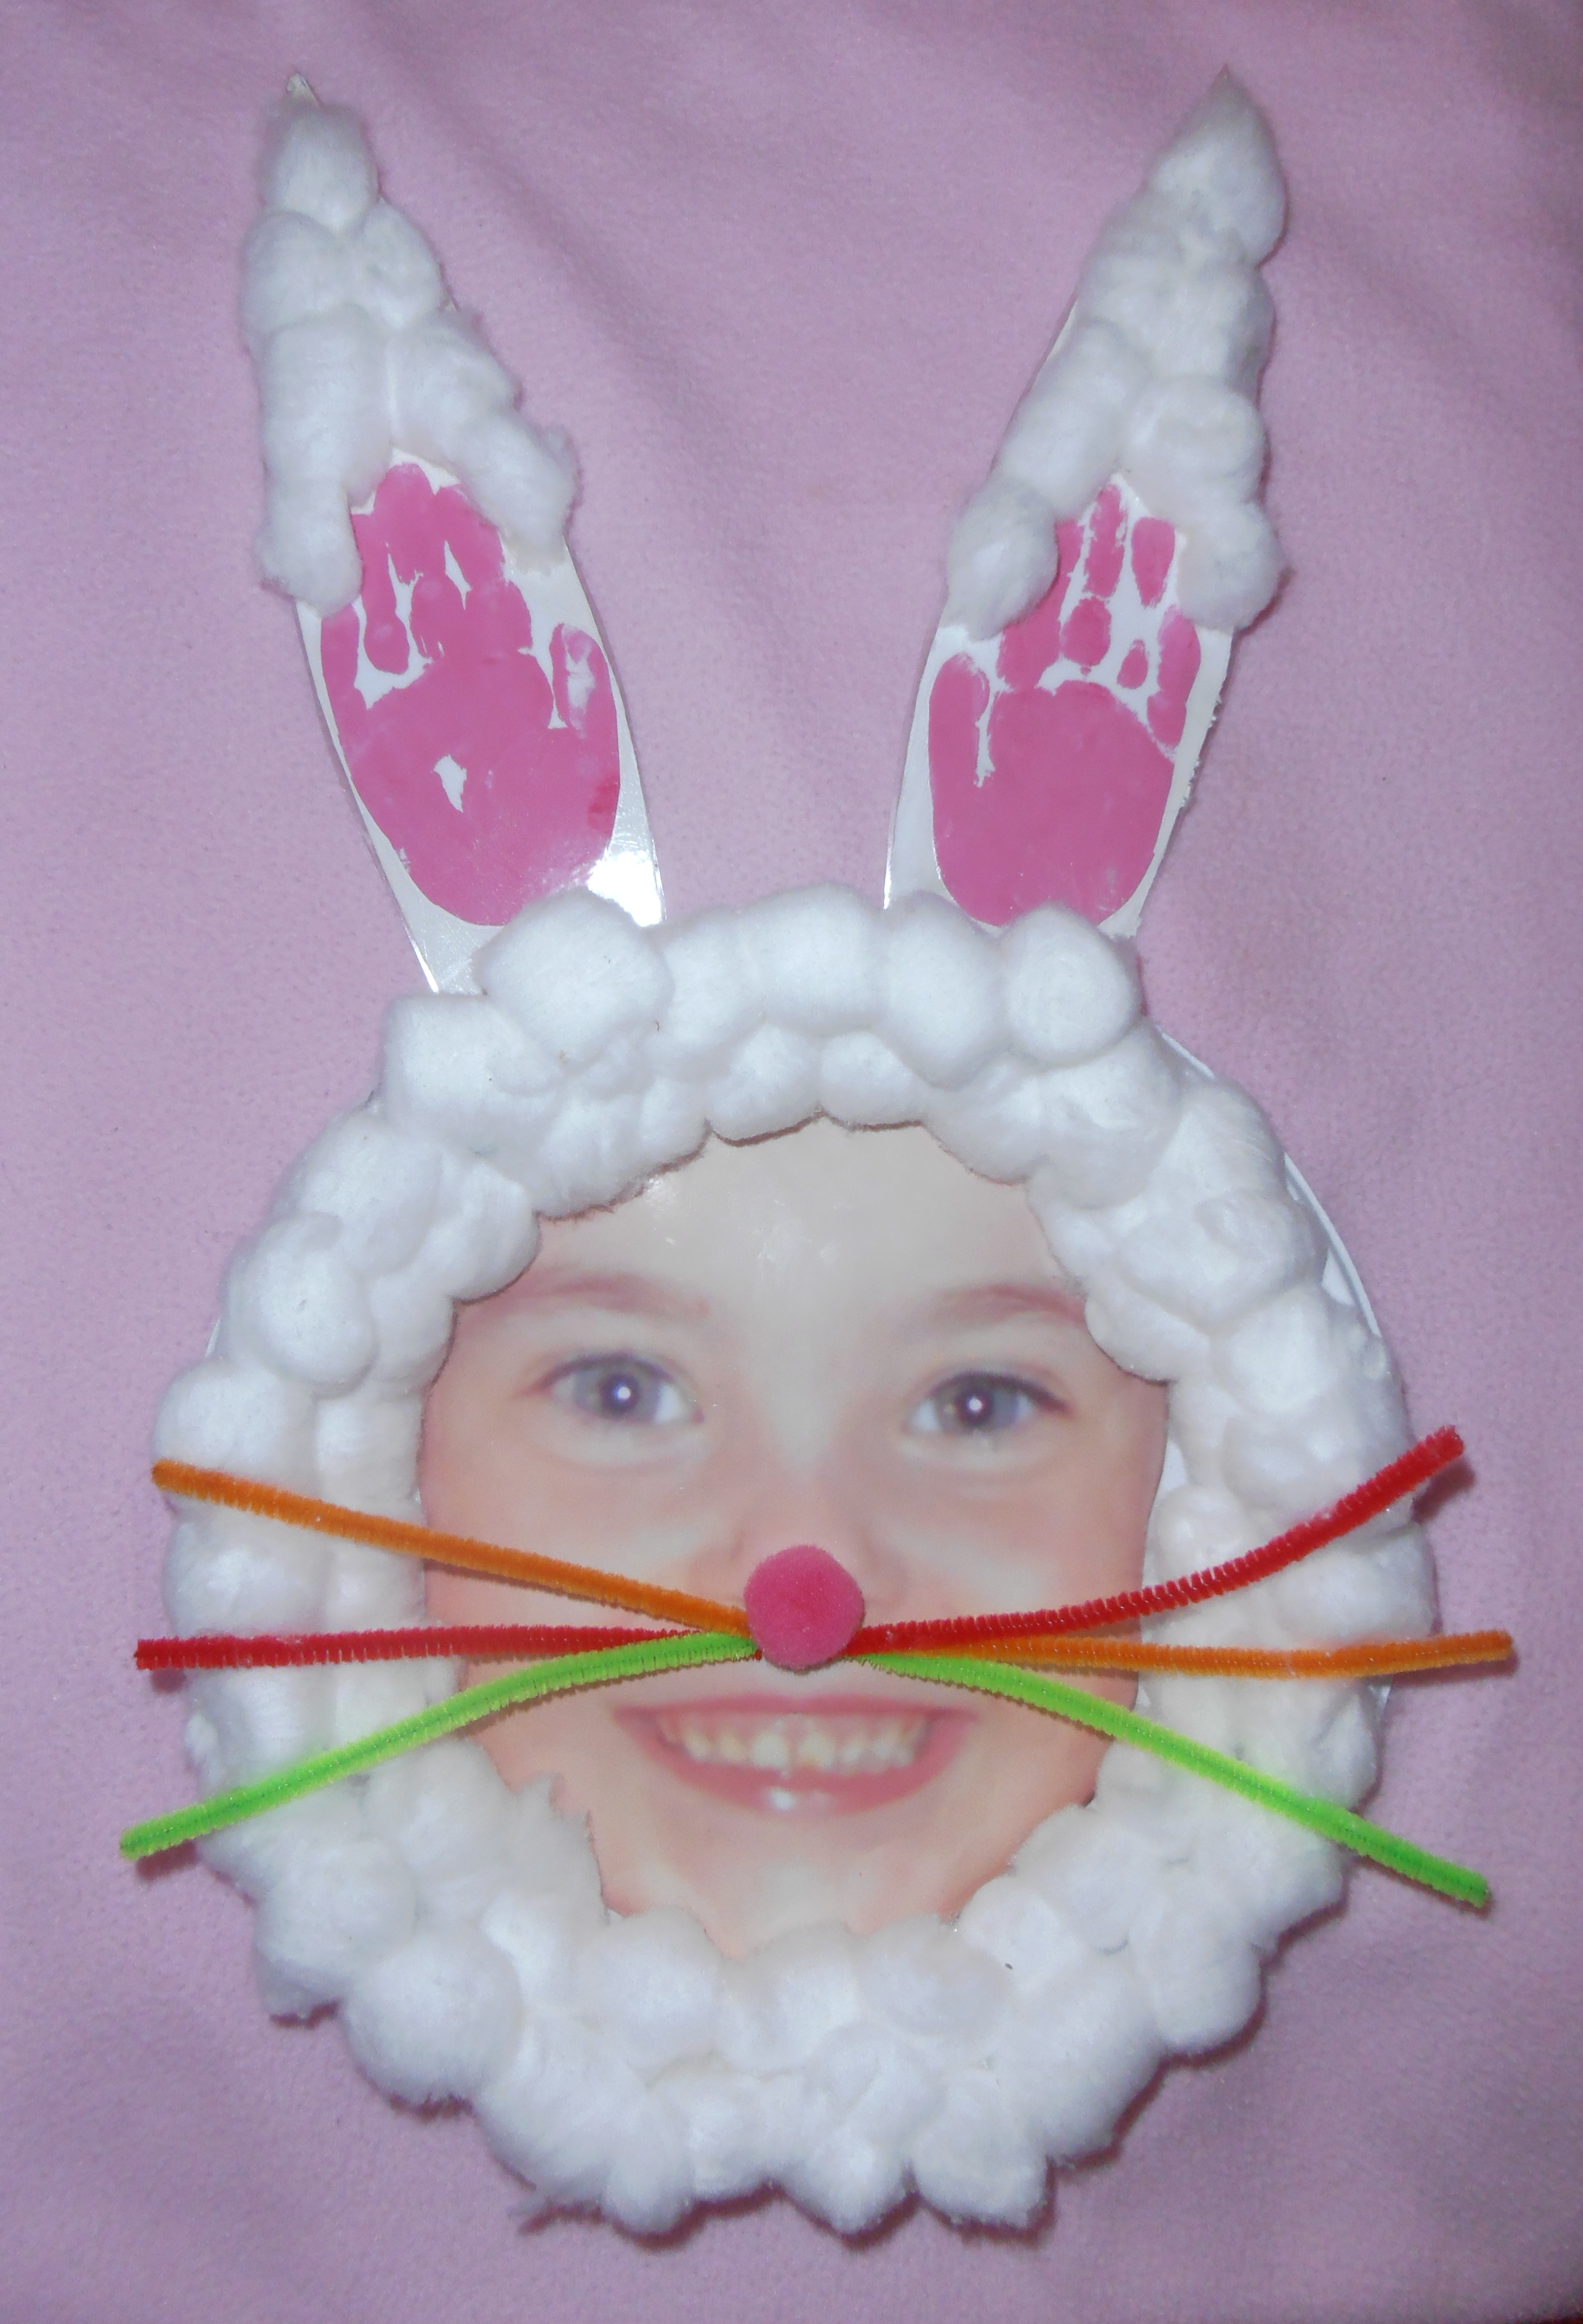
Step Four:   Cut out the enlarged photo of your darling precious child to fit the inside of your cardboard plate (laminate it if you would like to) then paste it onto the paper plate.

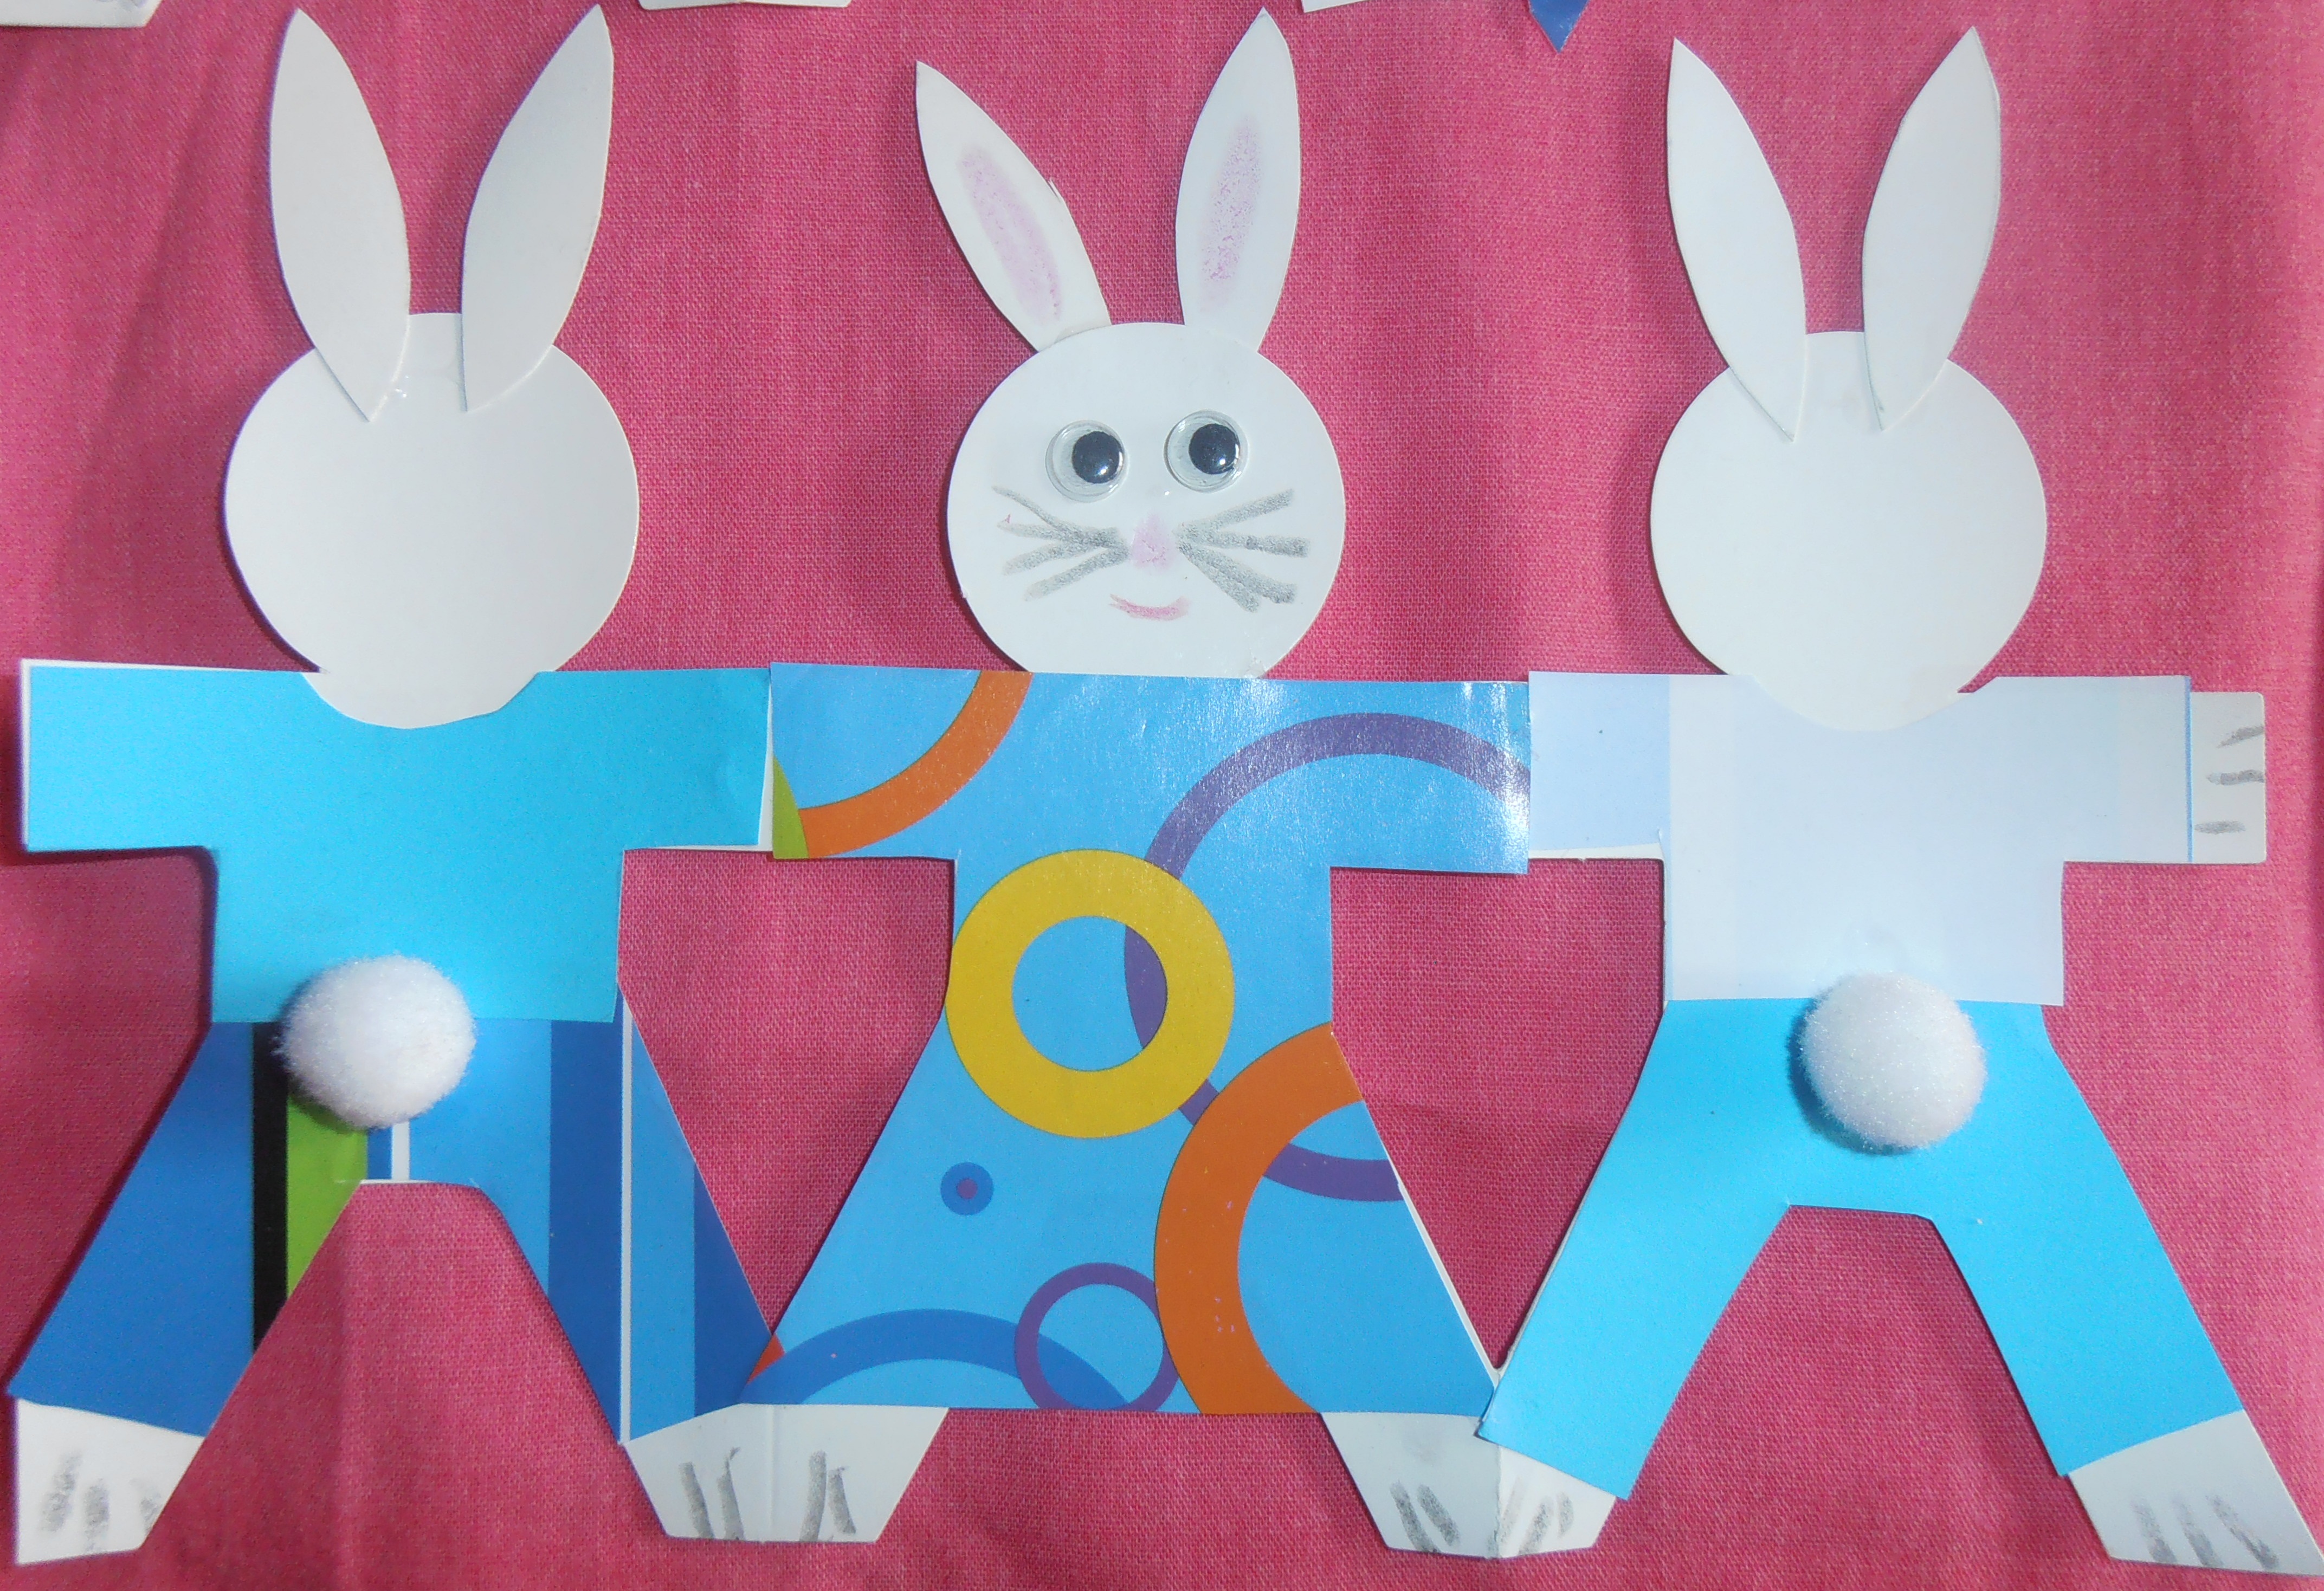
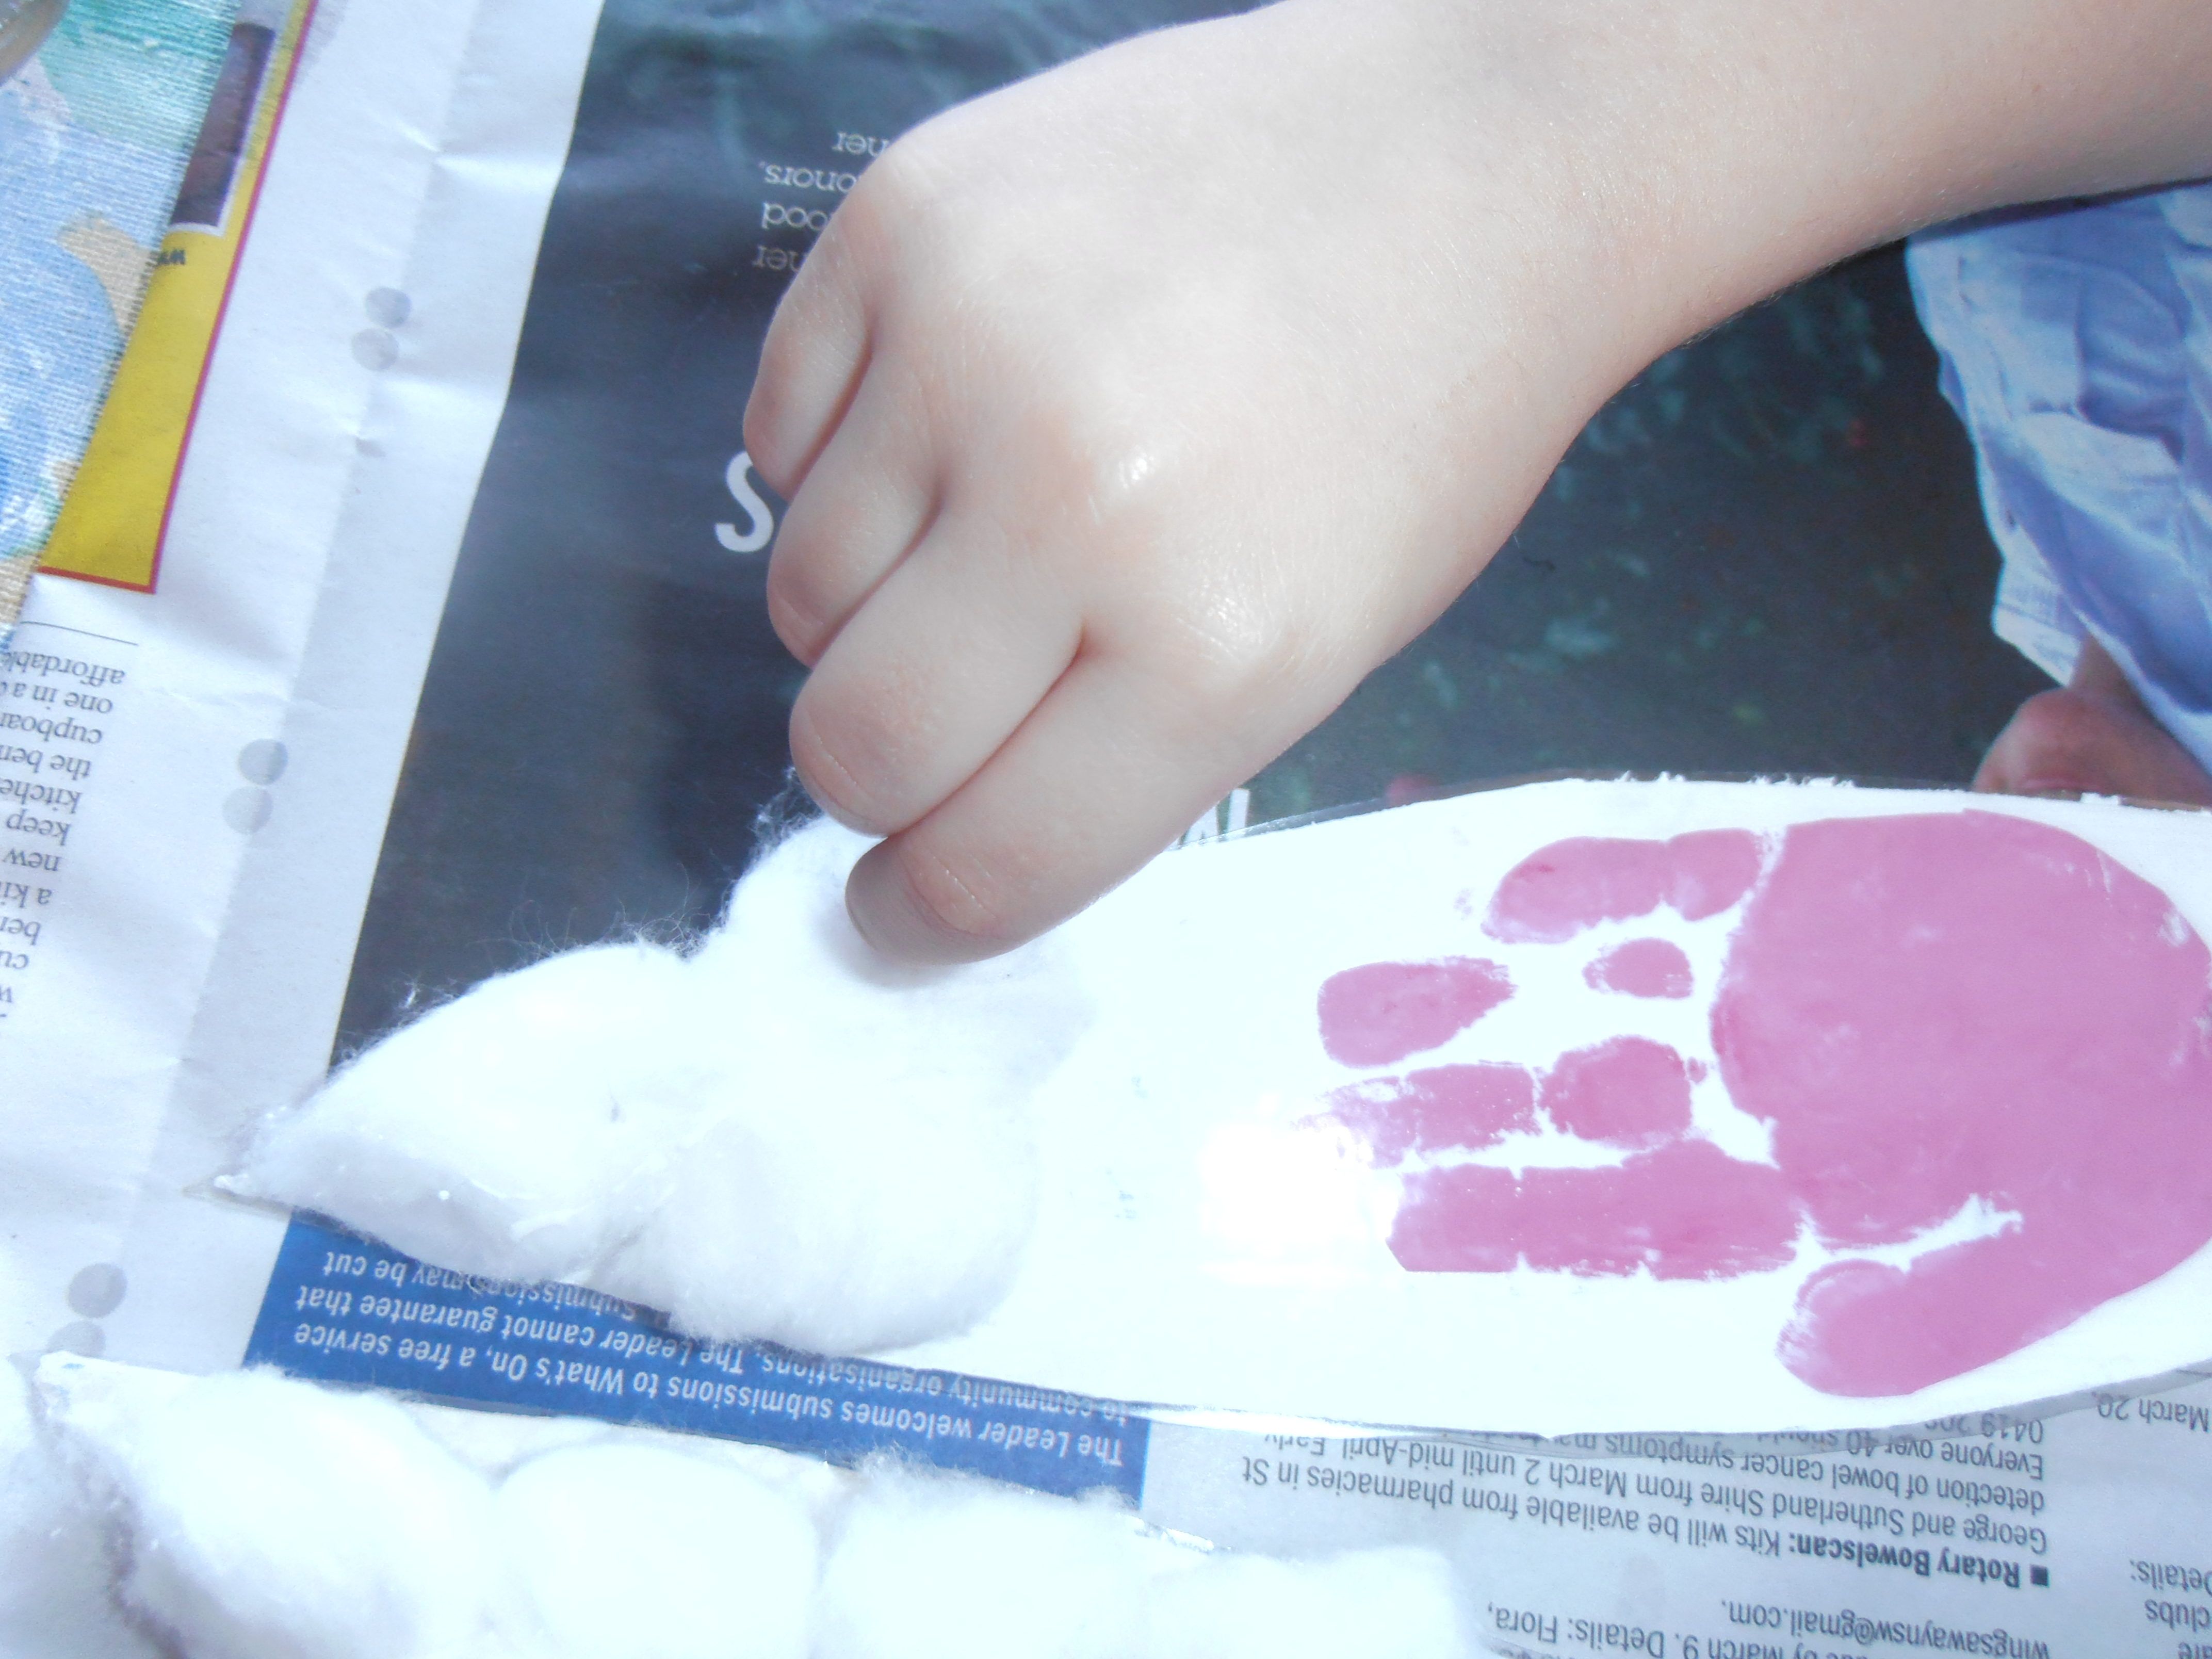
Step Five:   Glue cotton balls on the top of your bunny ears then around your bunny face and paper plate using your PVA/ craft glue.

OLYMPUS DIGITAL CAMERA                                                             OLYMPUS DIGITAL CAMERA

OLYMPUS DIGITAL CAMERA

Step Six: Glue your bunny ears to the back of your bunny face with PVA/craft glue and leave facing downwards for an hour or two to dry.

OLYMPUS DIGITAL CAMERA

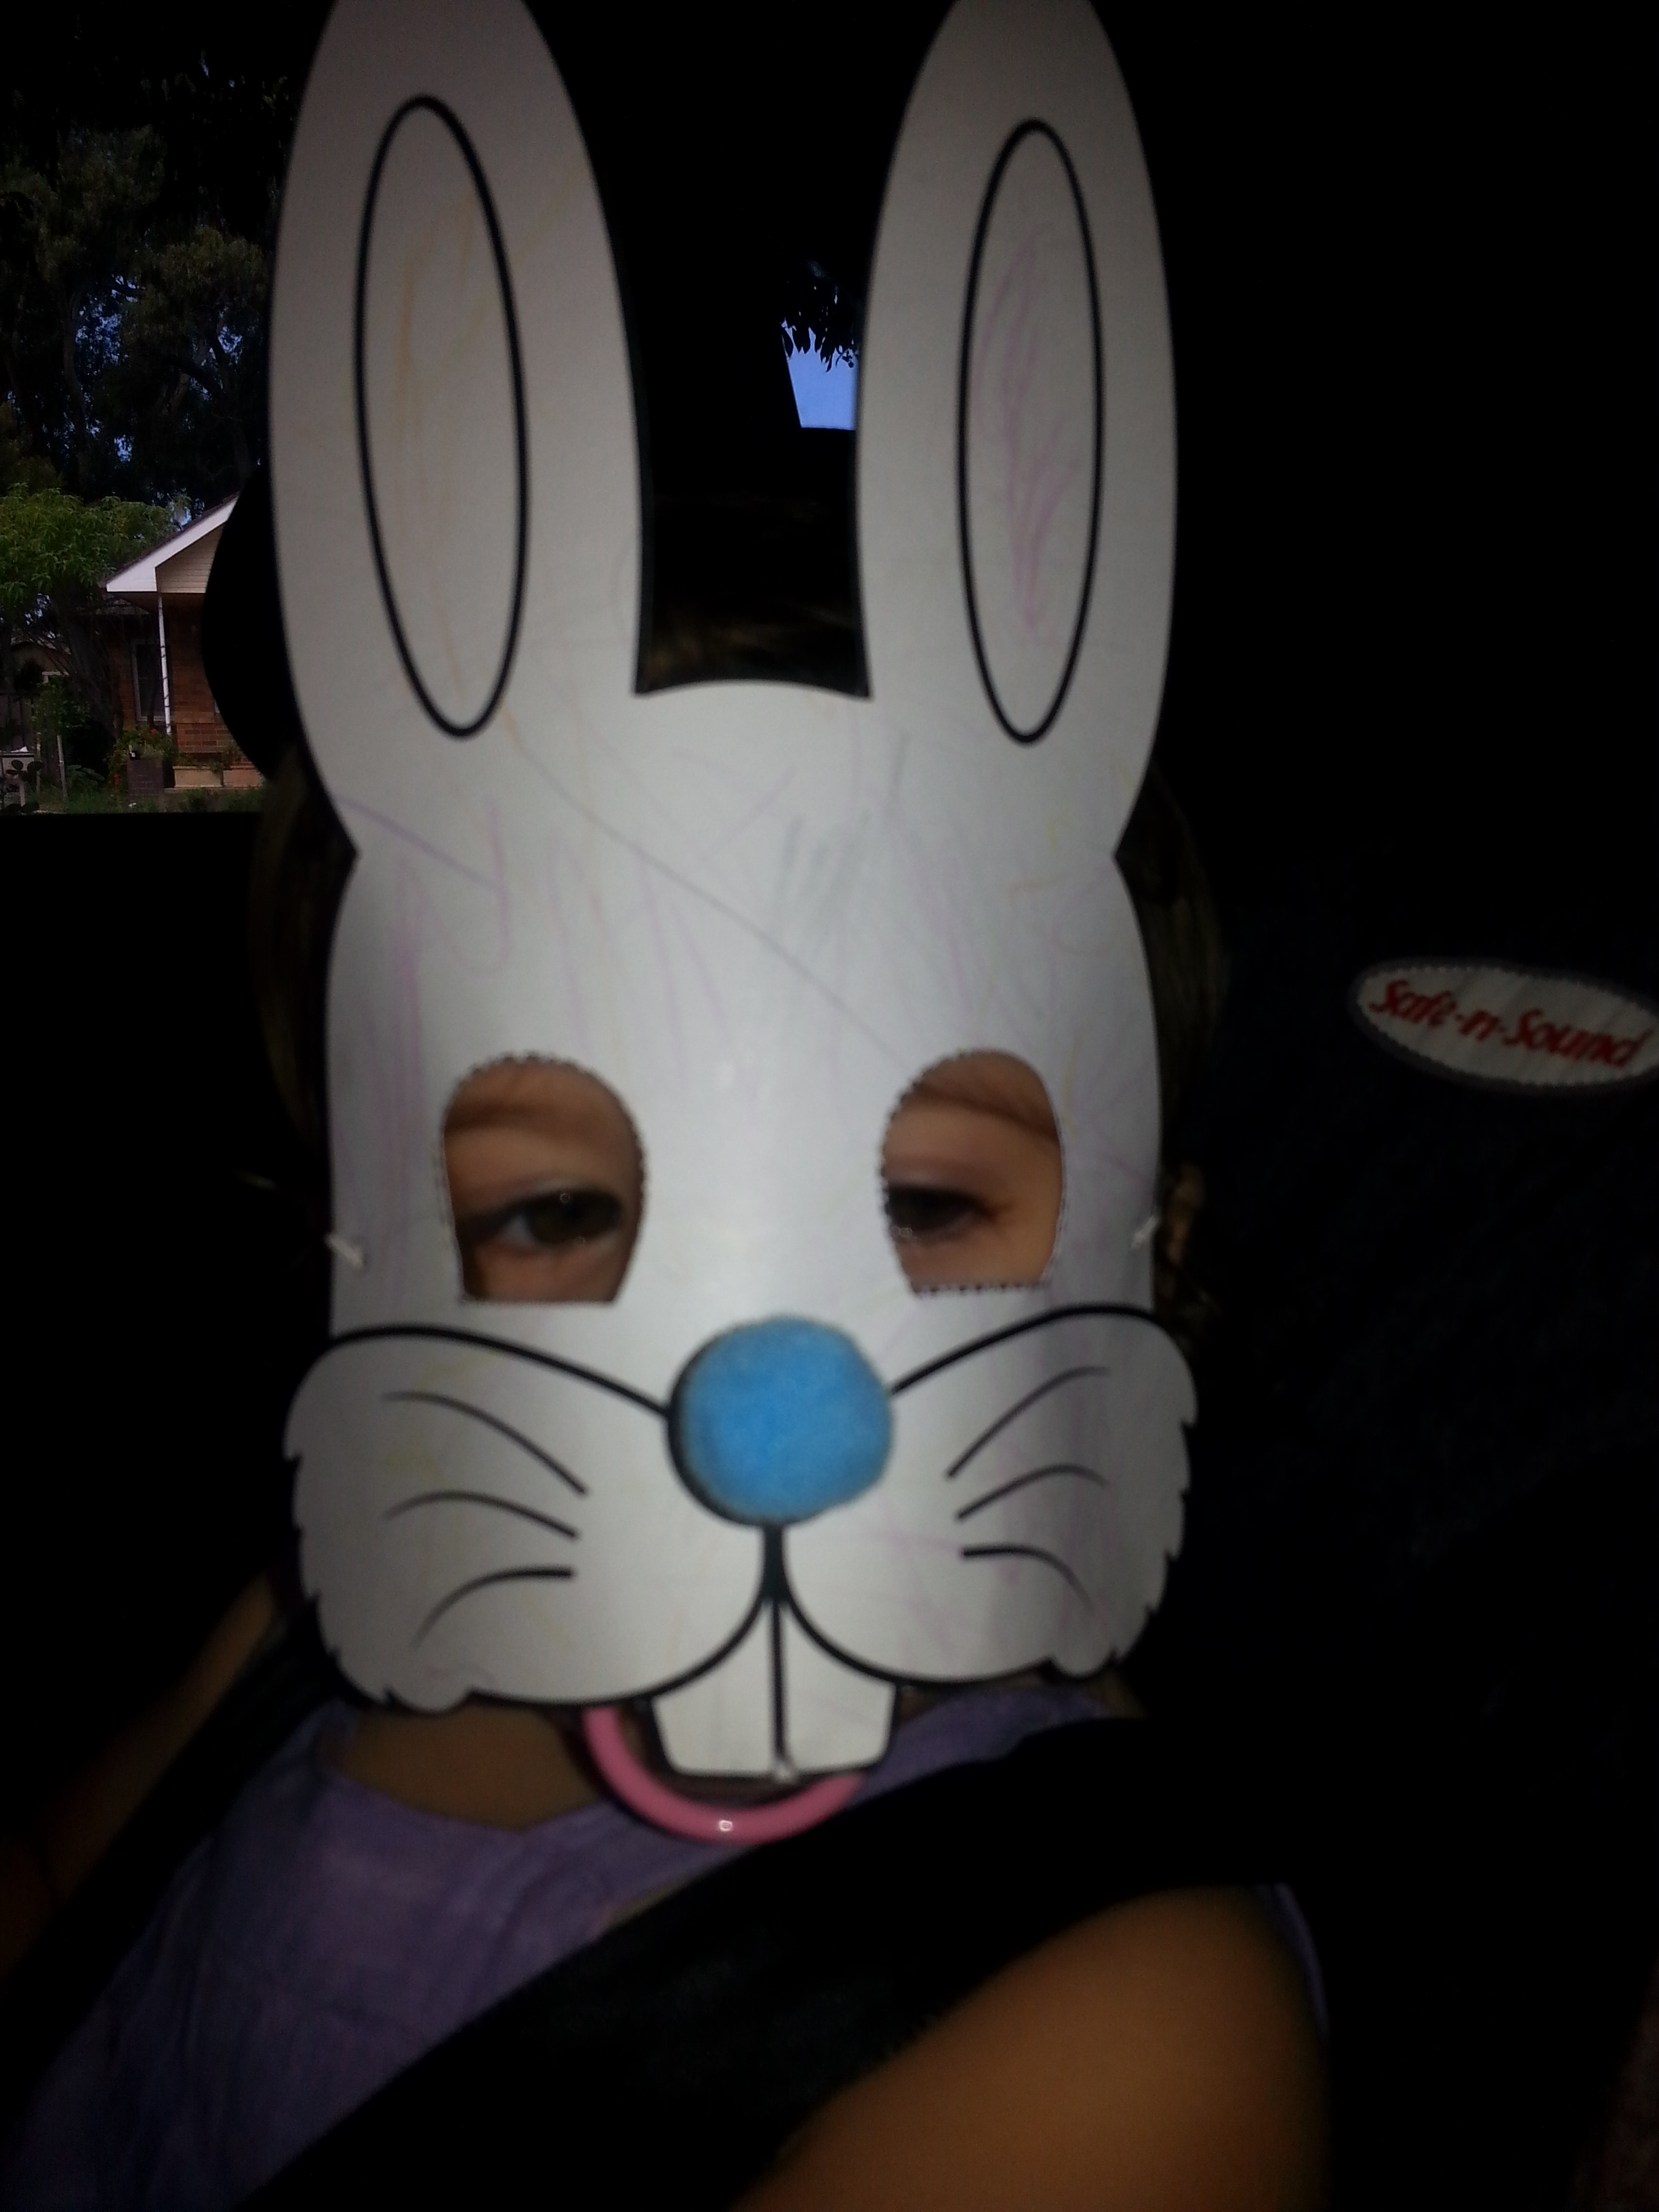
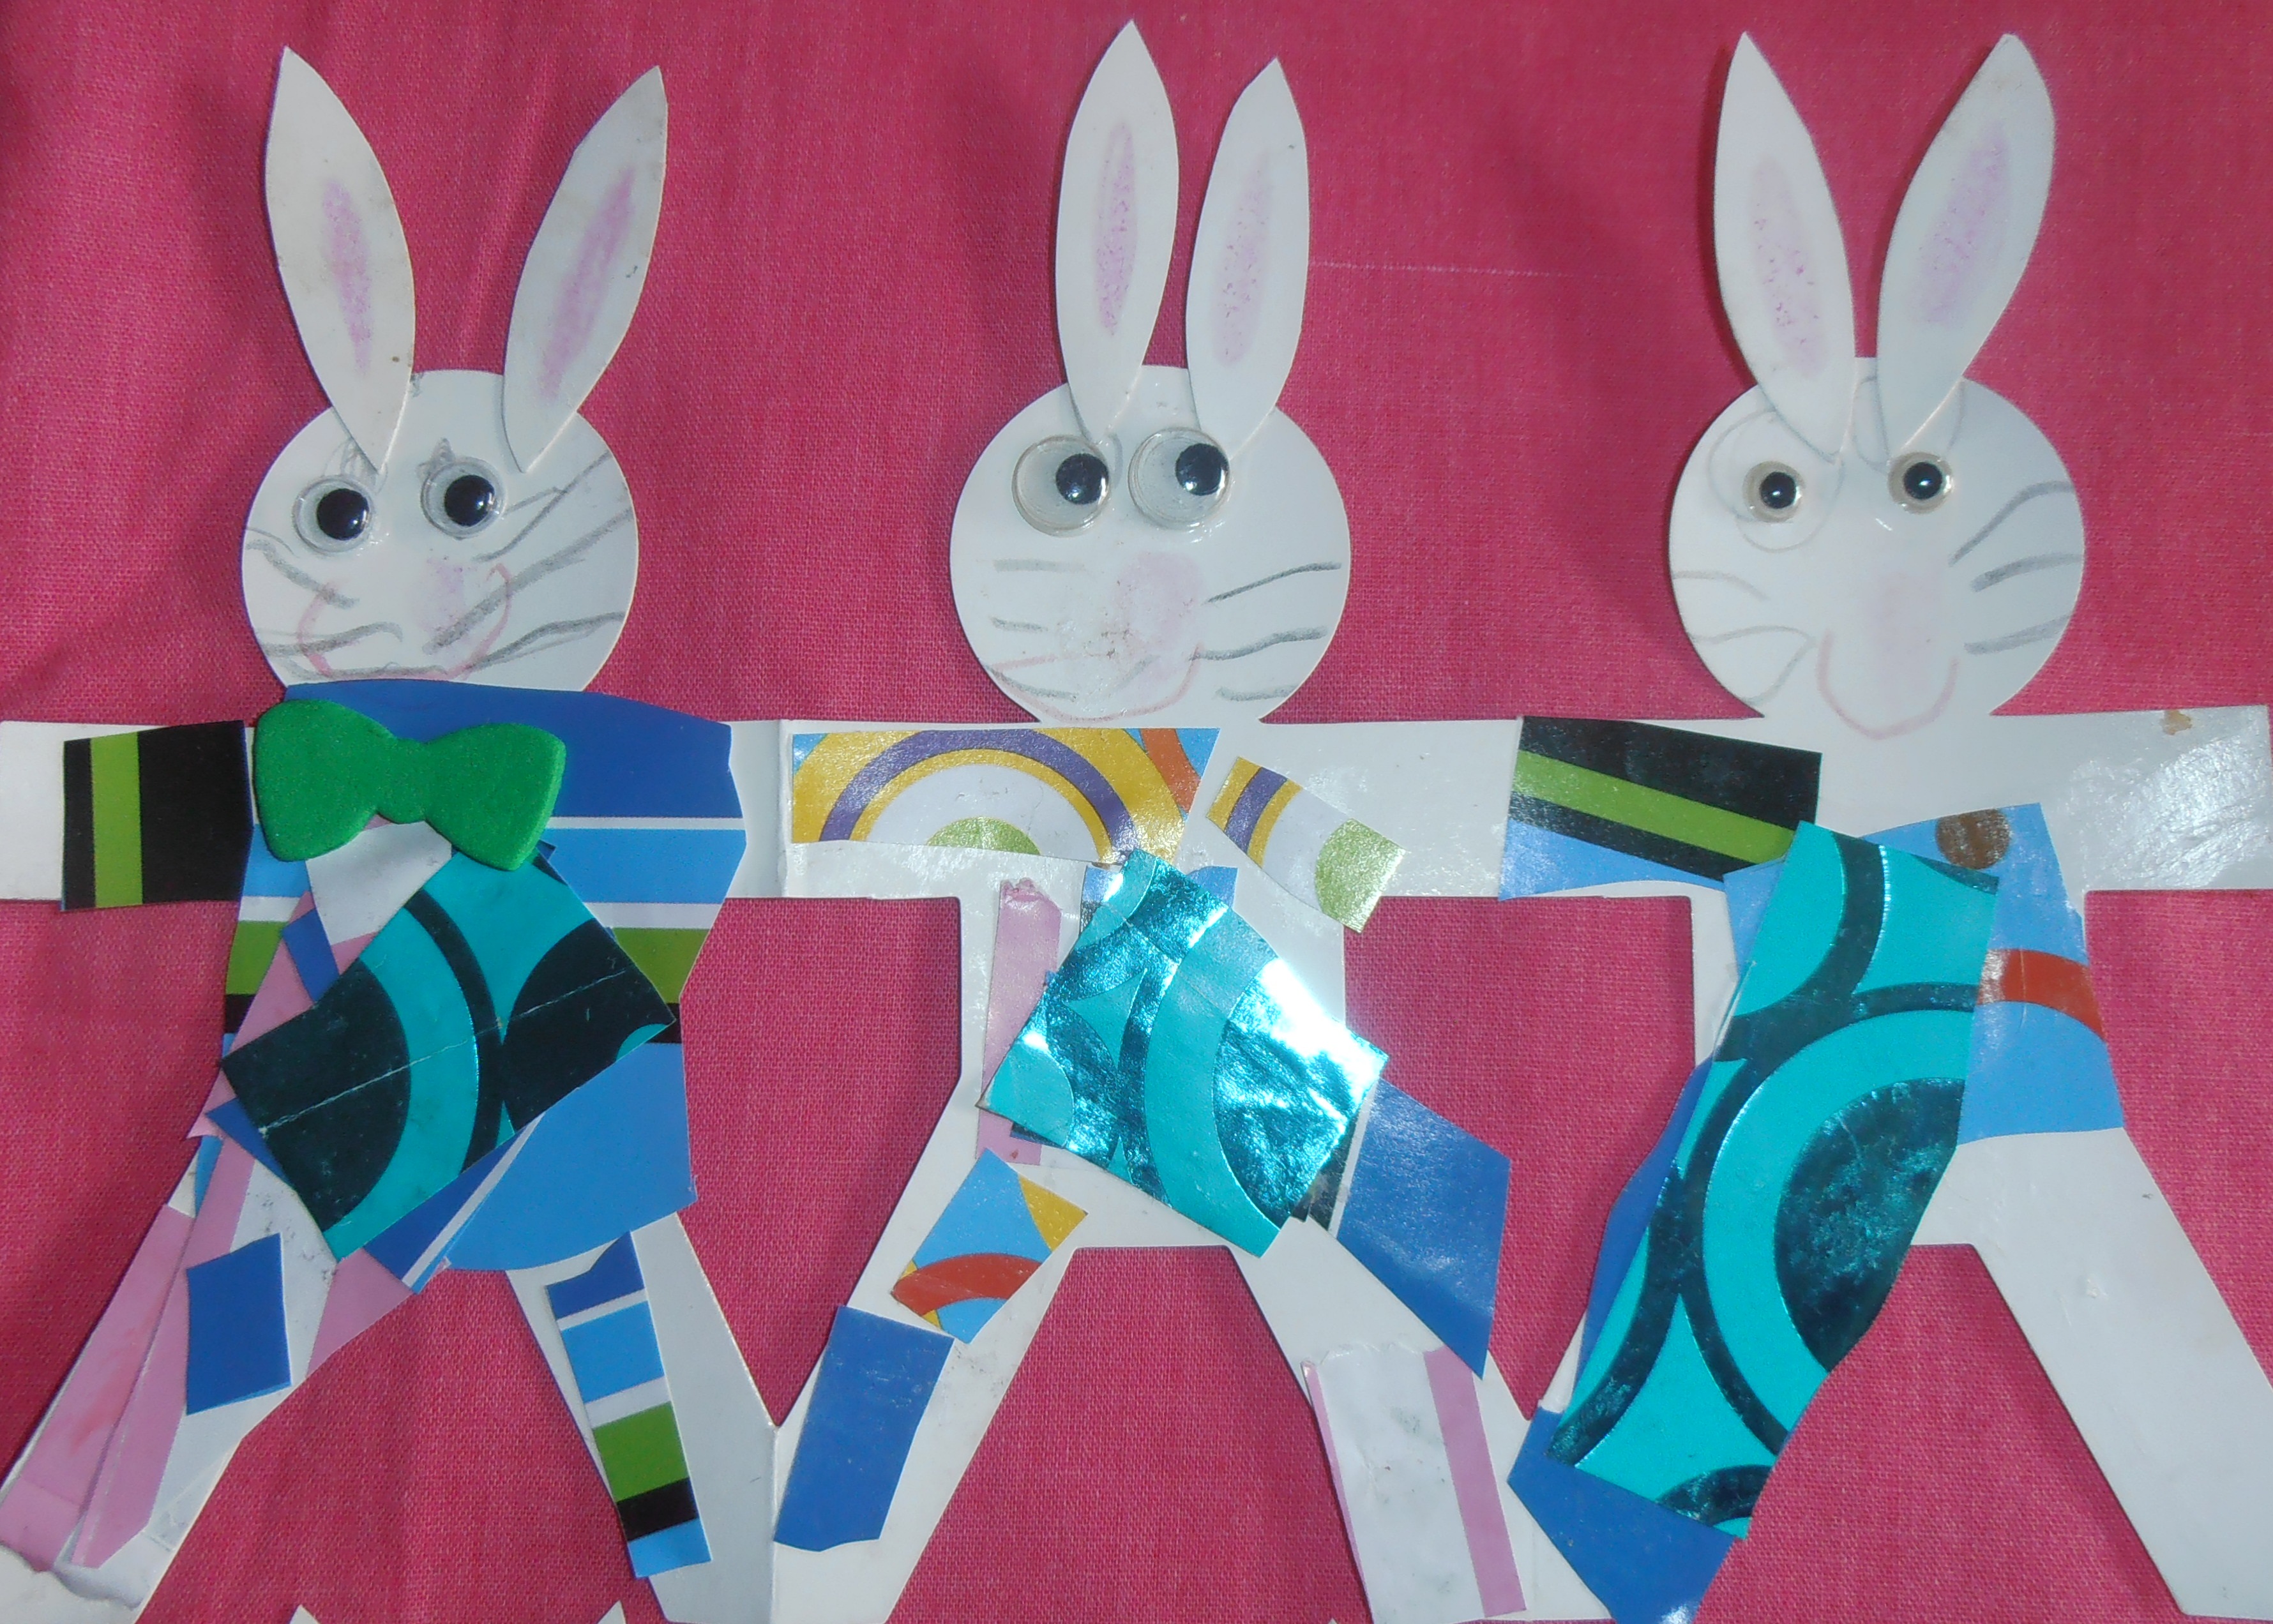
Step Seven:   Choose three coloured pipe cleaners and twist them together then glue them below your darling precious child’s/bunnies nose with PVA/craft glue. Finish your gorgeous bunny with a coloured fluffy pom-pom nose (see photo).

Your Colour Me Funny Easter Bunny is now complete so put it somewhere special where it will make everyone smile the whole Easter season! You now have your own unique bunny to treasure for years to come.

OLYMPUS DIGITAL CAMERA

Happy guiding and a peaceful Easter,

from

Darling Precious Children

By darlingpreciouschildren Posted in Easter