Christmas Foot Print Tree!

OLYMPUS DIGITAL CAMERA

What you will need – White A4 cardboard, green paint, paint in a variety of colours, paint brush, scissors, Christmas wrapping paper, black texta, ribbon, sequins, gold/silver cardboard star, glue stick, PVA glue.

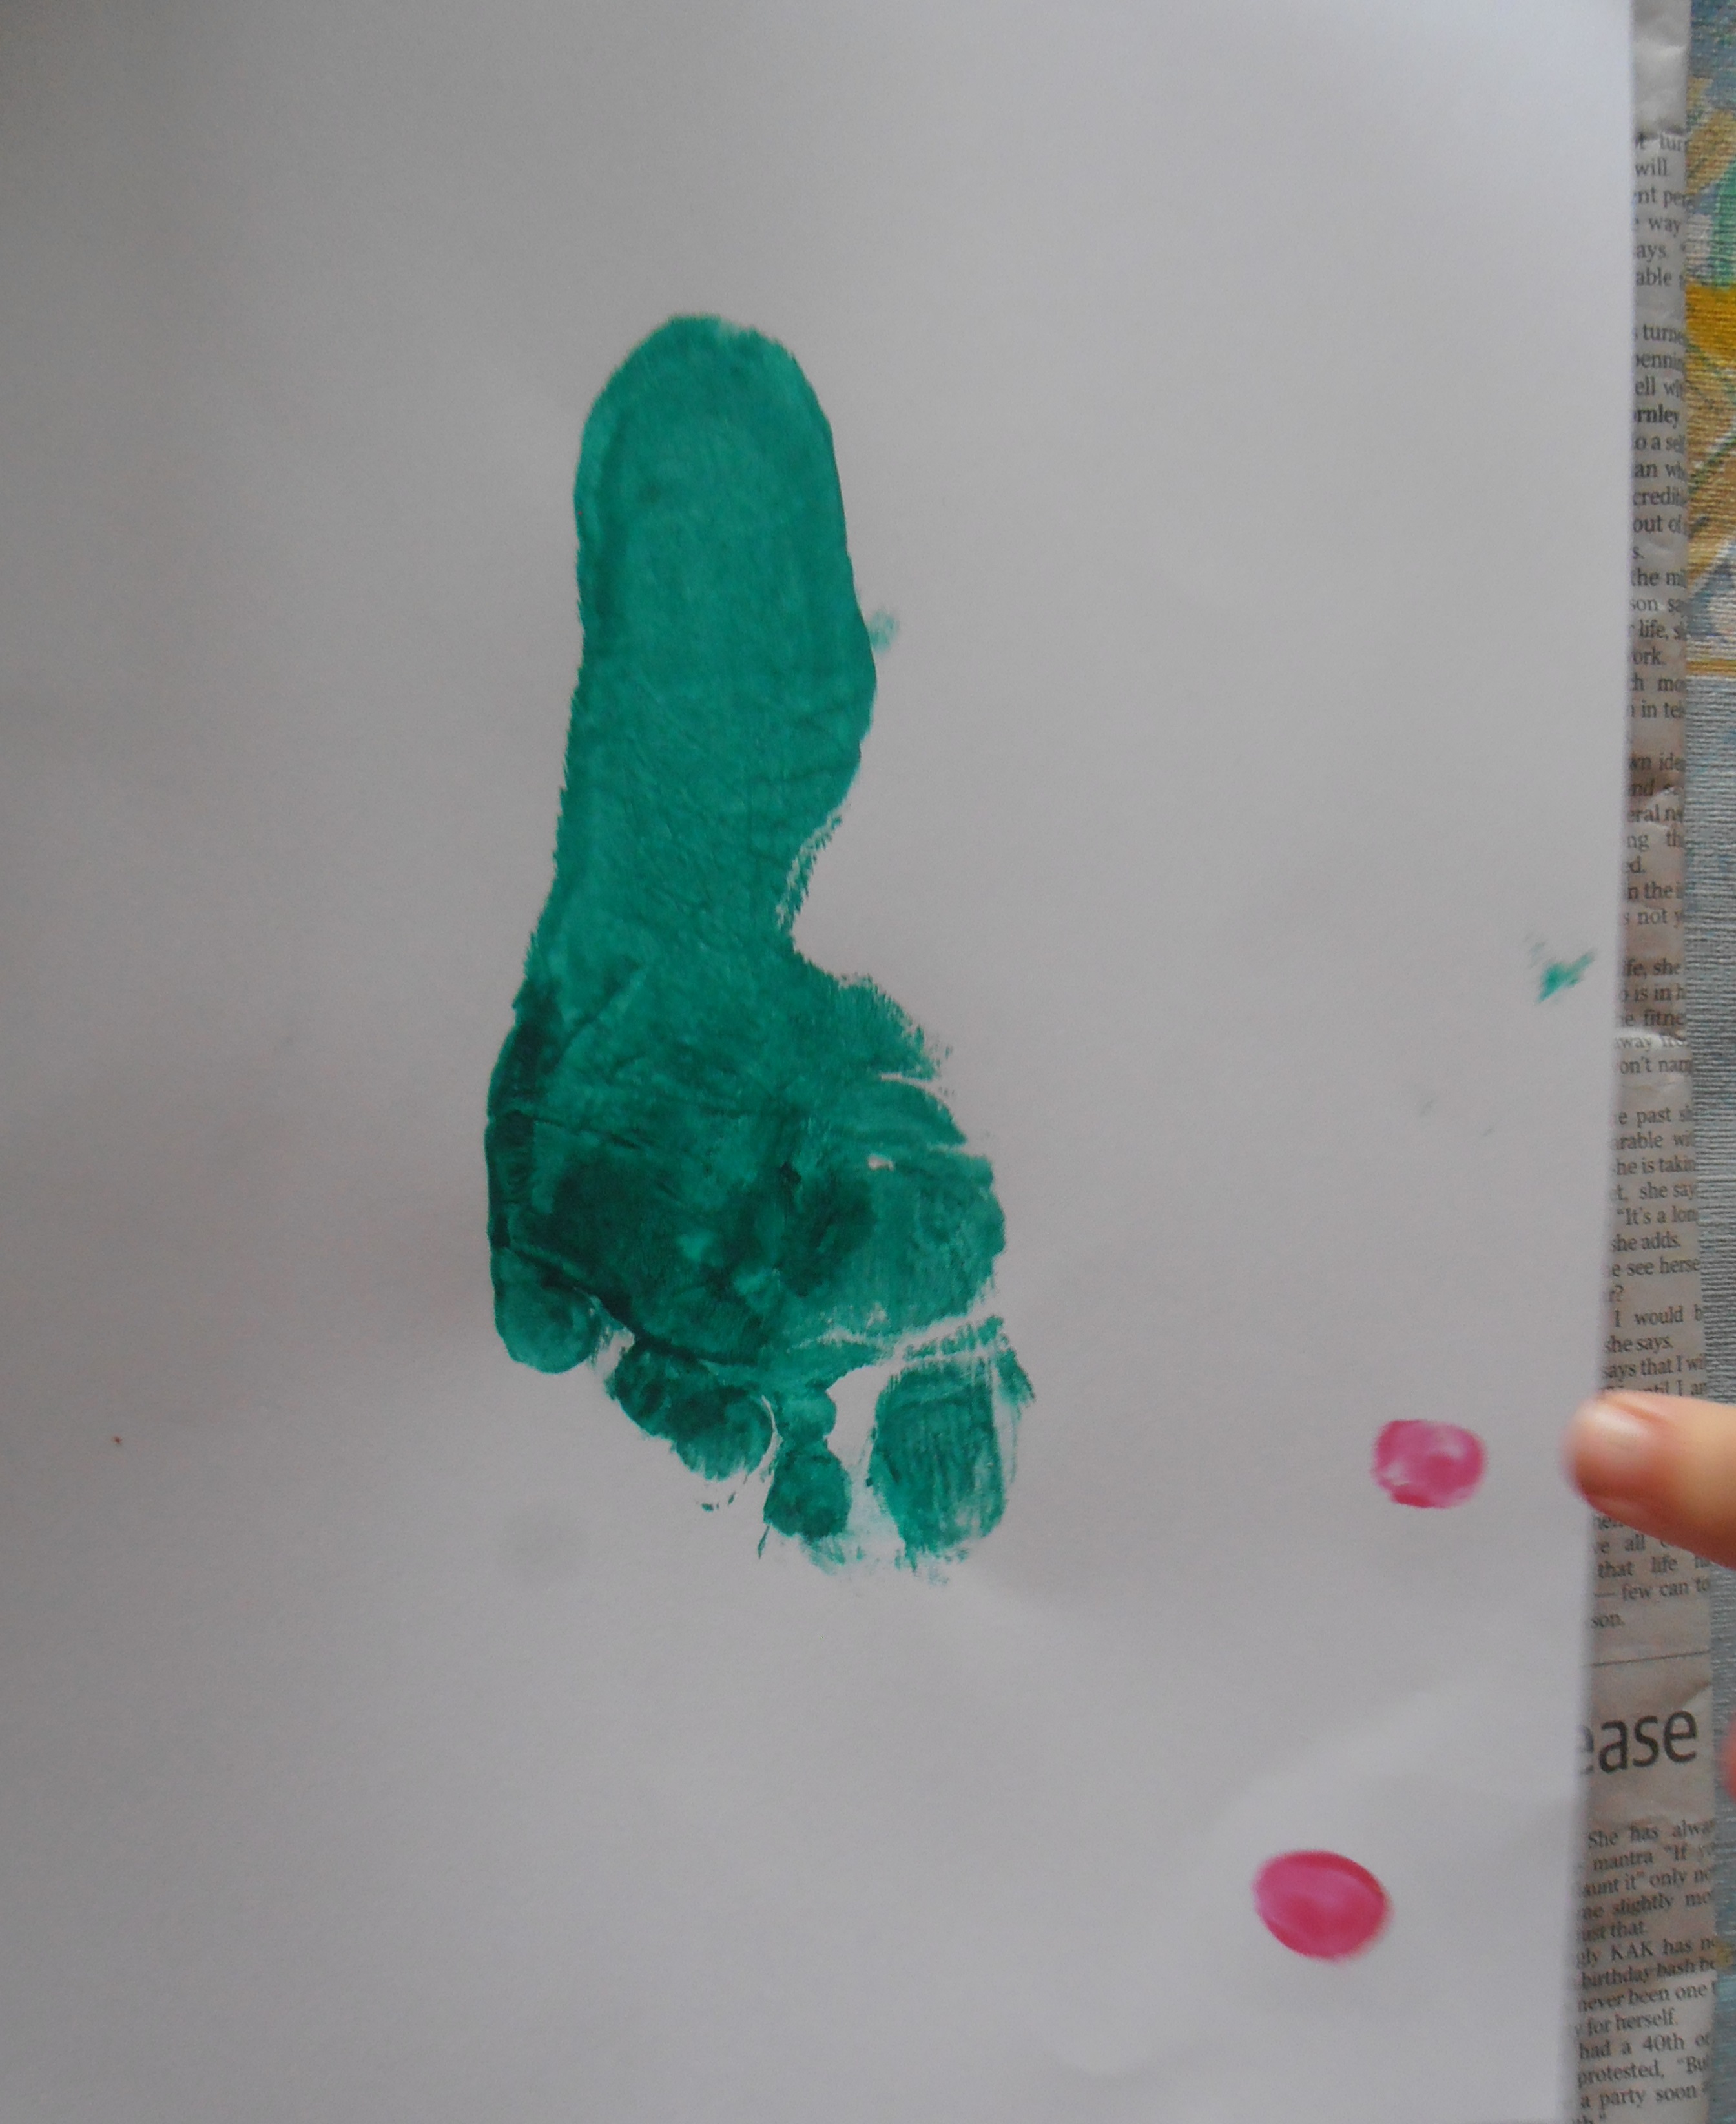
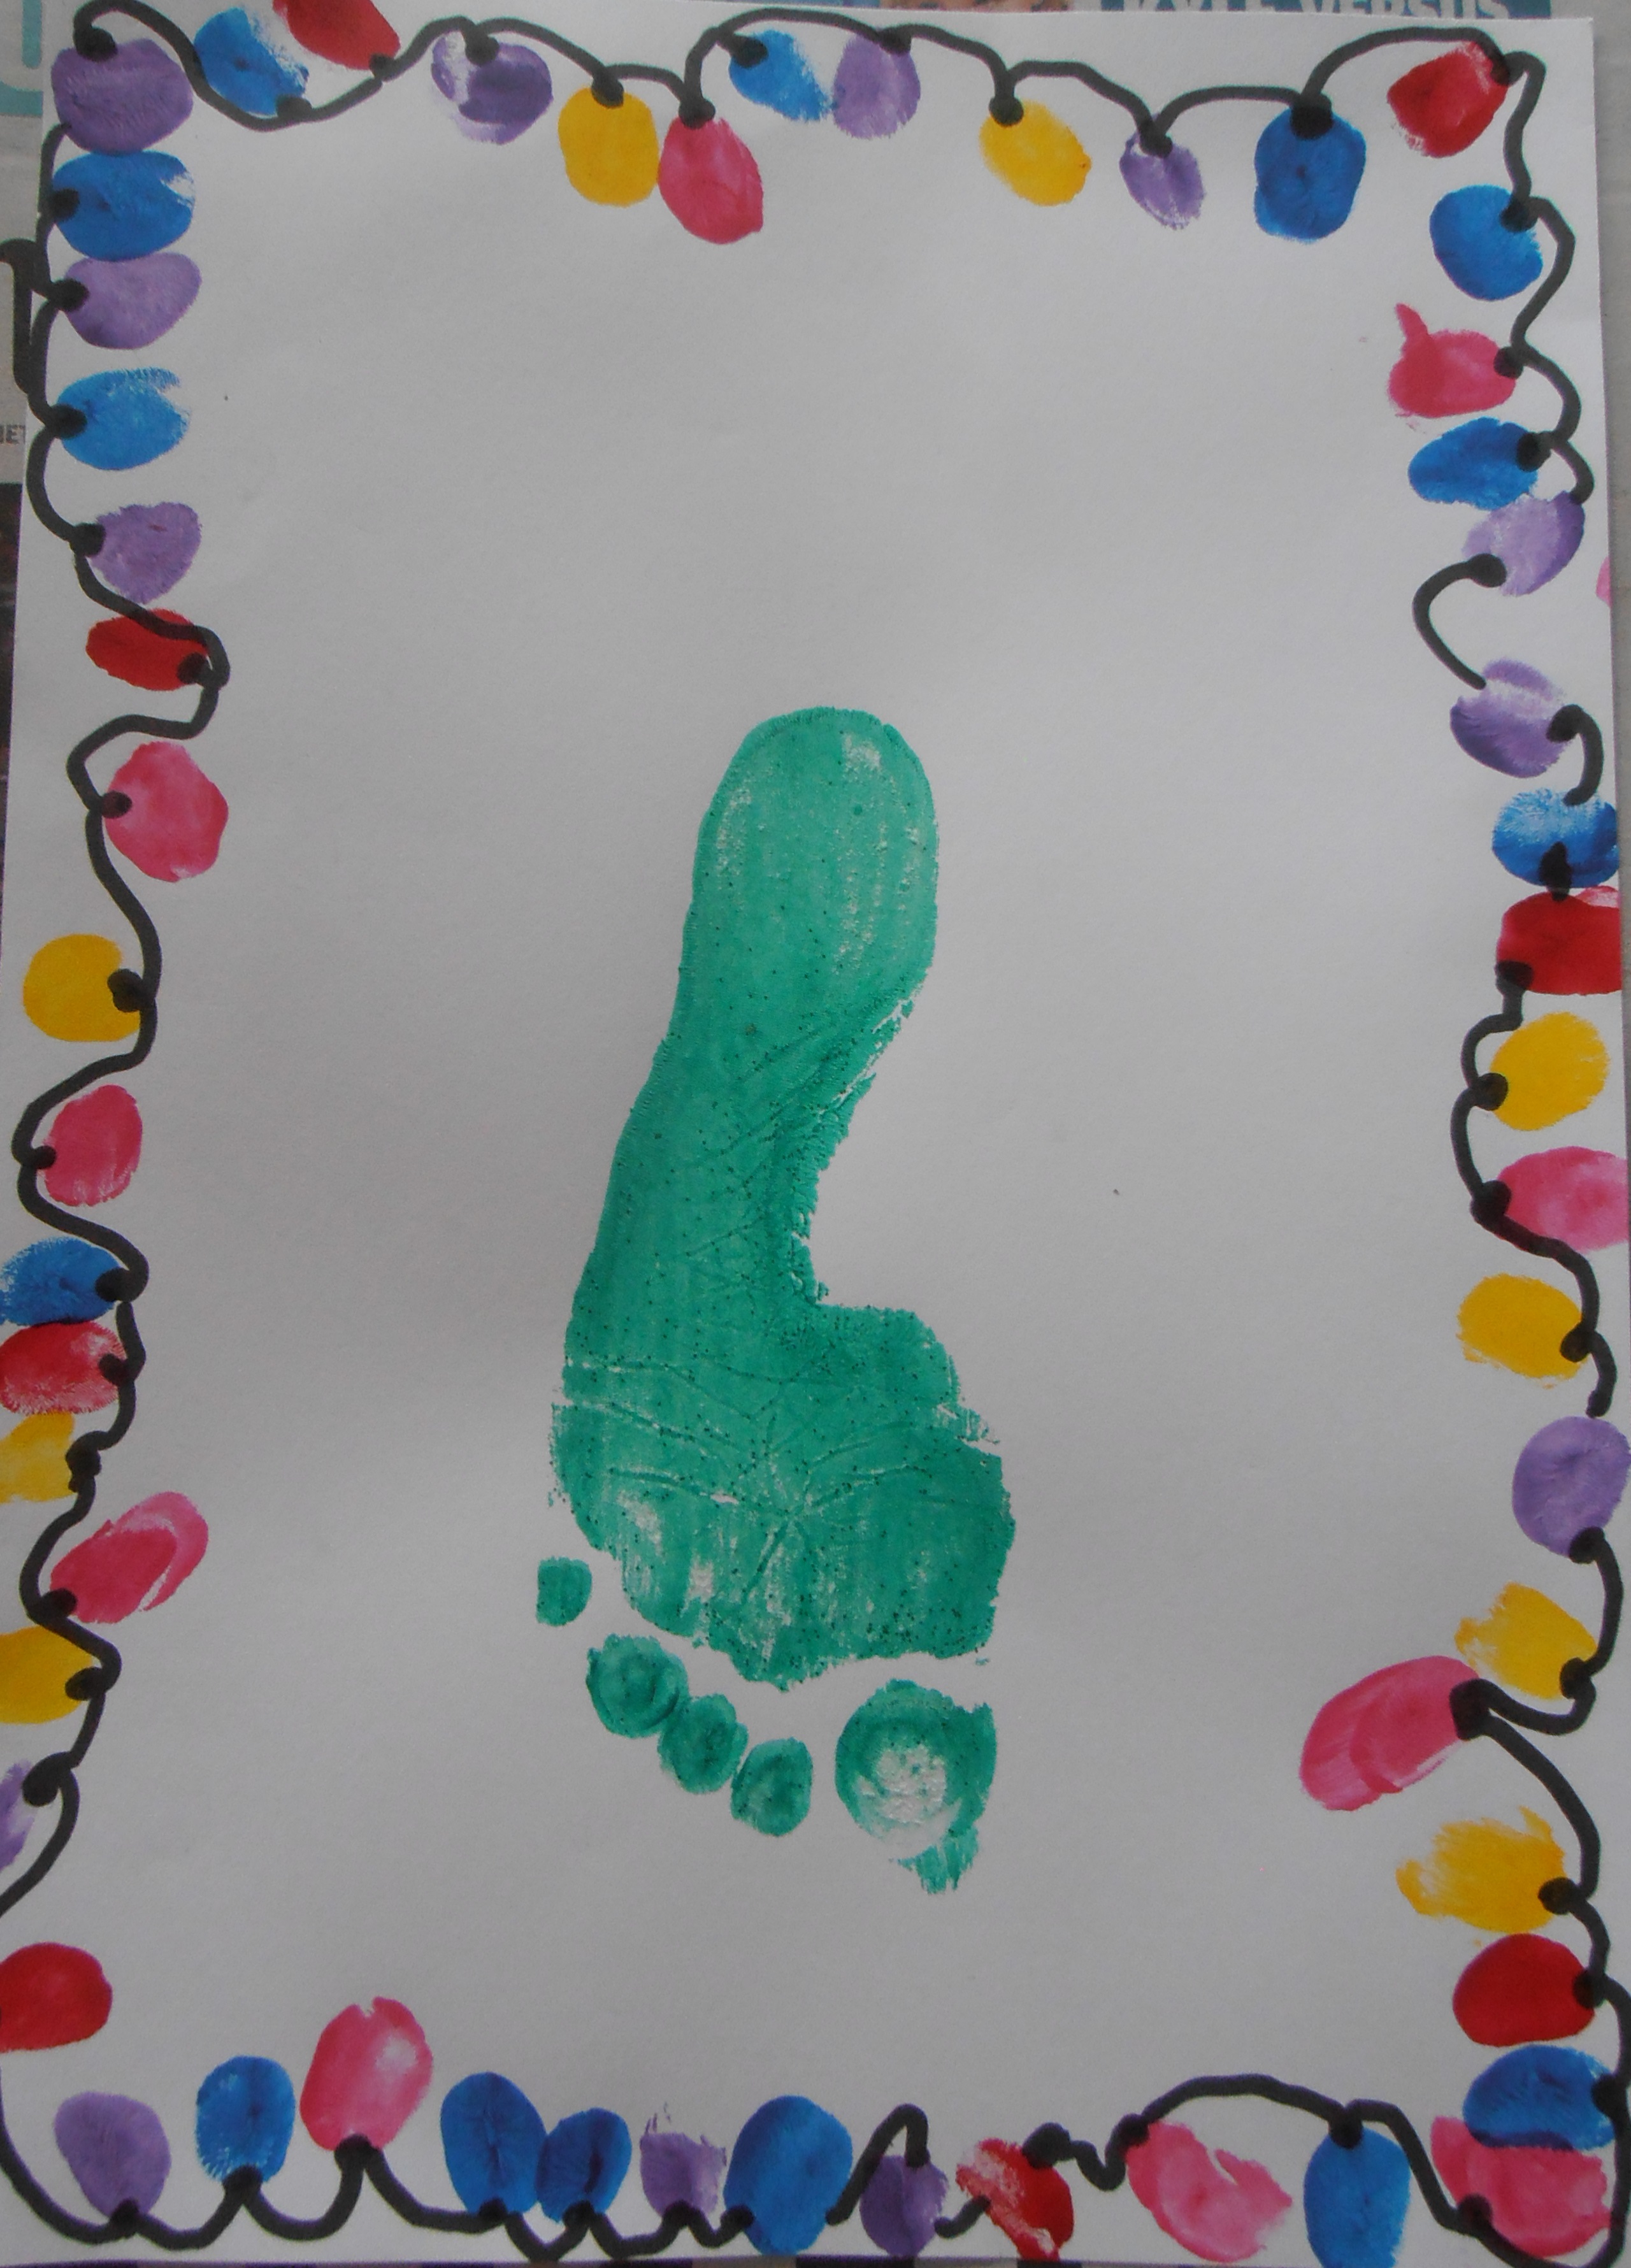
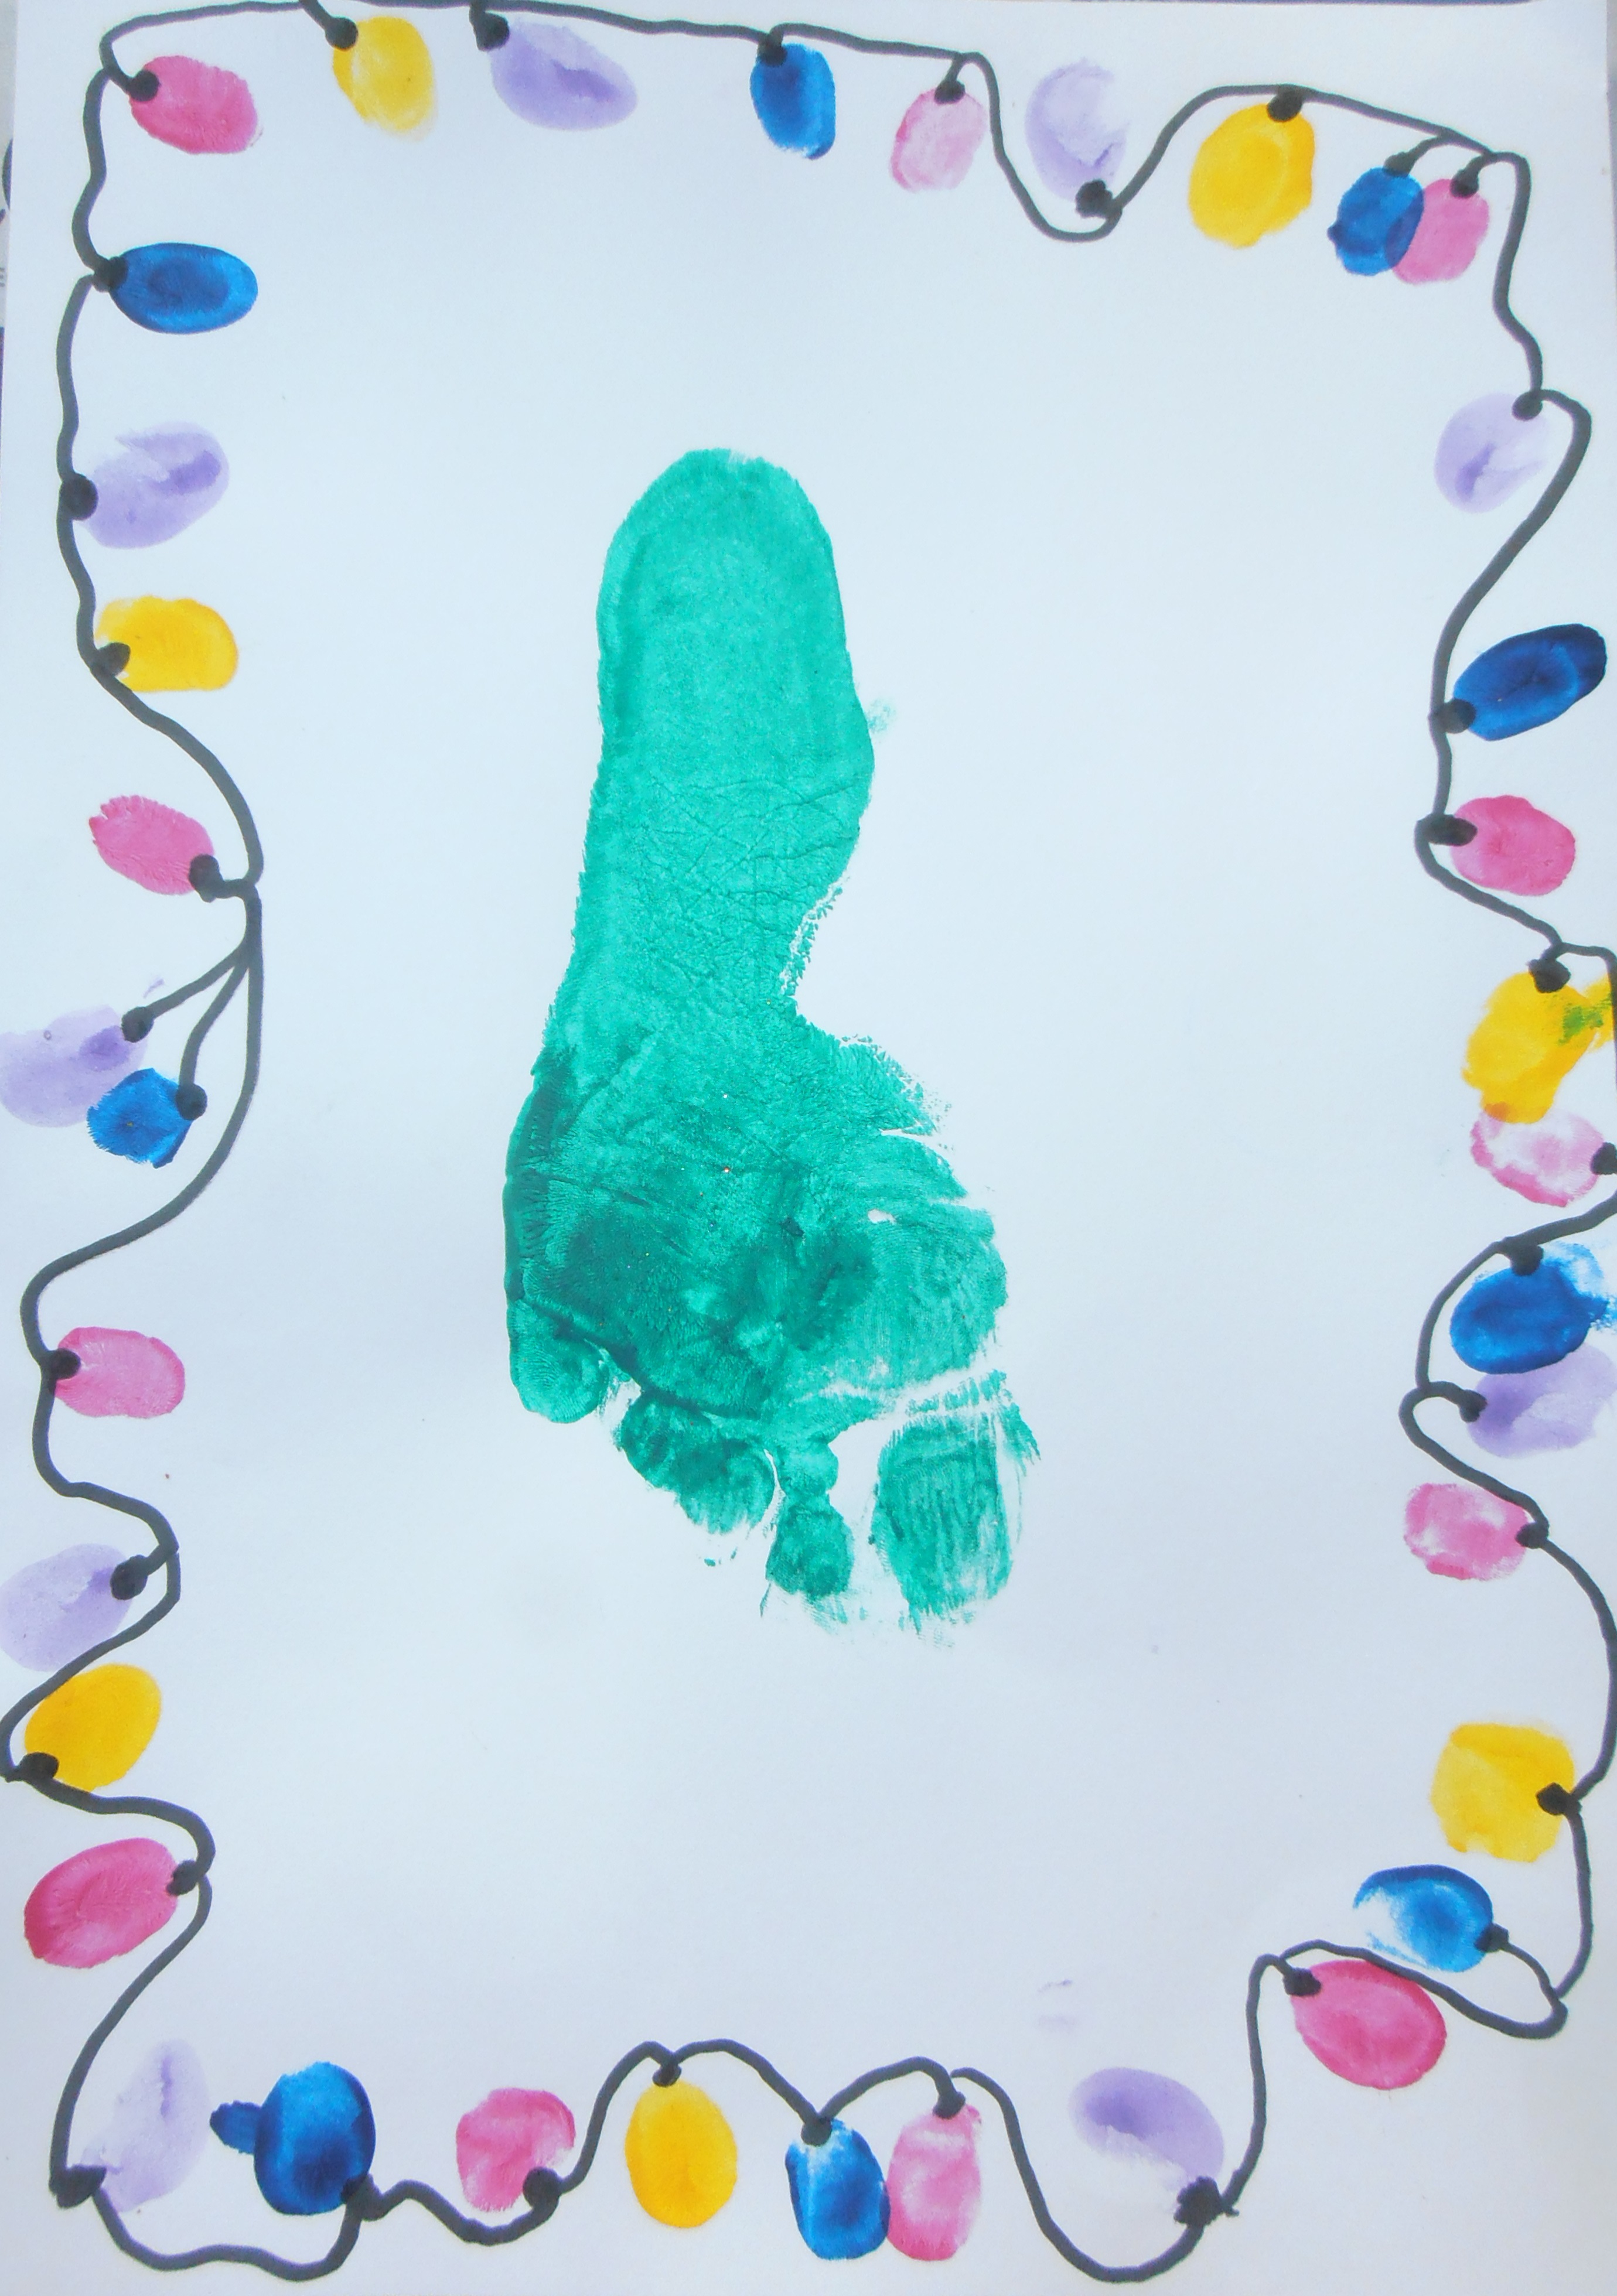
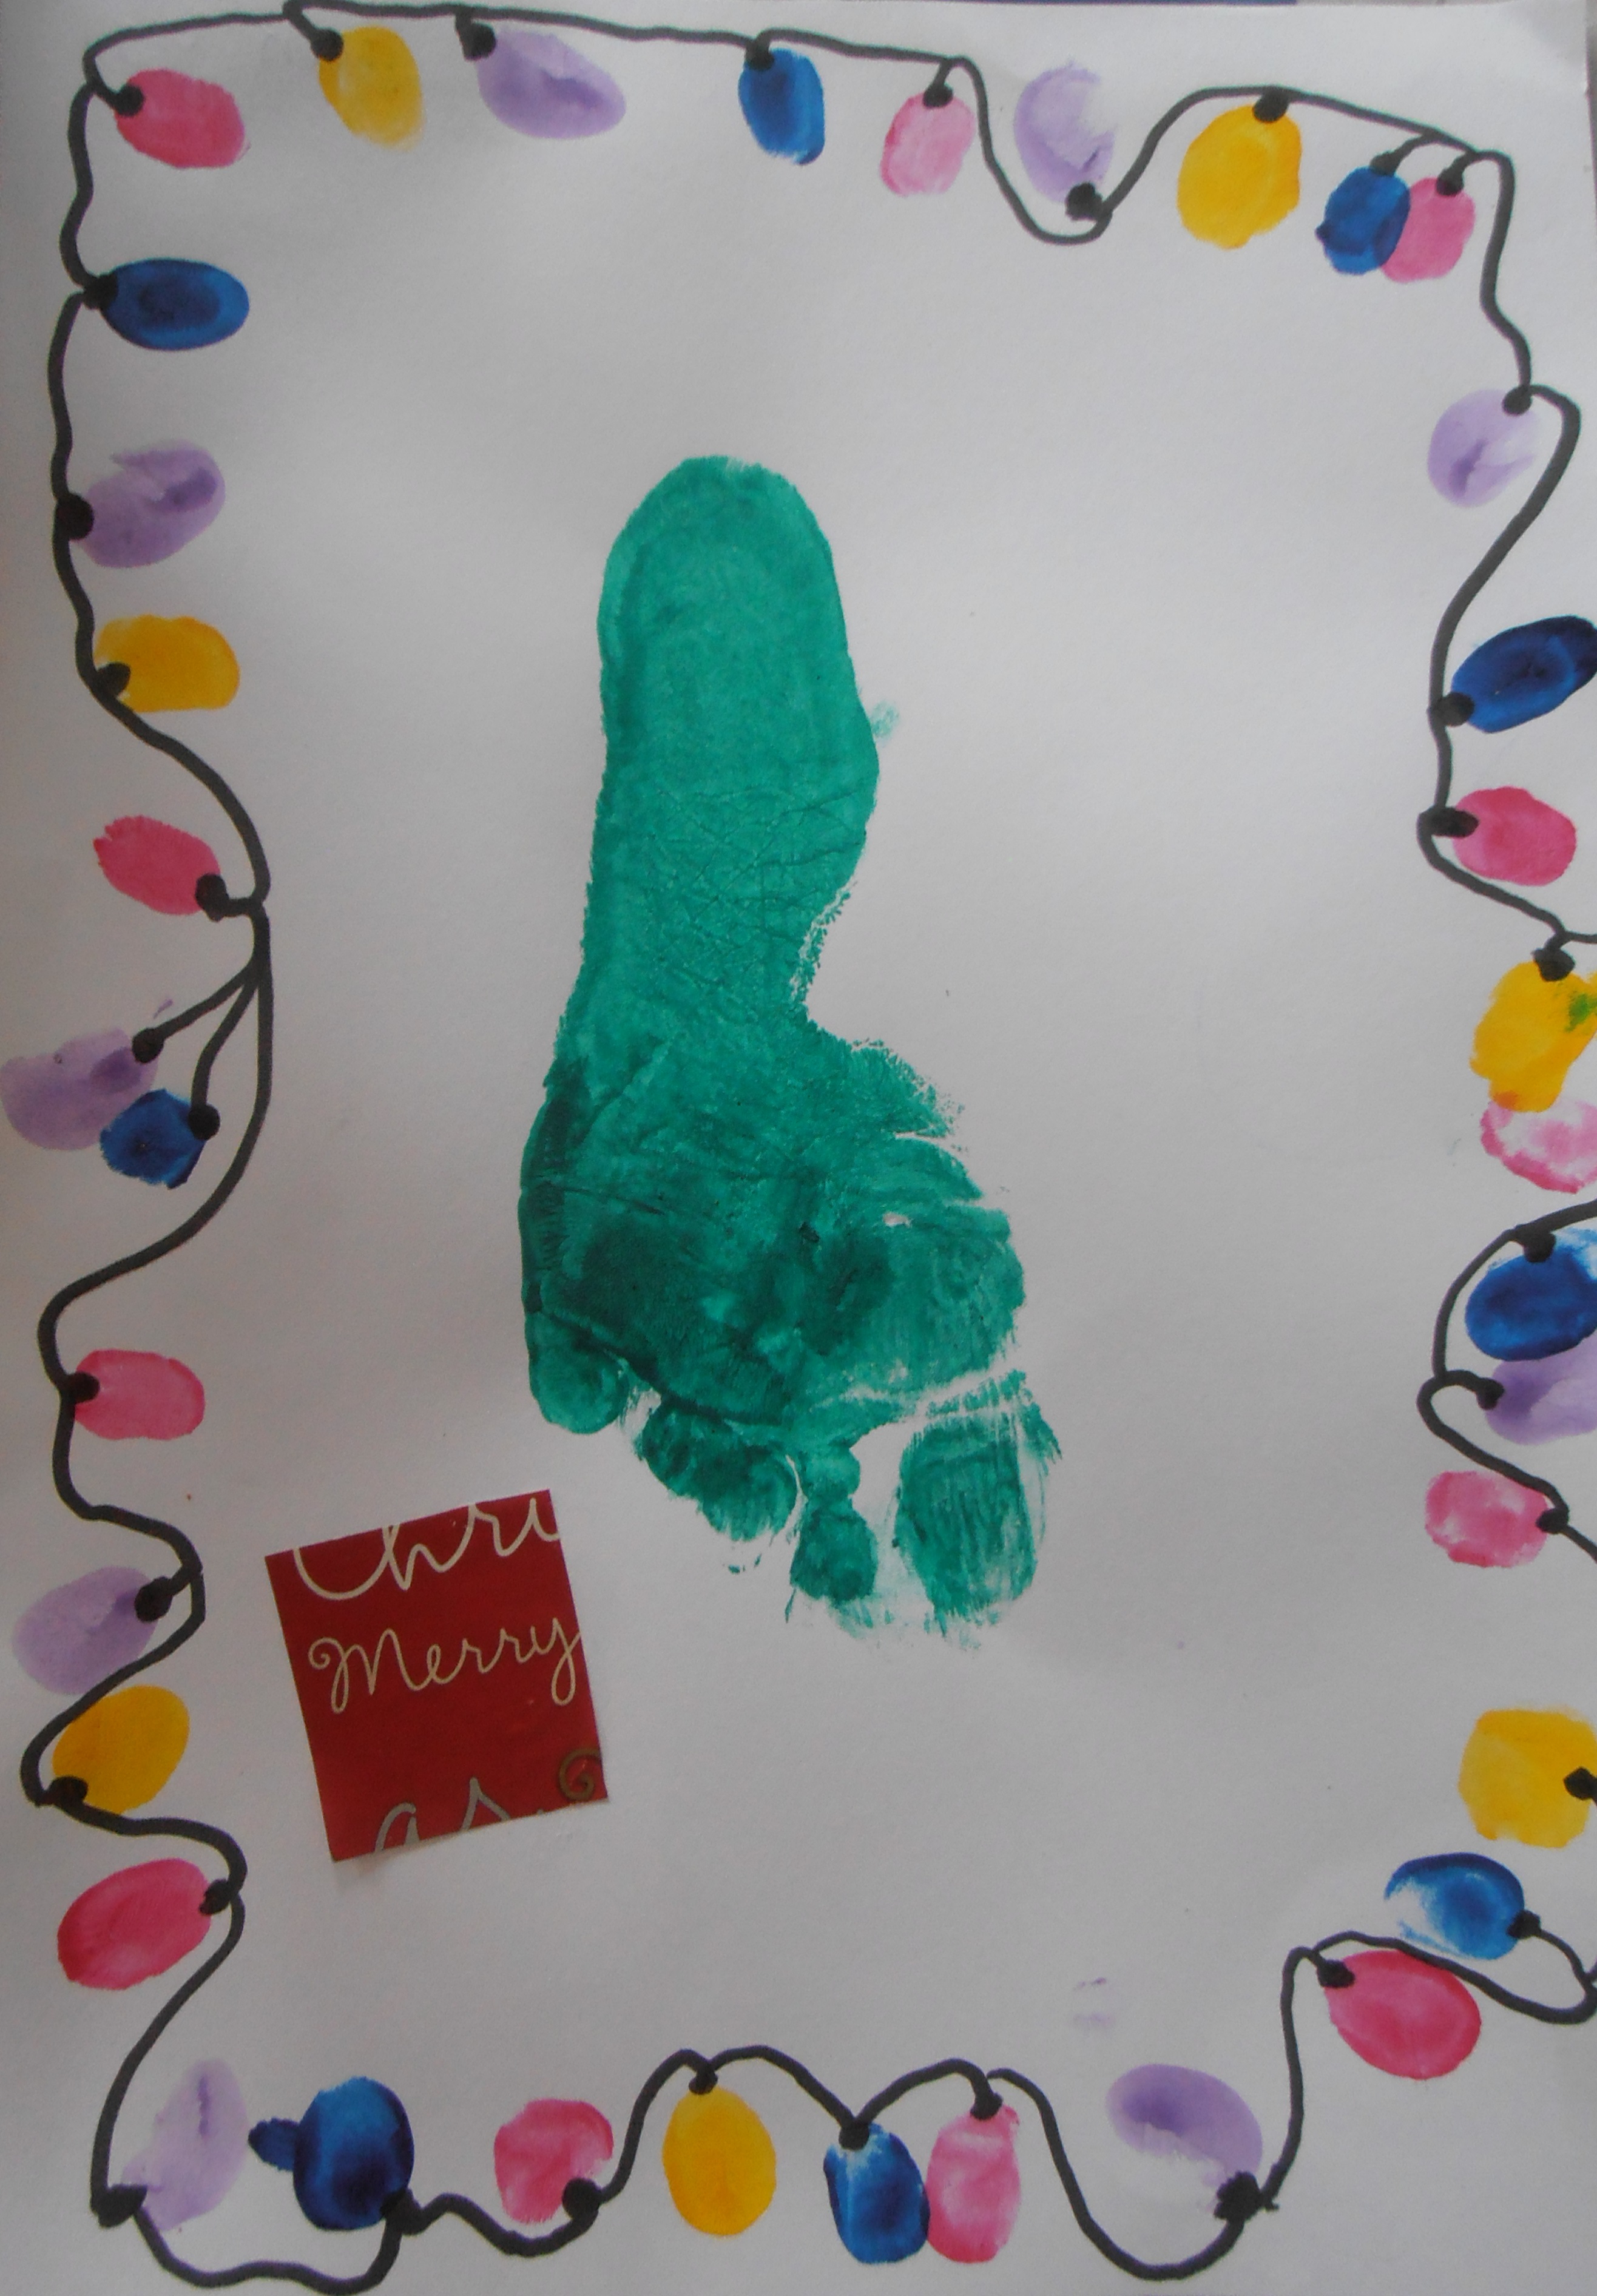
Step 1 – Paint the child’s foot with green paint and then get them to stamp it in the centre of the white A4 cardboard.

OLYMPUS DIGITAL CAMERA

Step 2 – Using the coloured paint get the child to make colourful thumb prints around the edge of the white A4 cardboard, alternating colours.

OLYMPUS DIGITAL CAMERA OLYMPUS DIGITAL CAMERAOLYMPUS DIGITAL CAMERA        OLYMPUS DIGITAL CAMERA

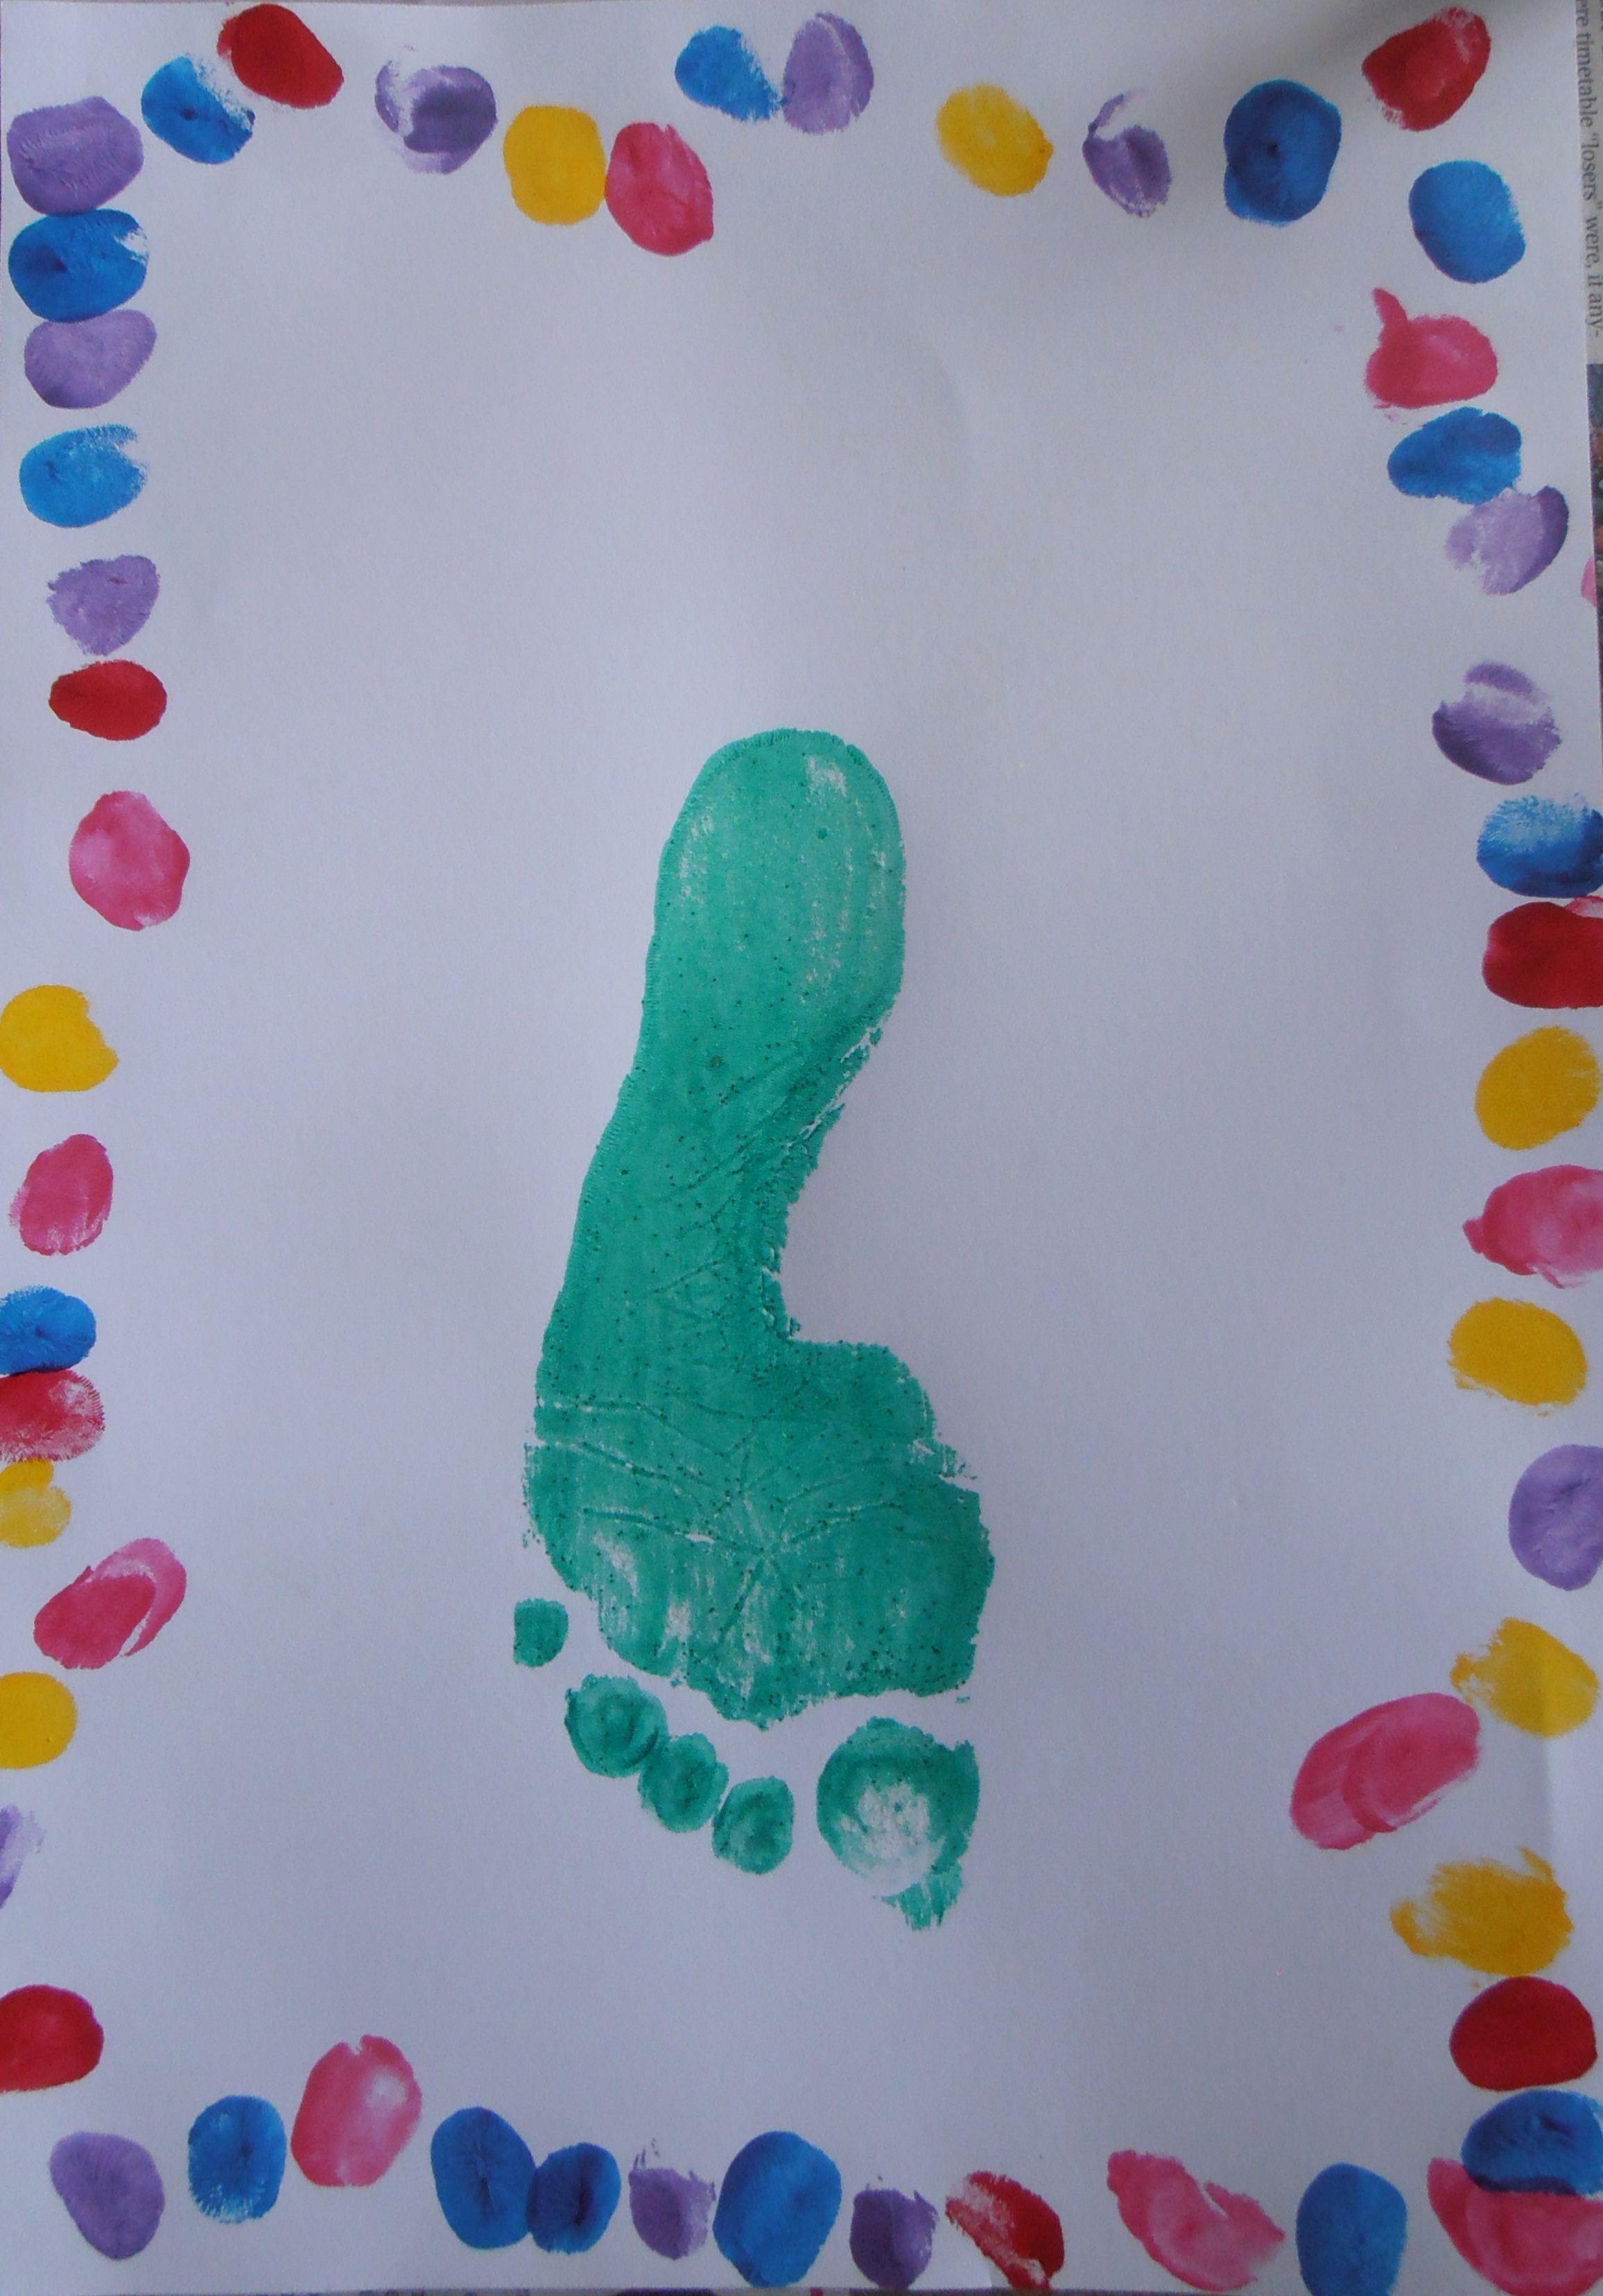
Step 3 – Using a black texta turn the thumb prints into lights by adding a dot to the bottom of each one and drawing black wire to connect the lights.

OLYMPUS DIGITAL CAMERA

OLYMPUS DIGITAL CAMERA


Step 4 – Make some Christmas presents by cutting the Christmas wrapping paper into small squares and glue them around the base of your Christmas foot print tree.

OLYMPUS DIGITAL CAMERA

Step 5 – Add some ribbon to your presents by gluing a small piece of ribbon horizontally across your present and another small piece of ribbon vertically across that one. Then curl some ribbon and add it to the present as shown in the pictures below.

OLYMPUS DIGITAL CAMERA

         OLYMPUS DIGITAL CAMERA

Step 6 – Squeeze some PVA glue in a zigzag pattern across your tree then stick sequins on to make some beautiful sparkly tinsel and decorations.

OLYMPUS DIGITAL CAMERA

  OLYMPUS DIGITAL CAMERA

Step 7 – Add the gold or silver cardboard star to the top of your gorgeous Christmas Foot Print Tree and glue it on with PVA or glue stick.

OLYMPUS DIGITAL CAMERA

Your very merry Christmas Foot Print Tree is now ready to be hung up and enjoyed for many Christmases to come so put it somewhere special!

Happy guiding and a

joyful, spiritual and magical Christmas

from

Darling Precious Children

Dancing Santas!

OLYMPUS DIGITAL CAMERA

What you will need – cardboard people or cardboard to cut your own people, red paper, cotton wool, black marker, googly eyes, tiny white pom poms, gold sequins, PVA glue and Glue stick.

OLYMPUS DIGITAL CAMERA

OLYMPUS DIGITAL CAMERA

Step 1 – Fold paper into threes in a concertina pattern. Then carefully trace around the shape of your cardboard person onto the red paper. This will make enough outfits for three Santas so repeat the process to make enough outfits for all six Santas if you are using six. Cut each outfit out.

OLYMPUS DIGITAL CAMERA

OLYMPUS DIGITAL CAMERA

Step 2 –  Place the outfits onto each Santa to make sure that they fit then glue the six Santa outfits onto the dancing Santas using a glue stick.

OLYMPUS DIGITAL CAMERA

OLYMPUS DIGITAL CAMERA

OLYMPUS DIGITAL CAMERA

Step 3 – Fold the red paper once again in a concertina (in threes or six)  then draw a Santa hat on the red paper and cut it out. You should now have six Santa hats to stick onto each Santa head. Glue each one on with glue stick.

OLYMPUS DIGITAL CAMERA

OLYMPUS DIGITAL CAMERA

Step 4 – Draw on some Santa boots with a black marker.

OLYMPUS DIGITAL CAMERA

Step 5 – Using a black marker, draw a black belt on each Santa in a curve so that it looks like a jolly Santa belly.

OLYMPUS DIGITAL CAMERA

Step 6 – Make a fluffy Santa beard using some cotton wool and glue it to each chin with PVA glue.

OLYMPUS DIGITAL CAMERA

Step 7 – Use PVA glue to add a gold sequin on each belt as a belt buckle.

OLYMPUS DIGITAL CAMERA

Step 8 – Add some googly eyes (with PVA glue) to each Santa’s face.

OLYMPUS DIGITAL CAMERA

Step 9 – Add some cotton wool to each Santa’s hat to make the fur trim.

OLYMPUS DIGITAL CAMERA

Step 10 – Glue a tiny pom pom onto the tip of each Santa hat using PVA glue.

OLYMPUS DIGITAL CAMERA

Your Dancing Santa’s are now ready to dance!

Happy Guiding and Many Blessings for the Christmas Season,

from

Darling Precious Children

OLYMPUS DIGITAL CAMERA